Feedback Request
Learn how to management your feedback forms
workingWithStartups
incubator
Feedback Request
The feedback request allows you to get feedback after a coaching session, training or event.
Who can create and edit
Only Admin and Admin&Coach can create and edit feedback forms.
Creating feedback forms
To create your feedback form, navigate to setup > forms > create a new form. To know more click here
Requesting the feedback
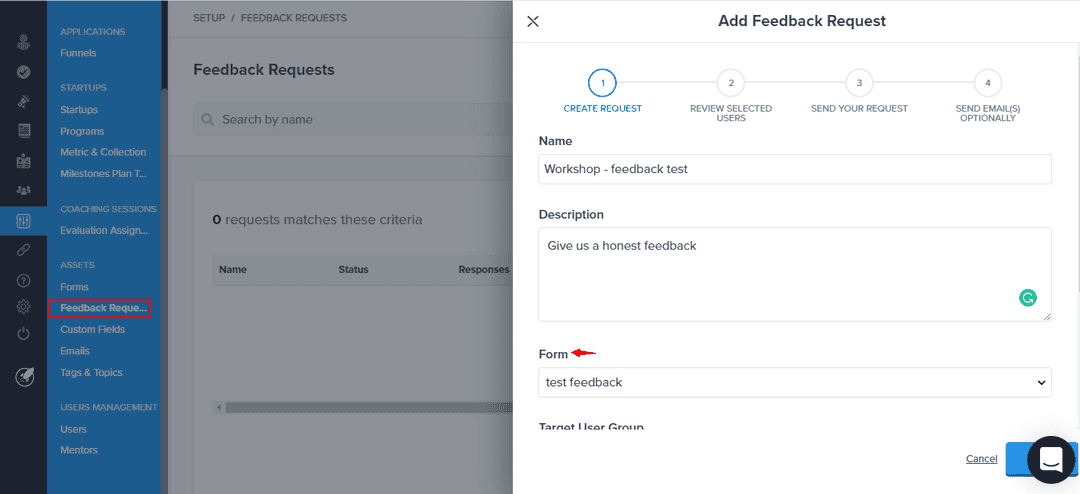
Once your form is ready, go to setup > feedback requests and click on the blue button create new request in the upper right corner of the page. The first step is to create a request where you need to fill the following fields:
- Feedback's name
- Description of the feedback
- Select the feedback form
- Select the user or startup target by program, tag or role. At the end of the page, you can visualize how many users are you sending the request feedback
After pressing the blue button save, you'll be able to review the selected users and compose the email with the feedback form.
Sending your request
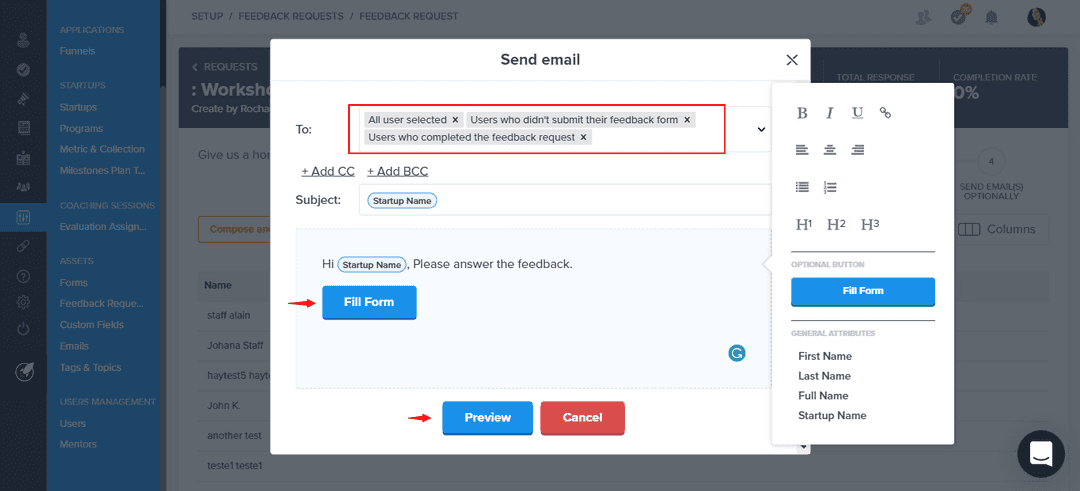
The third step is to set up your email. Click on the blue button send request in the left corner of the page and fill the email information:
Select who you want to request the feedback: all users, users who didn't submit their application form yet or users who completed their feedback request
Write the email with the link of the feedback form
Preview your email: review who will receive and the content
Press the button
sendand the users will receive the email and the notification to answer the feedback
Send email(s) optionally
The fourth step is sending optional emails after you have sent the feedback request, for example, an email to remind users who didn't submit their application form yet. To do this:
- Click on the orange button
compose and send email. - From there, select the group of users you want to invite
- Compose the email body (if you want you can add the form link) and format the email
- Preview the content, format and inviters before to send it
Managing the feedback
You can manage your feedback process through the feedback request dashboard and be able to see overall information about all the feedback forms created as name, description, status, responses, etc. and filter the visibility of this information in the column on the right side of the page.
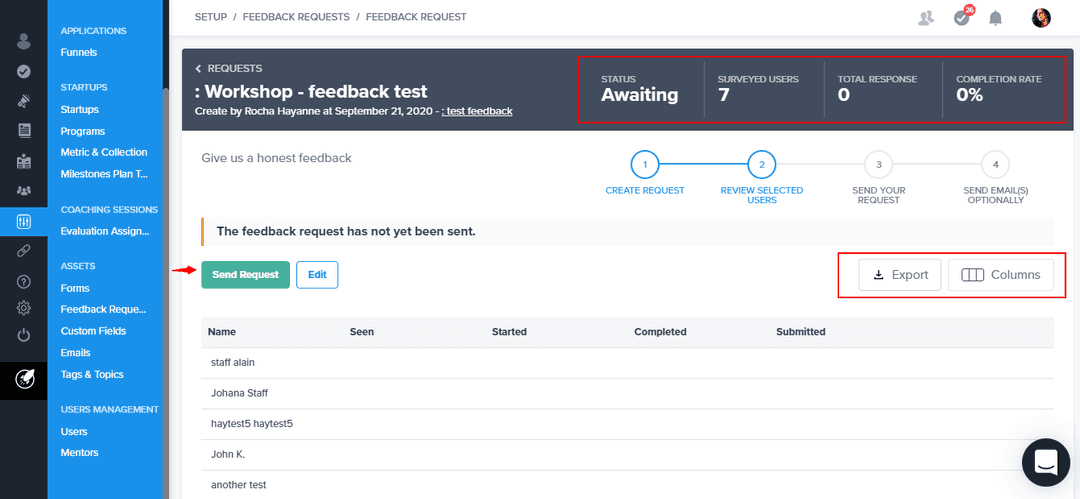
To follow the status of each feedback, click in the feedback's name. From there you can:
See the status, visualize how many users are surveyed, total response and completion rate
Filter the information in the column by fields
Export your data clicking the export icon
Viewing responses
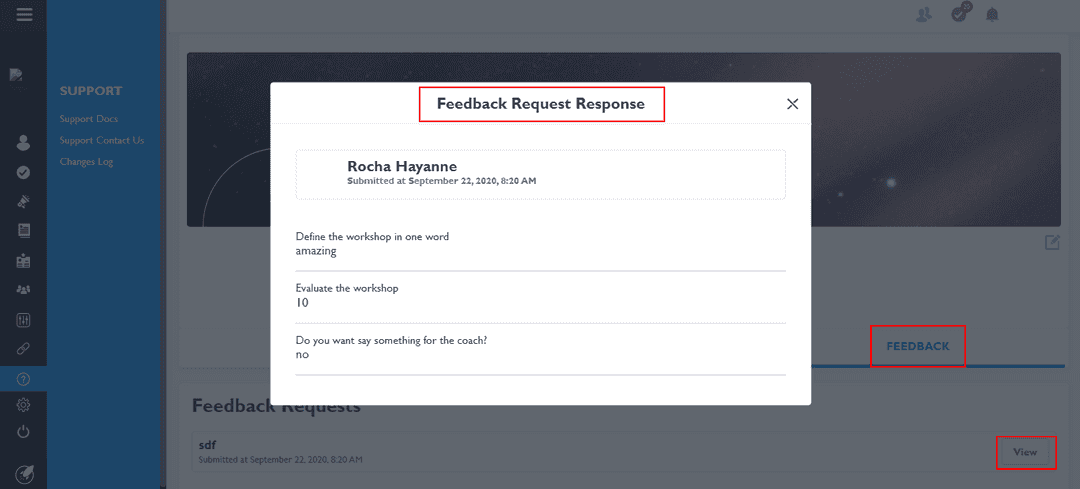
You can view the feedback responses in 2 ways:
- Going directly to the user profile and selecting feedback and clicking on the button
viewin the right corner of the page. - Accessing each feedback answer in the feedback request dashboard and select
viewfor each respondent
Closing request
When you want to close your feedback request, click on the red close request button. If has not submitted their form, they will no longer be able to do so.


