


Managing Your Availability
Setting your availability allows community members — including startups, mentors, and program staff — to schedule meetings with you based on your actual open slots. Your availability feeds directly into one-on-one events and coaching session scheduling, so keeping it up to date ensures a smooth booking experience for everyone.
Where to Find Availability Settings
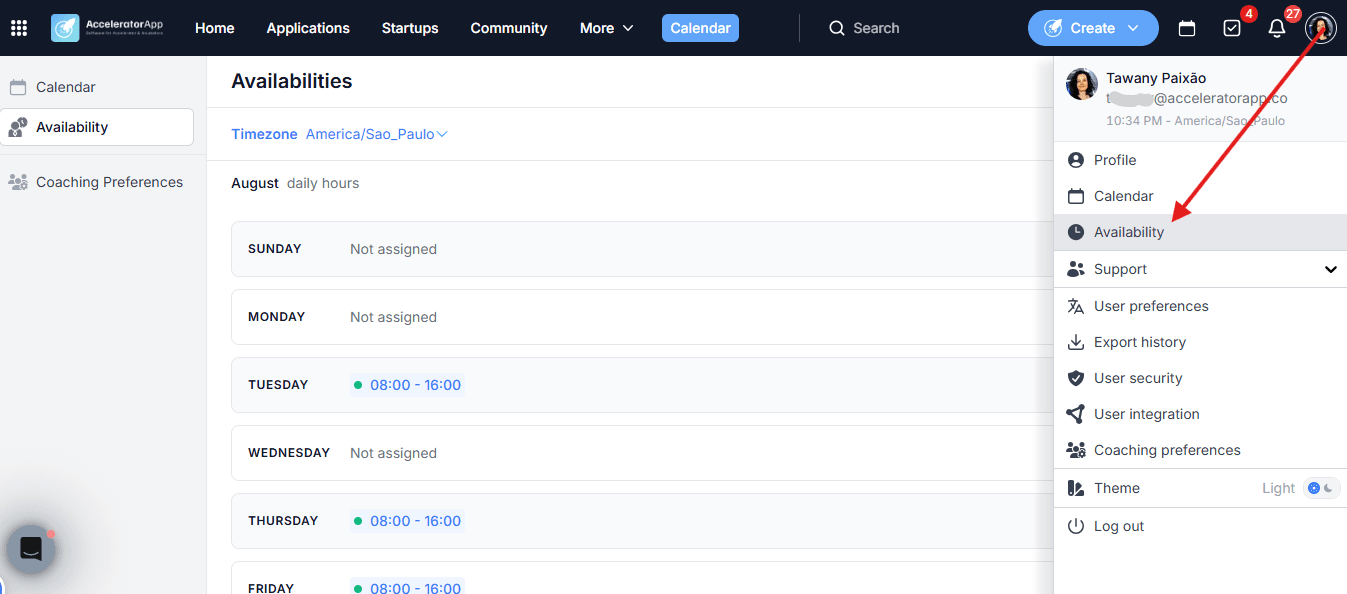
Click on your Profile icon in the top-right corner of the platform and select Availability.
Step-by-Step
1. Open Availability Settings
Click on your Profile icon and select Availability to enter the availability management view.
2. Set Recurring Availability
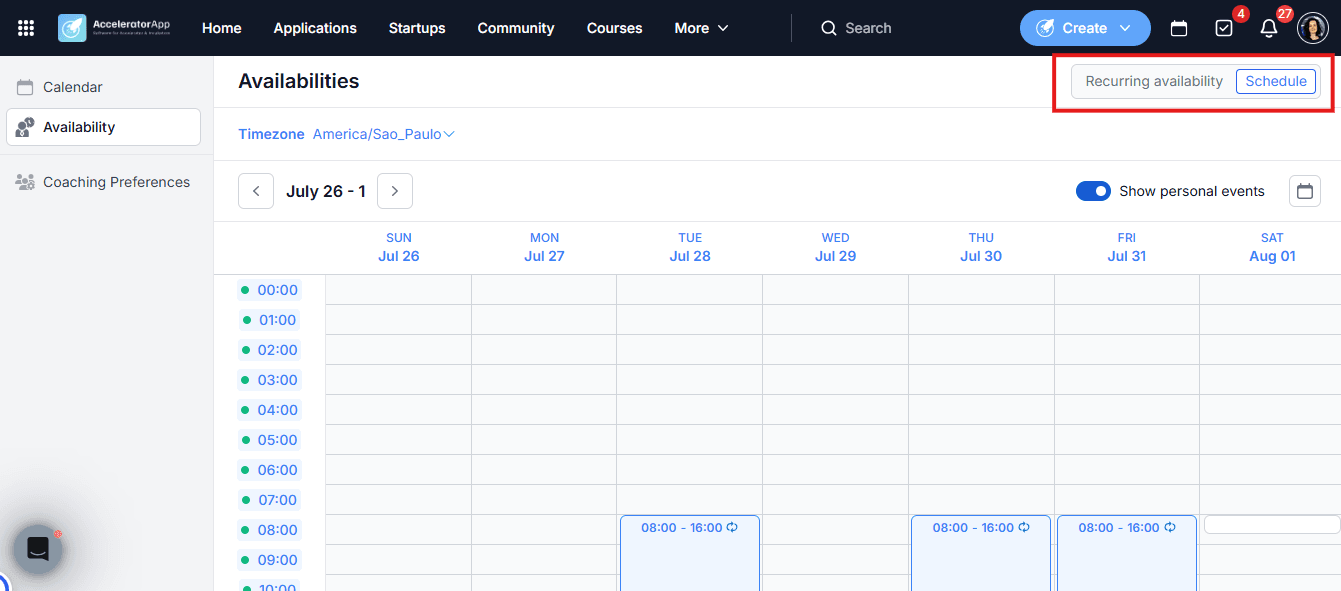
In the Settings mode, select a day of the week to add recurring time slots — these will repeat weekly and apply every time that day comes around.
3. Add Time Slots
Add the time ranges during which you are available on that day. You can add multiple slots per day (e.g. 9:00–12:00 and 14:00–17:00).
4. Apply Your Changes
Click Apply to save the time slots for that day.
5. Adjust Availability for a Specific Day
In the Weekly view, you can override your recurring availability for a single specific date — useful for exceptions like holidays, travel, or one-off schedule changes. Changes made in this view apply to that day only and do not affect your recurring settings.
6. Connect Your Calendar to Block Busy Slots
If you connect your Google Calendar or Microsoft Outlook to AcceleratorApp, any events already in your personal calendar will automatically block the corresponding slots in your availability — preventing others from booking you during those times.
Your personal calendar events are never visible to other users. The integration only uses your existing commitments to block unavailable slots — no one can see what you have scheduled or any details from your calendar.
To connect your calendar, go to your Profile icon and select Calendar.
Best Practices
- Set your timezone first. Your availability is displayed to others based on the timezone you configure — an incorrect timezone will cause scheduling confusion for both parties.
- Use recurring availability for your standard schedule. Set up your typical weekly availability once and rely on the weekly view only for exceptions — this reduces ongoing maintenance.
- Connect your calendar to avoid double-bookings. Linking Google Calendar or Microsoft Outlook ensures your personal commitments automatically block the right slots without any manual effort.
- Keep your availability up to date. If your schedule changes, update your slots promptly to avoid bookings during times you are unavailable.