


Introduction to Requests
Requests allow you to collect structured information from selected users through a form. In AcceleratorApp, you can create a Request, choose who should receive it, send it, follow up by email, and track completion from one place.
Note: Requests can trigger an auto-task for recipients, but only when the selected Request Form includes at least one required field.
Where to find Requests
To access Requests:
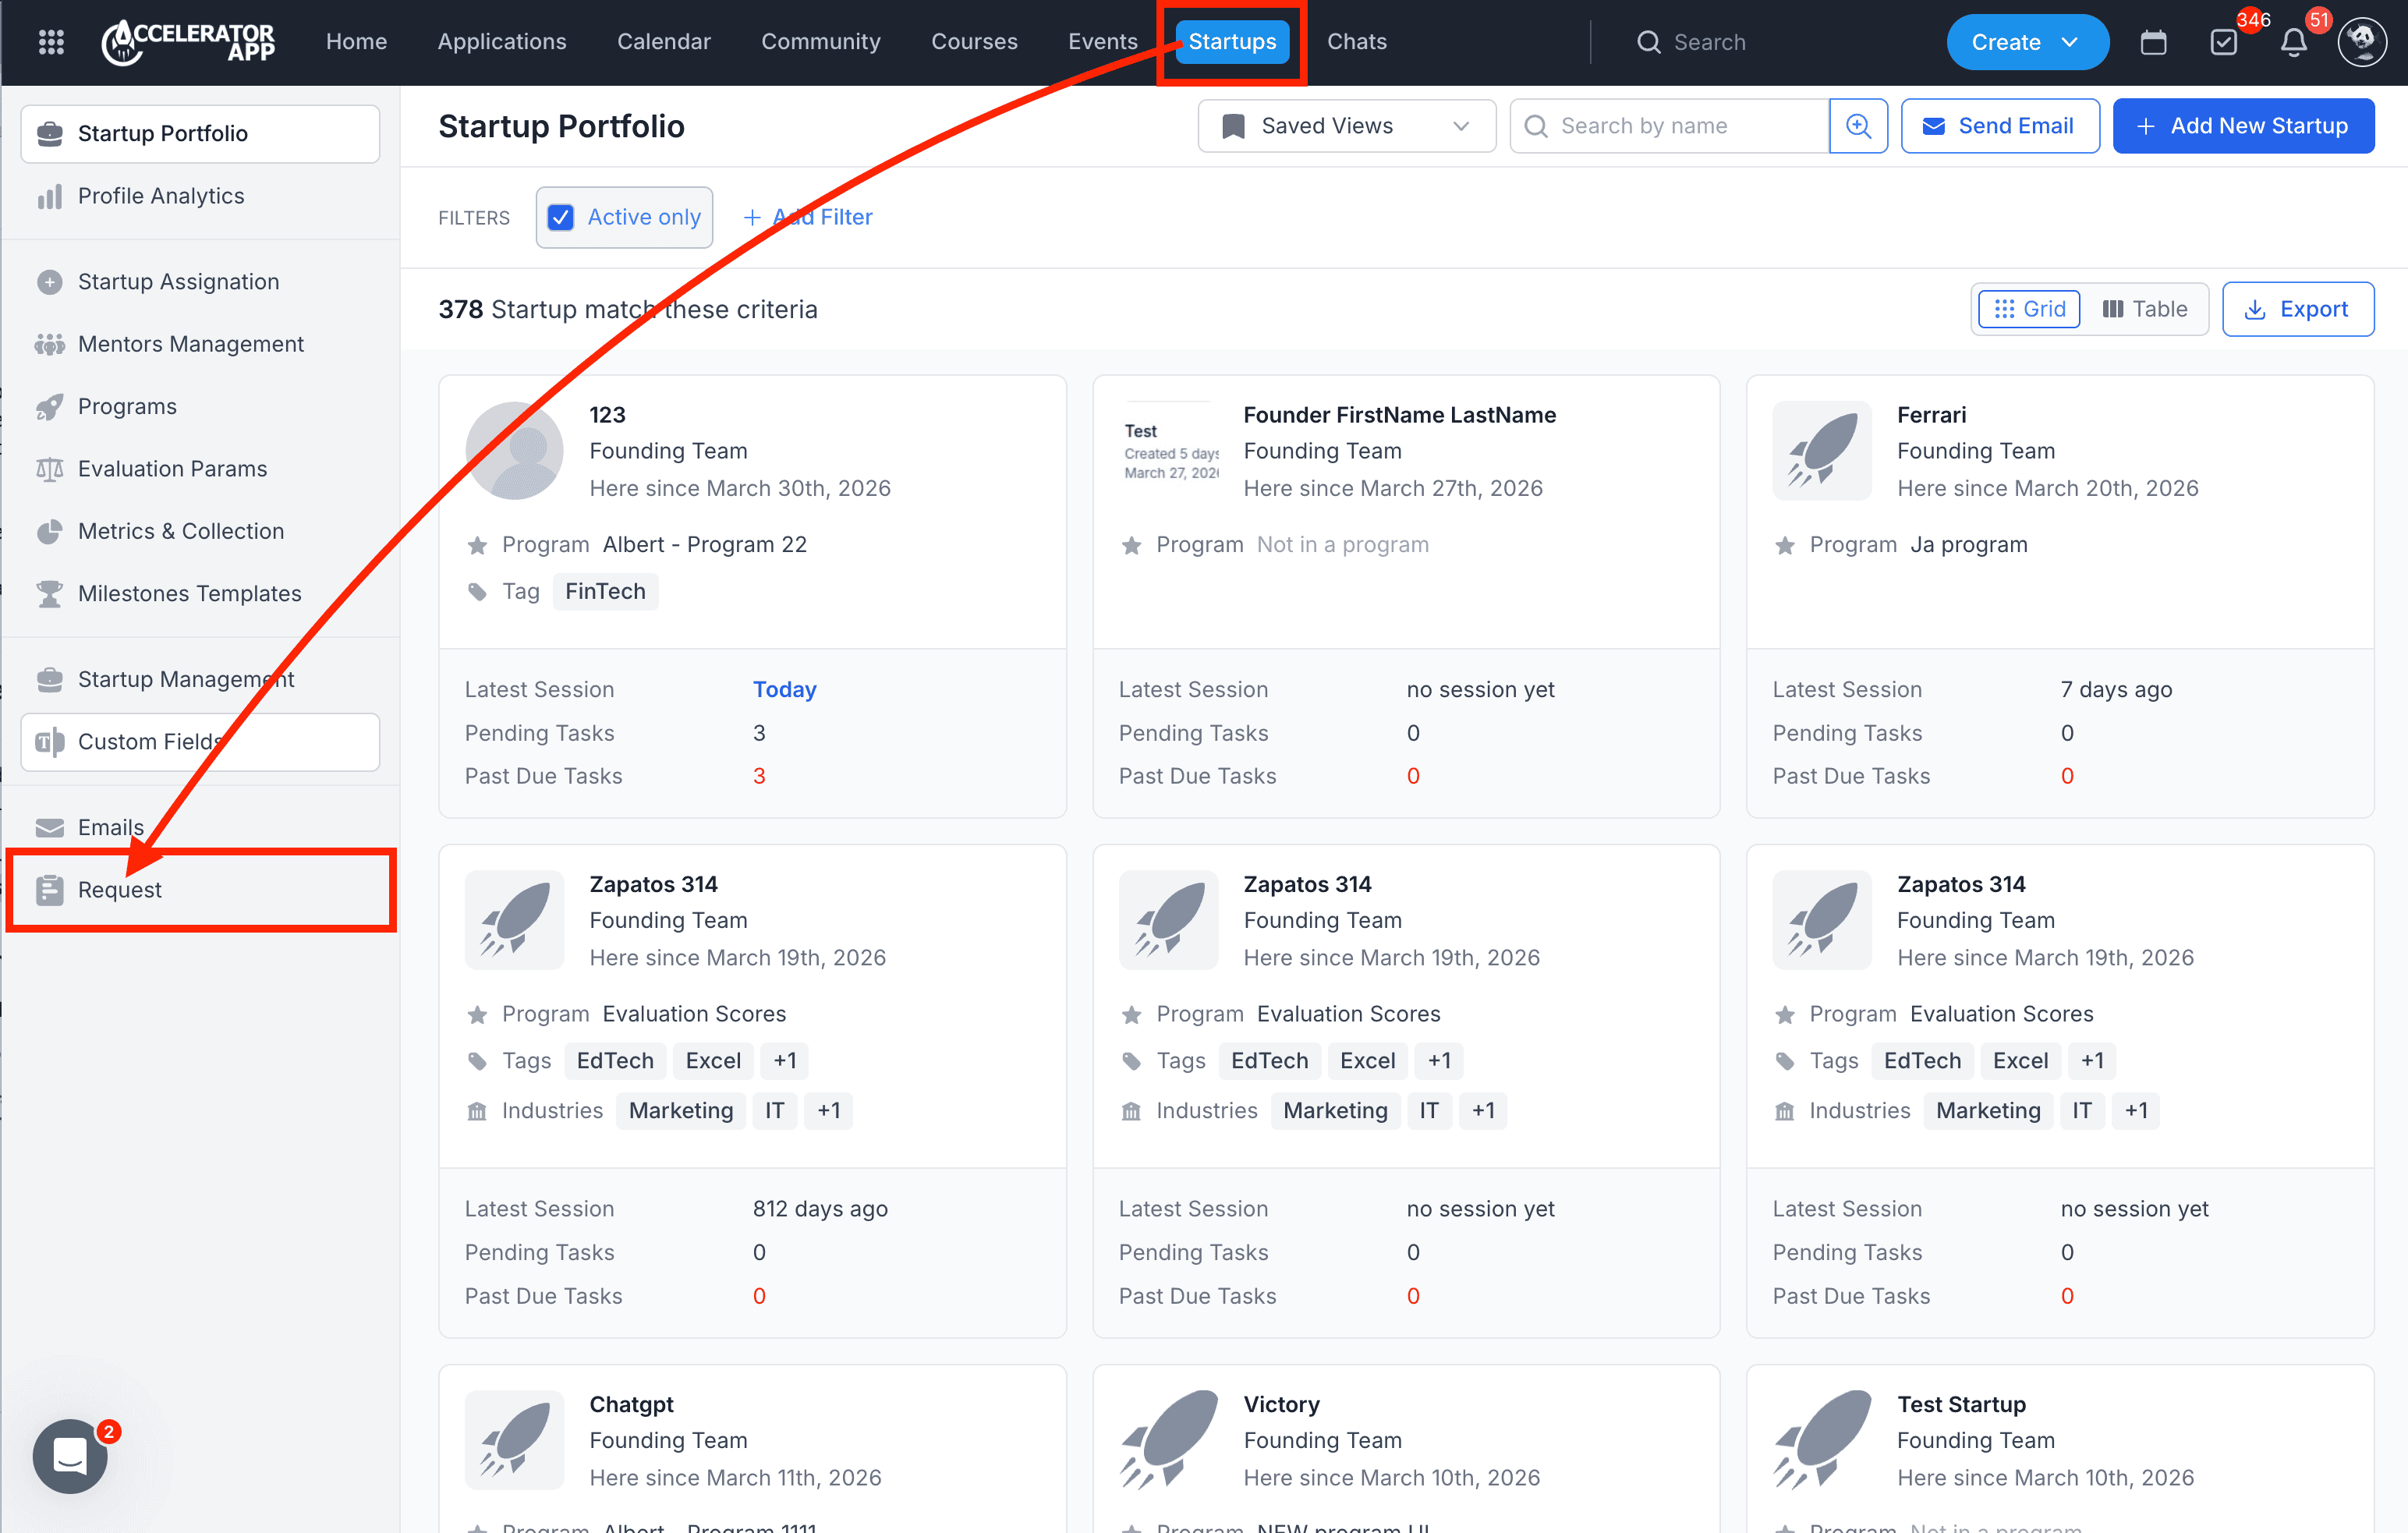
- Navigate to Startups from the main top-navigation bar.
- In the left sidebar, click Request to view and manage existing requests.
Step-by-Step
1. Creating a Request
To create a new Request:
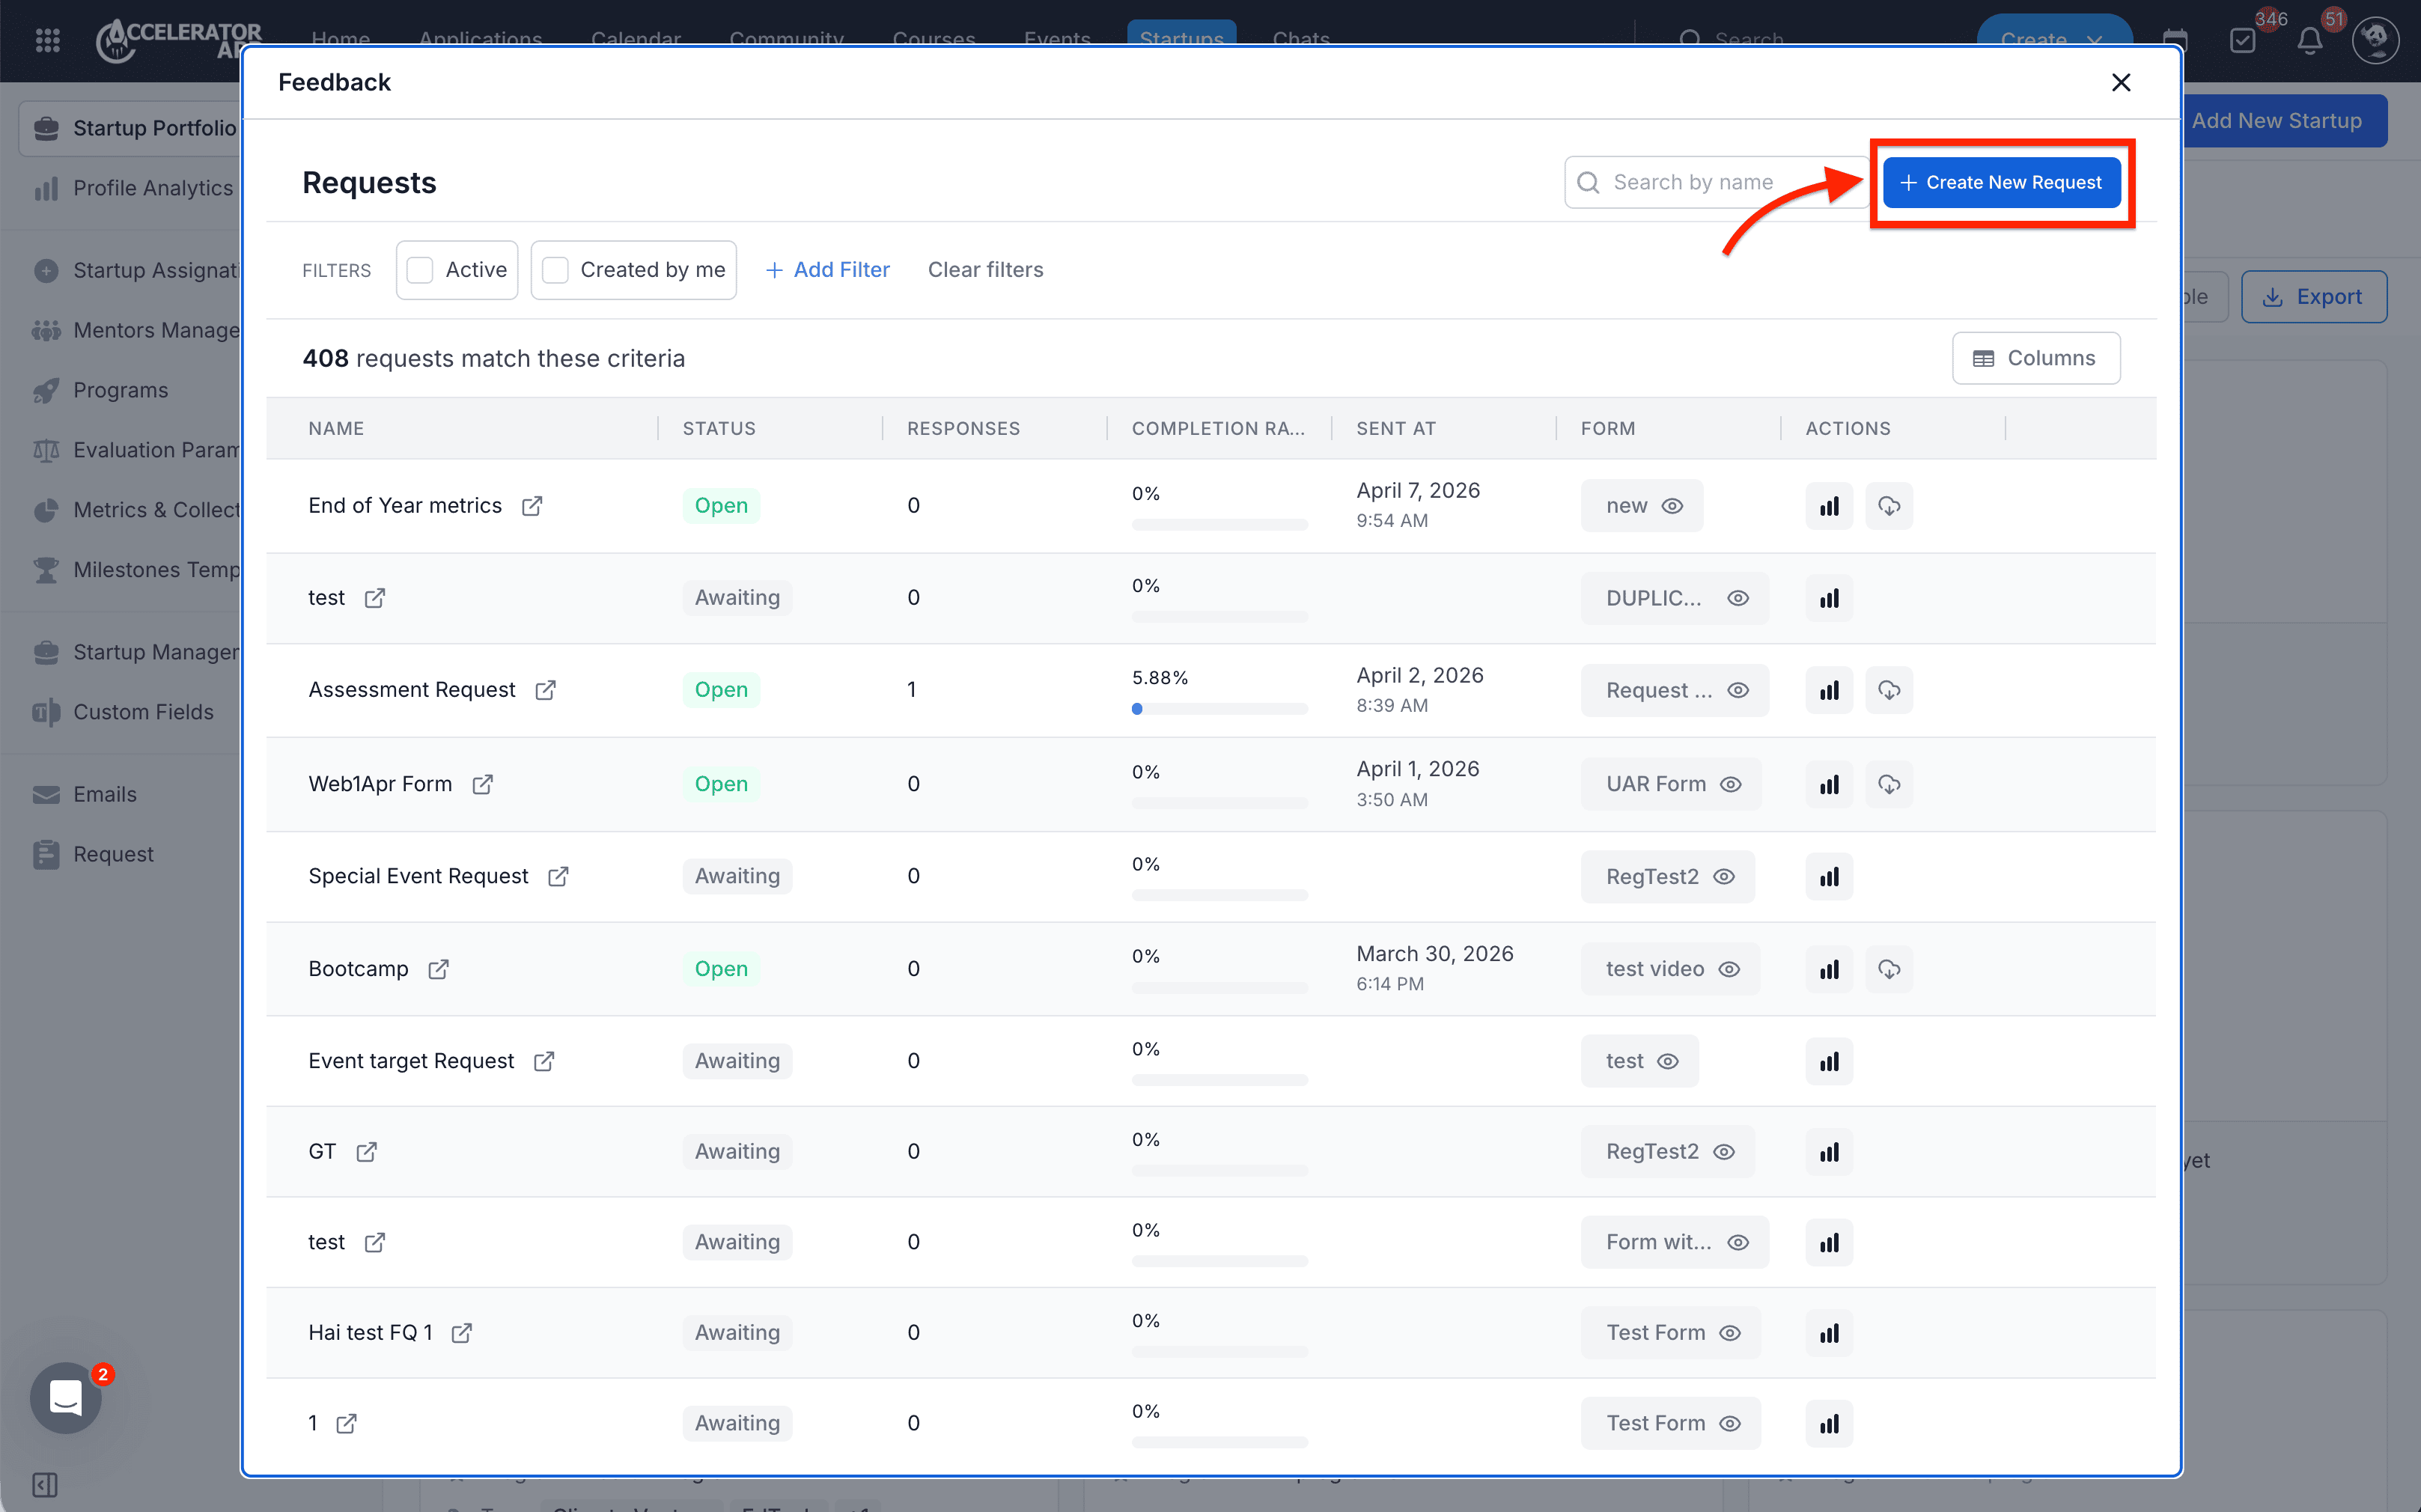
- Once in the Request section.
- Click on Create New Request.
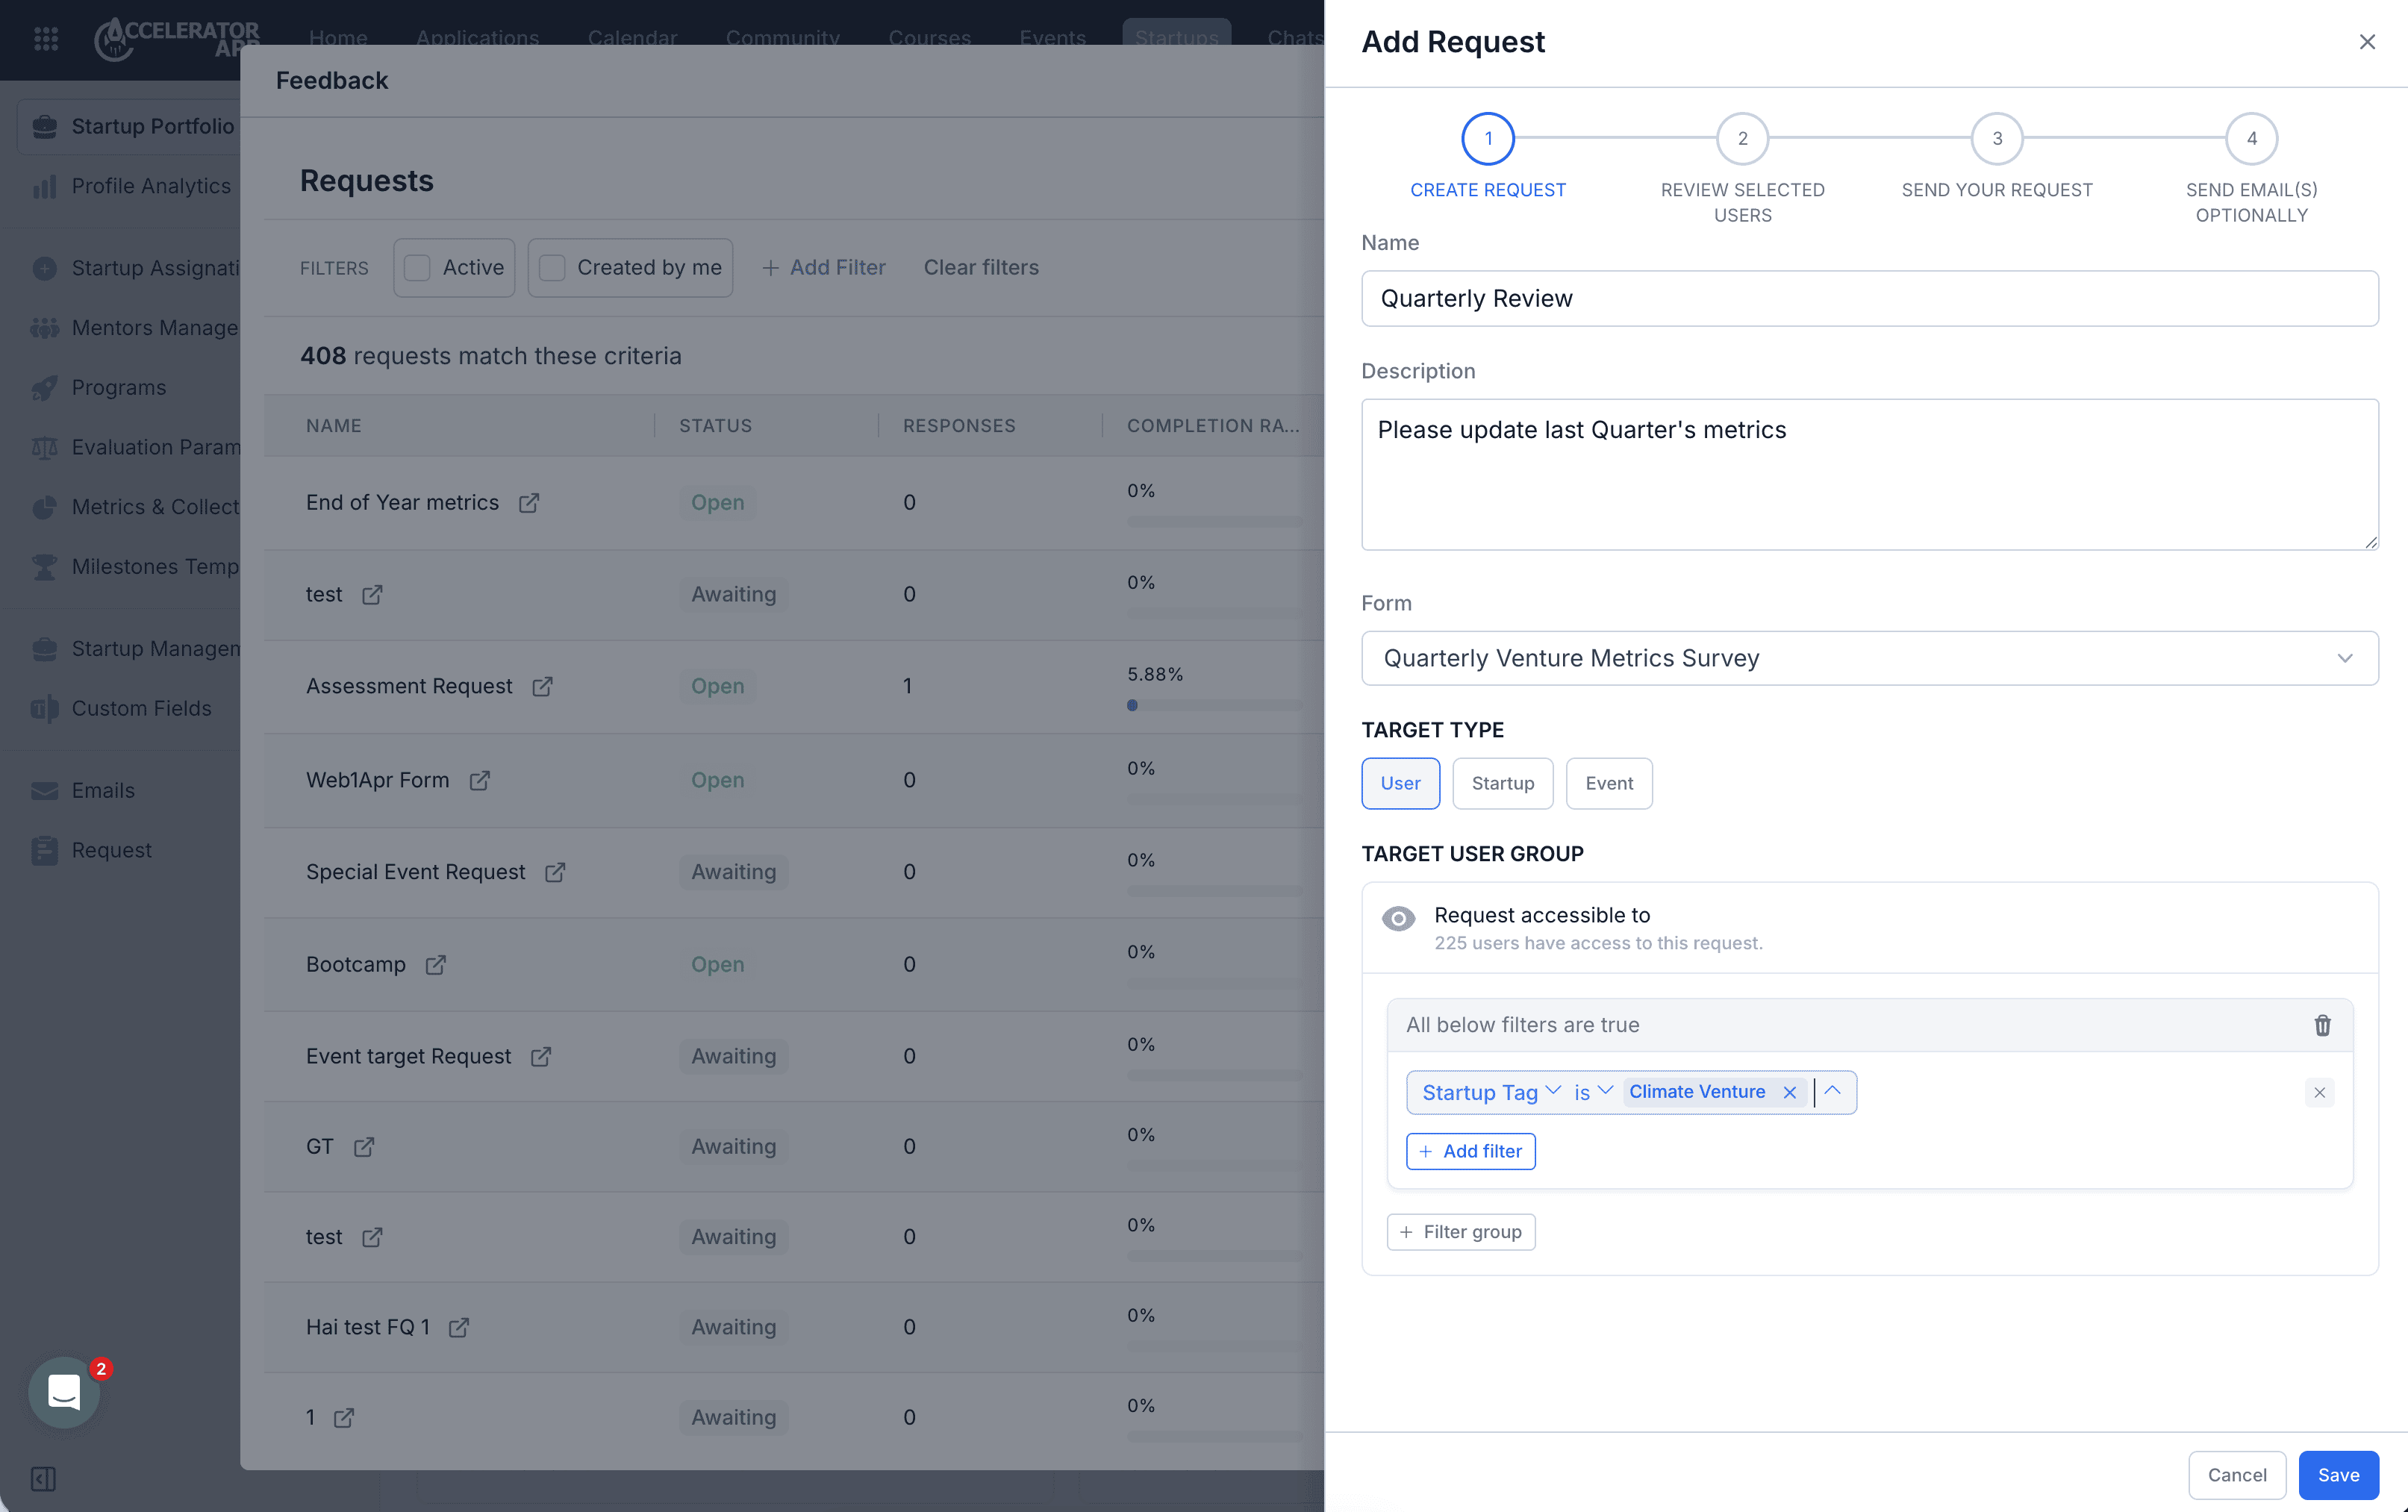
In Create New Request, complete the following fields:
- Name
- Description
- Select the Form you want to send with the Request. For more information about creating forms, see How to Create a Request Form.
- Target Type: User, Startup, or Event
Define who should receive the Request.
- When targeting startups, use filters and filter groups to select the right audience.
Click Save.
2. Reviewing Selected Users
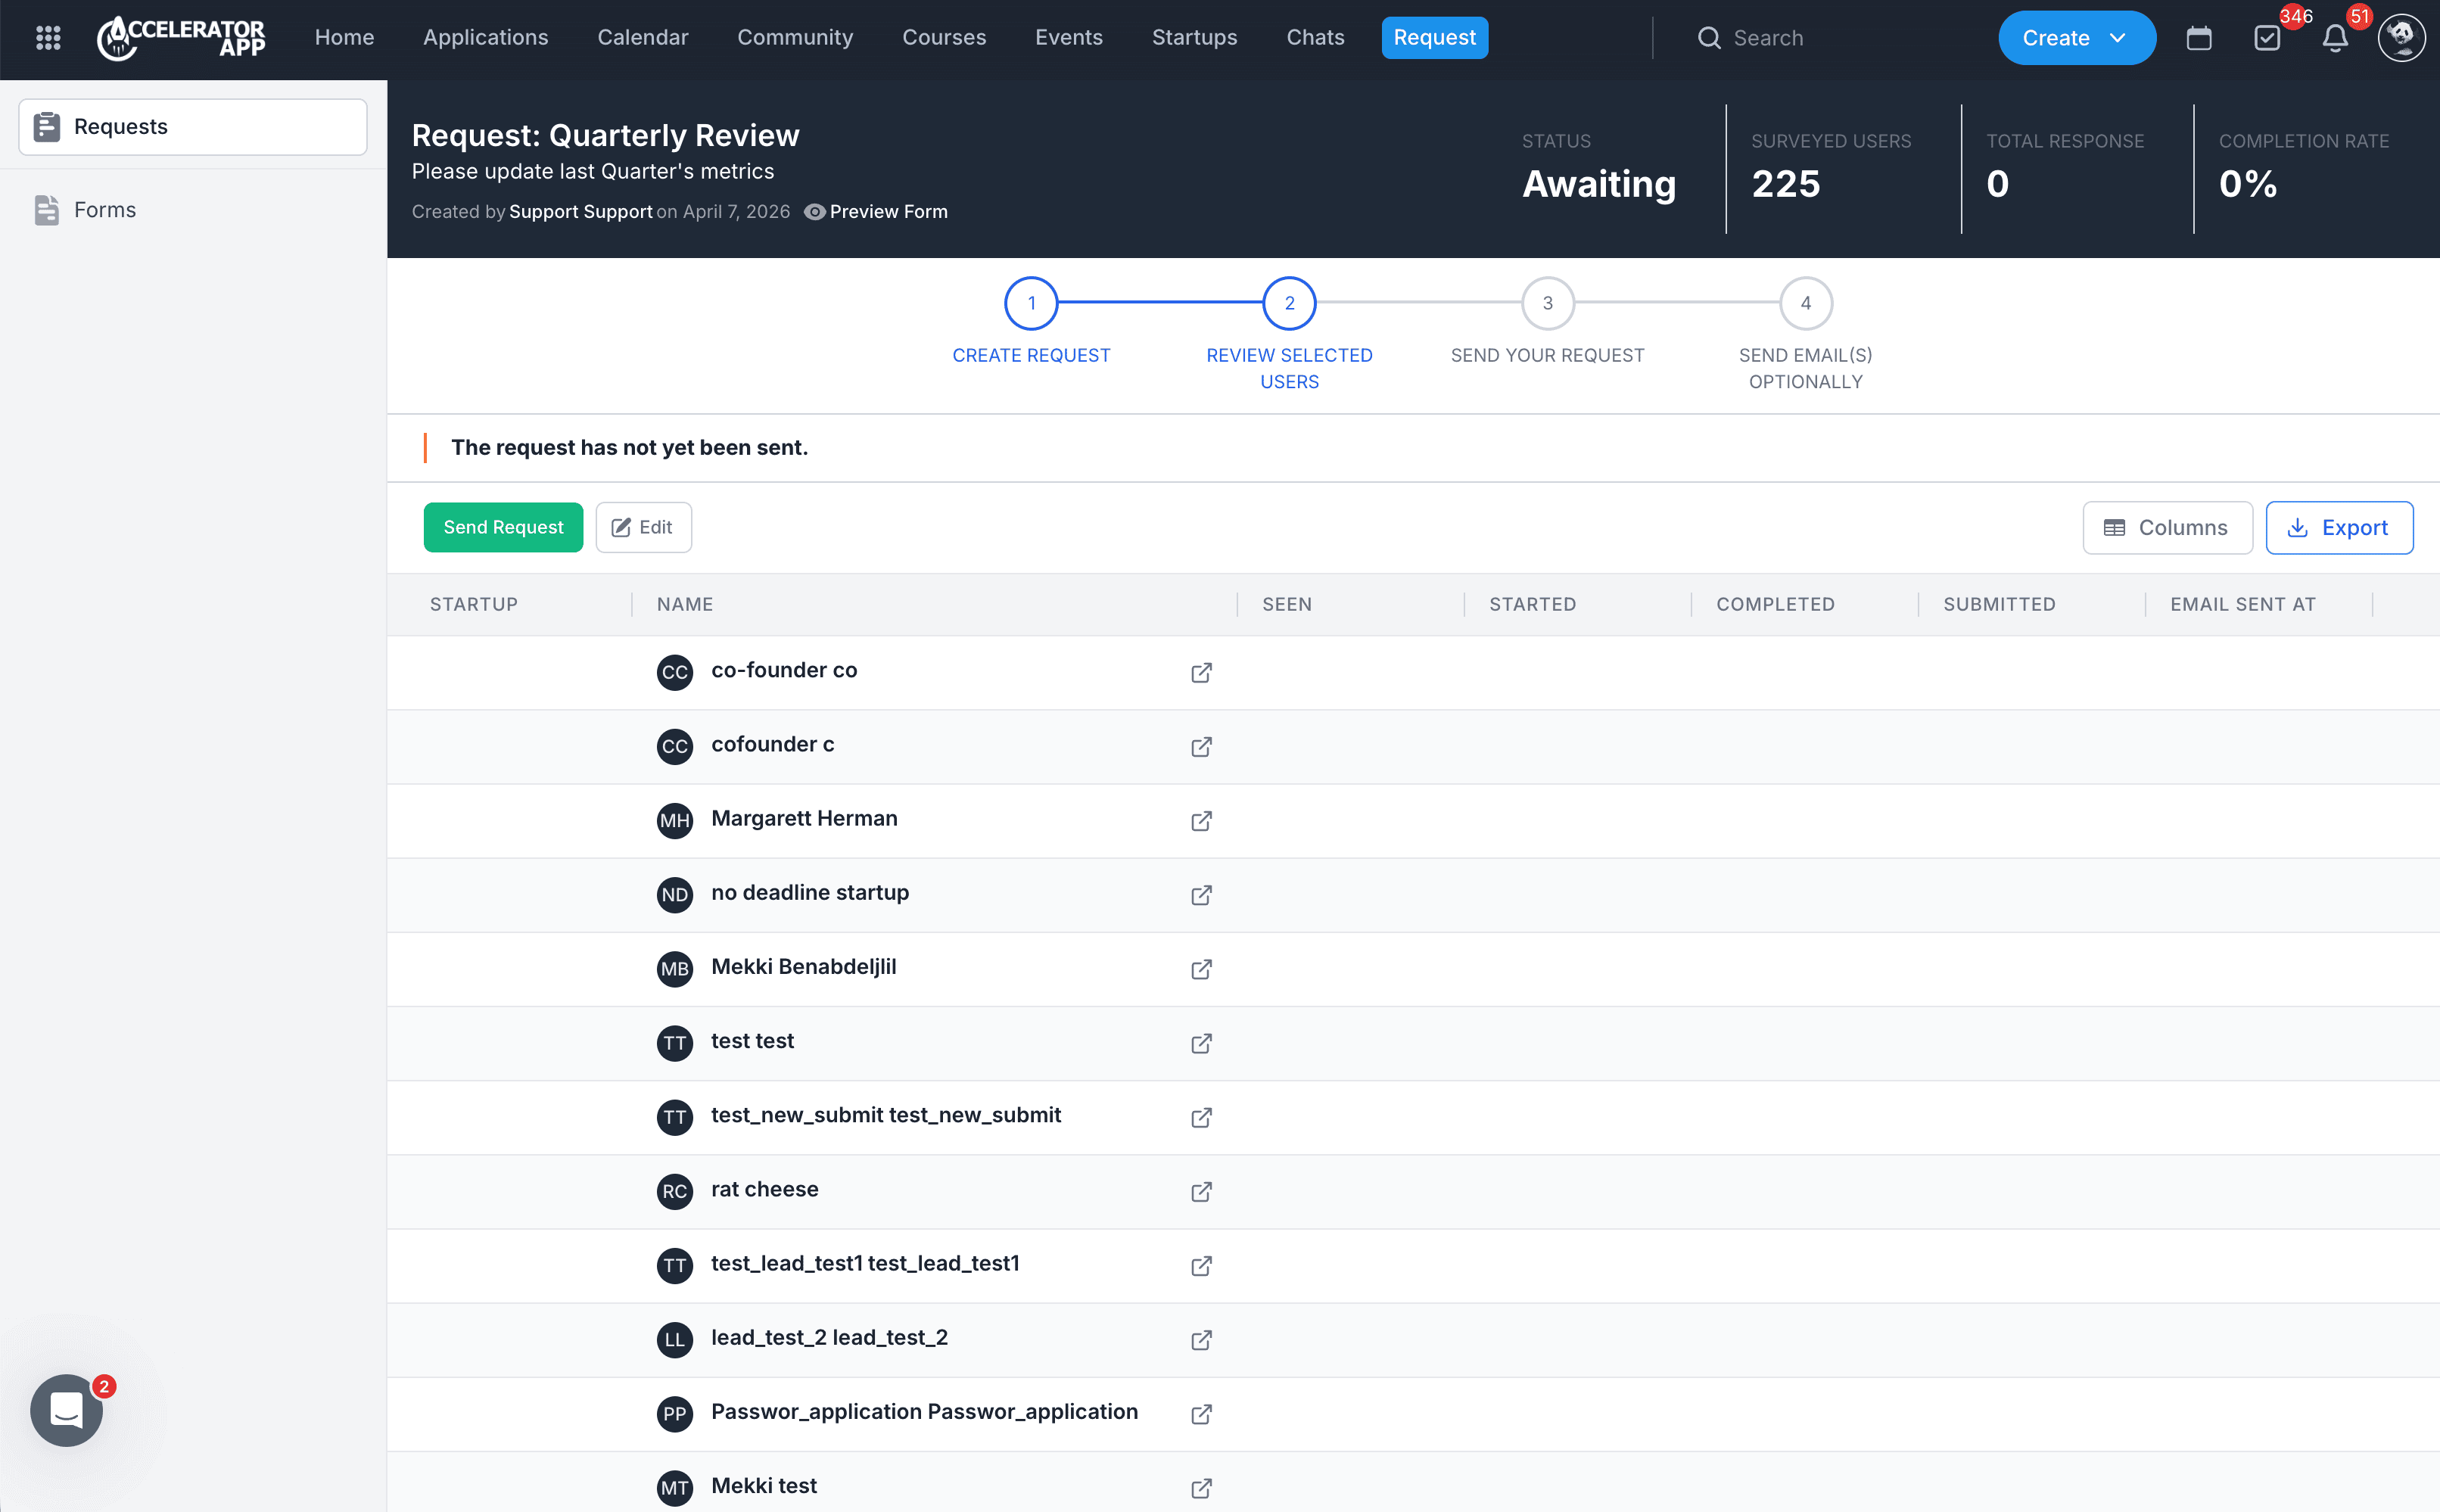
After saving, the Request opens in the review page.
Here you can:
- Review the Request details.
- Check the current Status.
- See the number of Surveyed Users, Total Response, and Completion Rate.
- Review the selected users before sending.
- Click Edit if you need to make changes.
3. Sending the Request
When the Request is ready:
- Click Send Request.
- Review the confirmation message.
- Click Confirm to send it.
Once sent:
- The Request status changes from Awaiting to Open.
- The Request becomes active for the selected recipients.
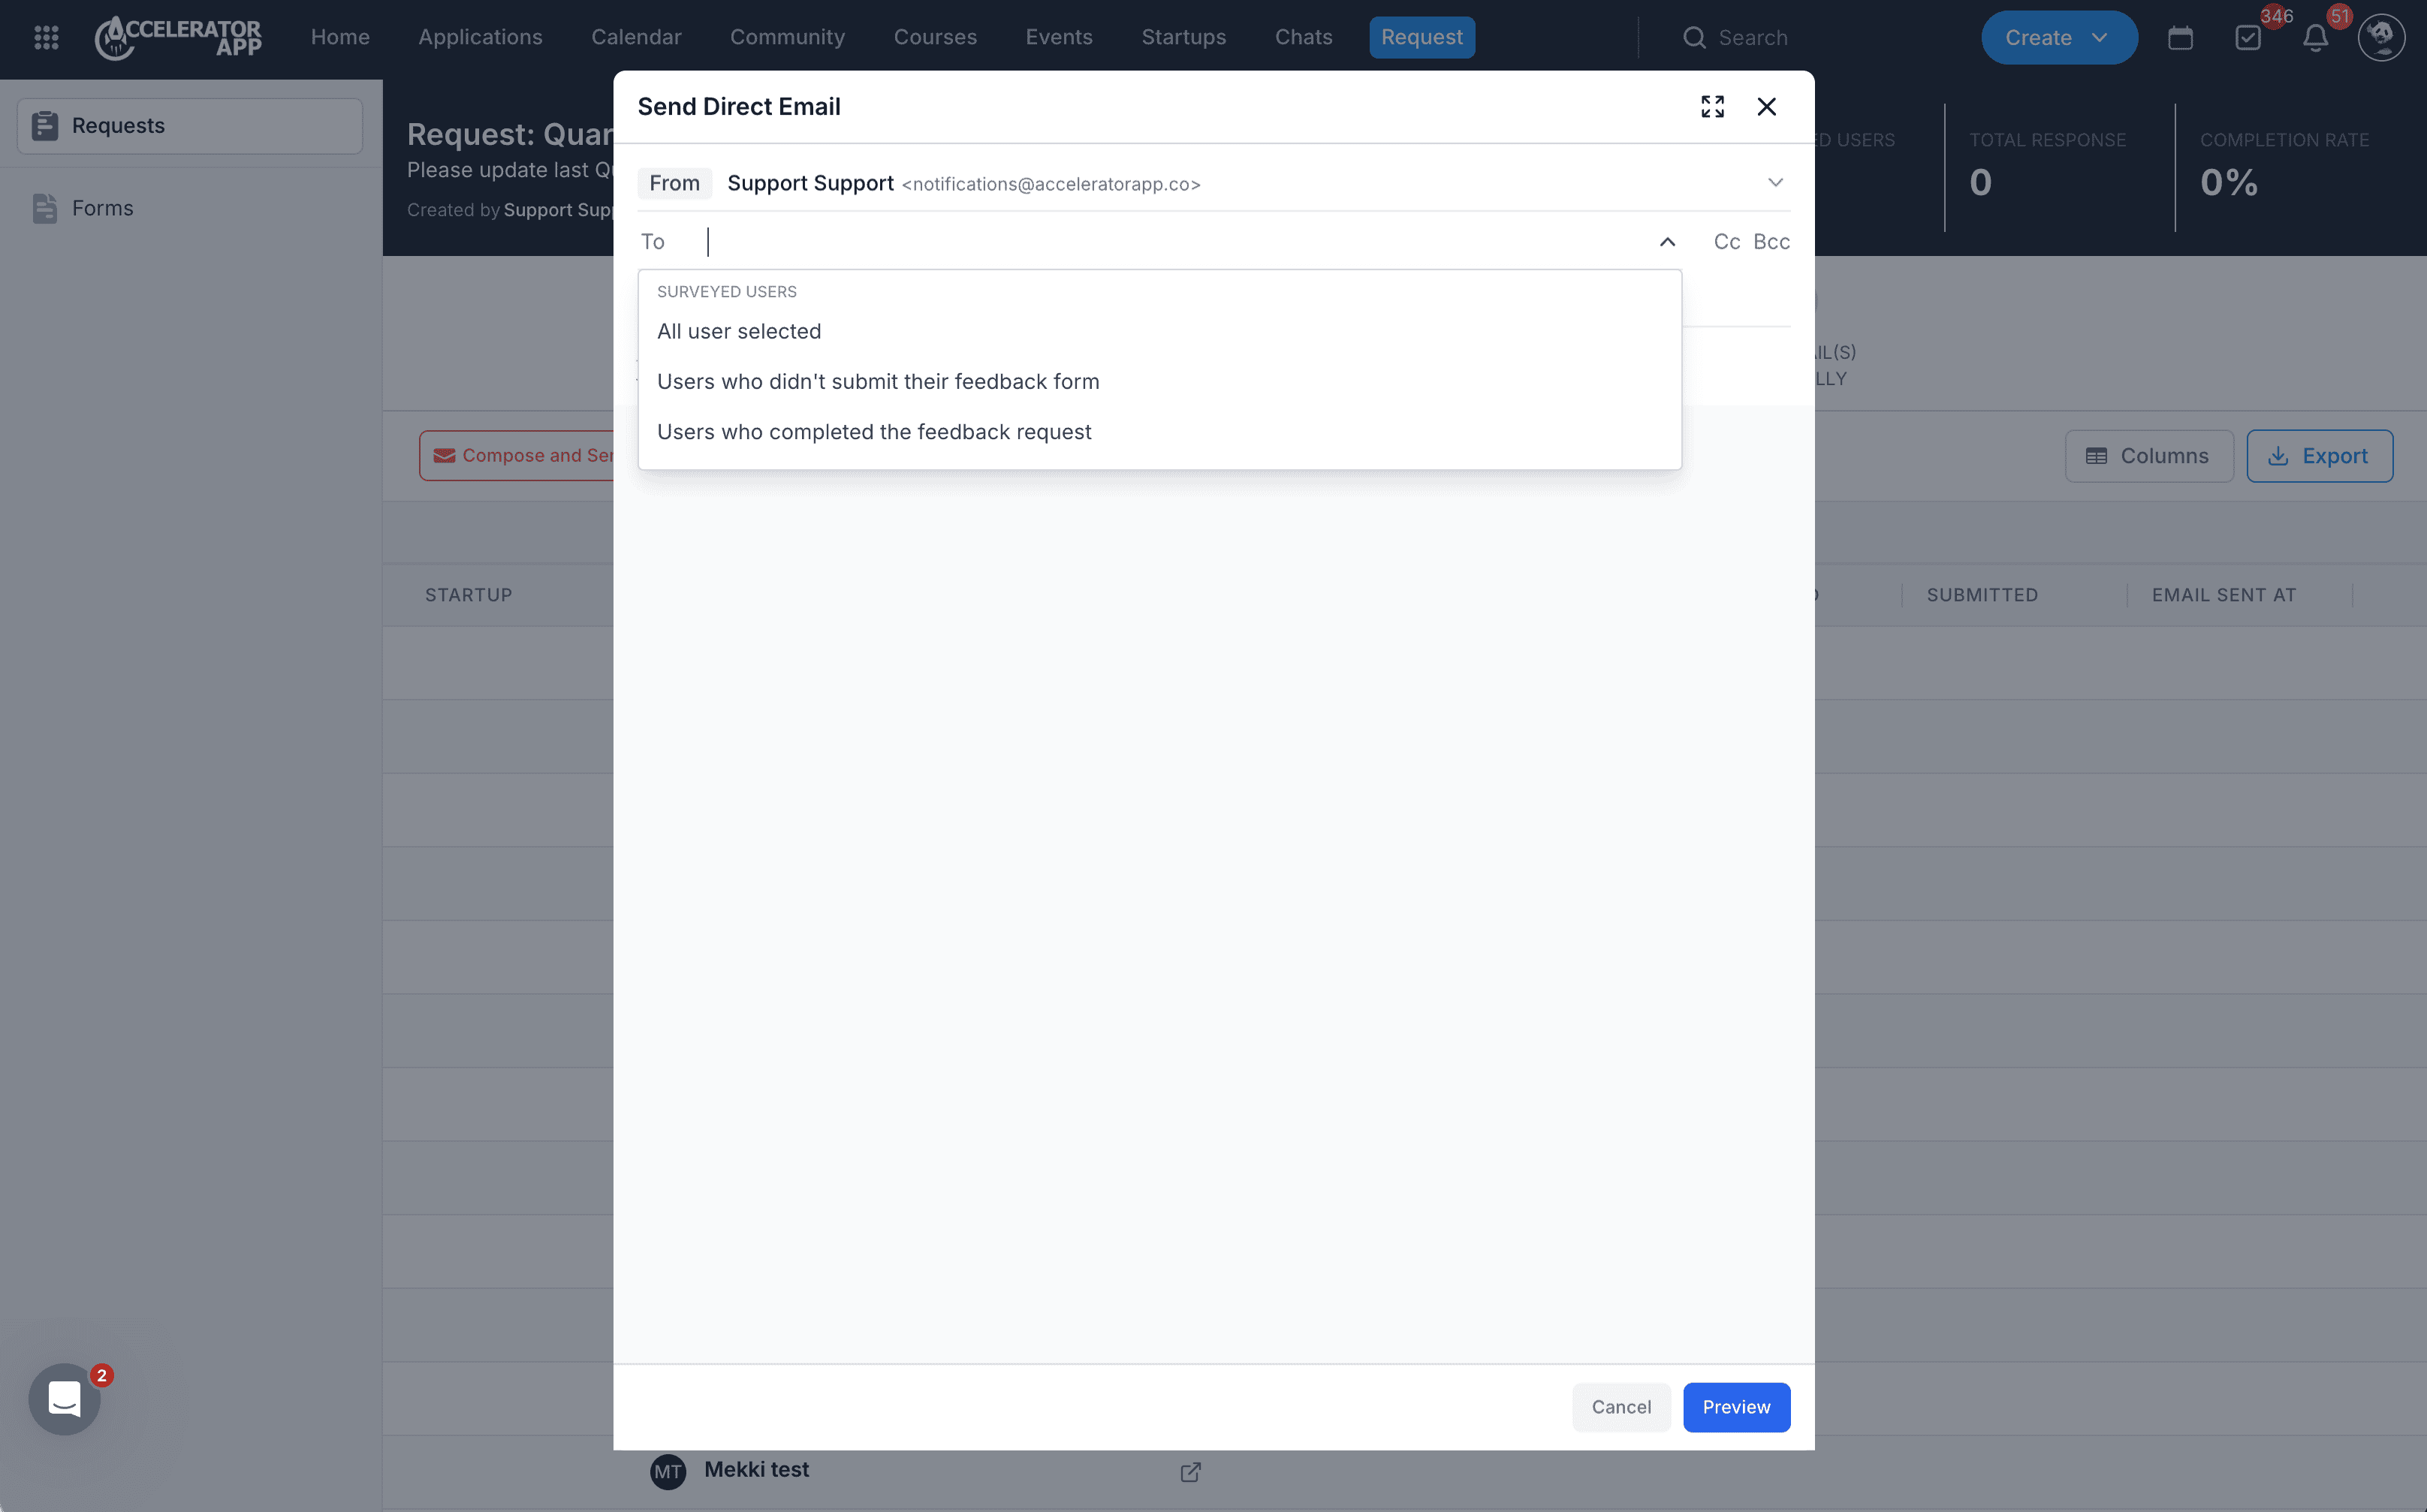
4. Sending Email(s) Optionally
After sending the Request, you can follow up by email.
To send an email:
- Open the Request.
- Click Compose and Send Email.
- Add recipients as needed.
- Enter the Subject and email content.
- Use Personalization or Templates if needed.
- Click Preview before sending.
5. Editing a Request
You can edit a Request when needed.
To edit a Request:
- Open the Request.
- Click Edit.
- Update the Request settings.
- Save your changes.
6. Closing a Request
When you no longer want to collect responses:
- Open the Request.
- Click Close Request.
Closing a Request stops it from remaining active.
7. Tracking Progress and Exporting Data
From the Request page, you can monitor progress and export data.
You can review:
- Status
- Surveyed Users
- Total Response
- Completion Rate
- User-level progress such as Seen, Started, Completed, and Submitted
You can also:
- Click Columns to customize the table view.
- Click Export to download the Request data.
Tips & Best Practices
- Make sure the correct Form is selected before sending the Request.
- Choose the right Target Type so the Request reaches the correct audience.
- Use filters carefully to narrow down your recipients.
- Review the selected users before sending.
- Send a follow-up email to improve response rates.
Common Cases
- Collecting end-of-year startup metrics
- Sending post-event or post-session forms for feedback
- Requesting updates from selected startups or users
- Following up on program-related check-ins