


Introduction to the Startup Profile Template
The Startup Profile page allows startups to present their company, team, and progress in a structured and consistent way. Program managers, mentors, coaches, and administrators can easily view, understand, and assess startups based on the information provided.
Profile data is displayed based on the permissions set in User Role Settings and can be searched, filtered, and reported on across the platform. Customizing the template allows you to collect the data that matters most for your programs — such as traction, market size, goals, documents, or validation strategies — to support decision-making, program analysis, and reporting.
The Startup Profile template is built using custom fields. Answers submitted by startups are saved and synced across the platform, and custom fields can be reused wherever that field appears, including forms, workflows, and reports.
This feature is available to Accelerator/Incubator administrators only.
Where to Find the Startup Profile Template
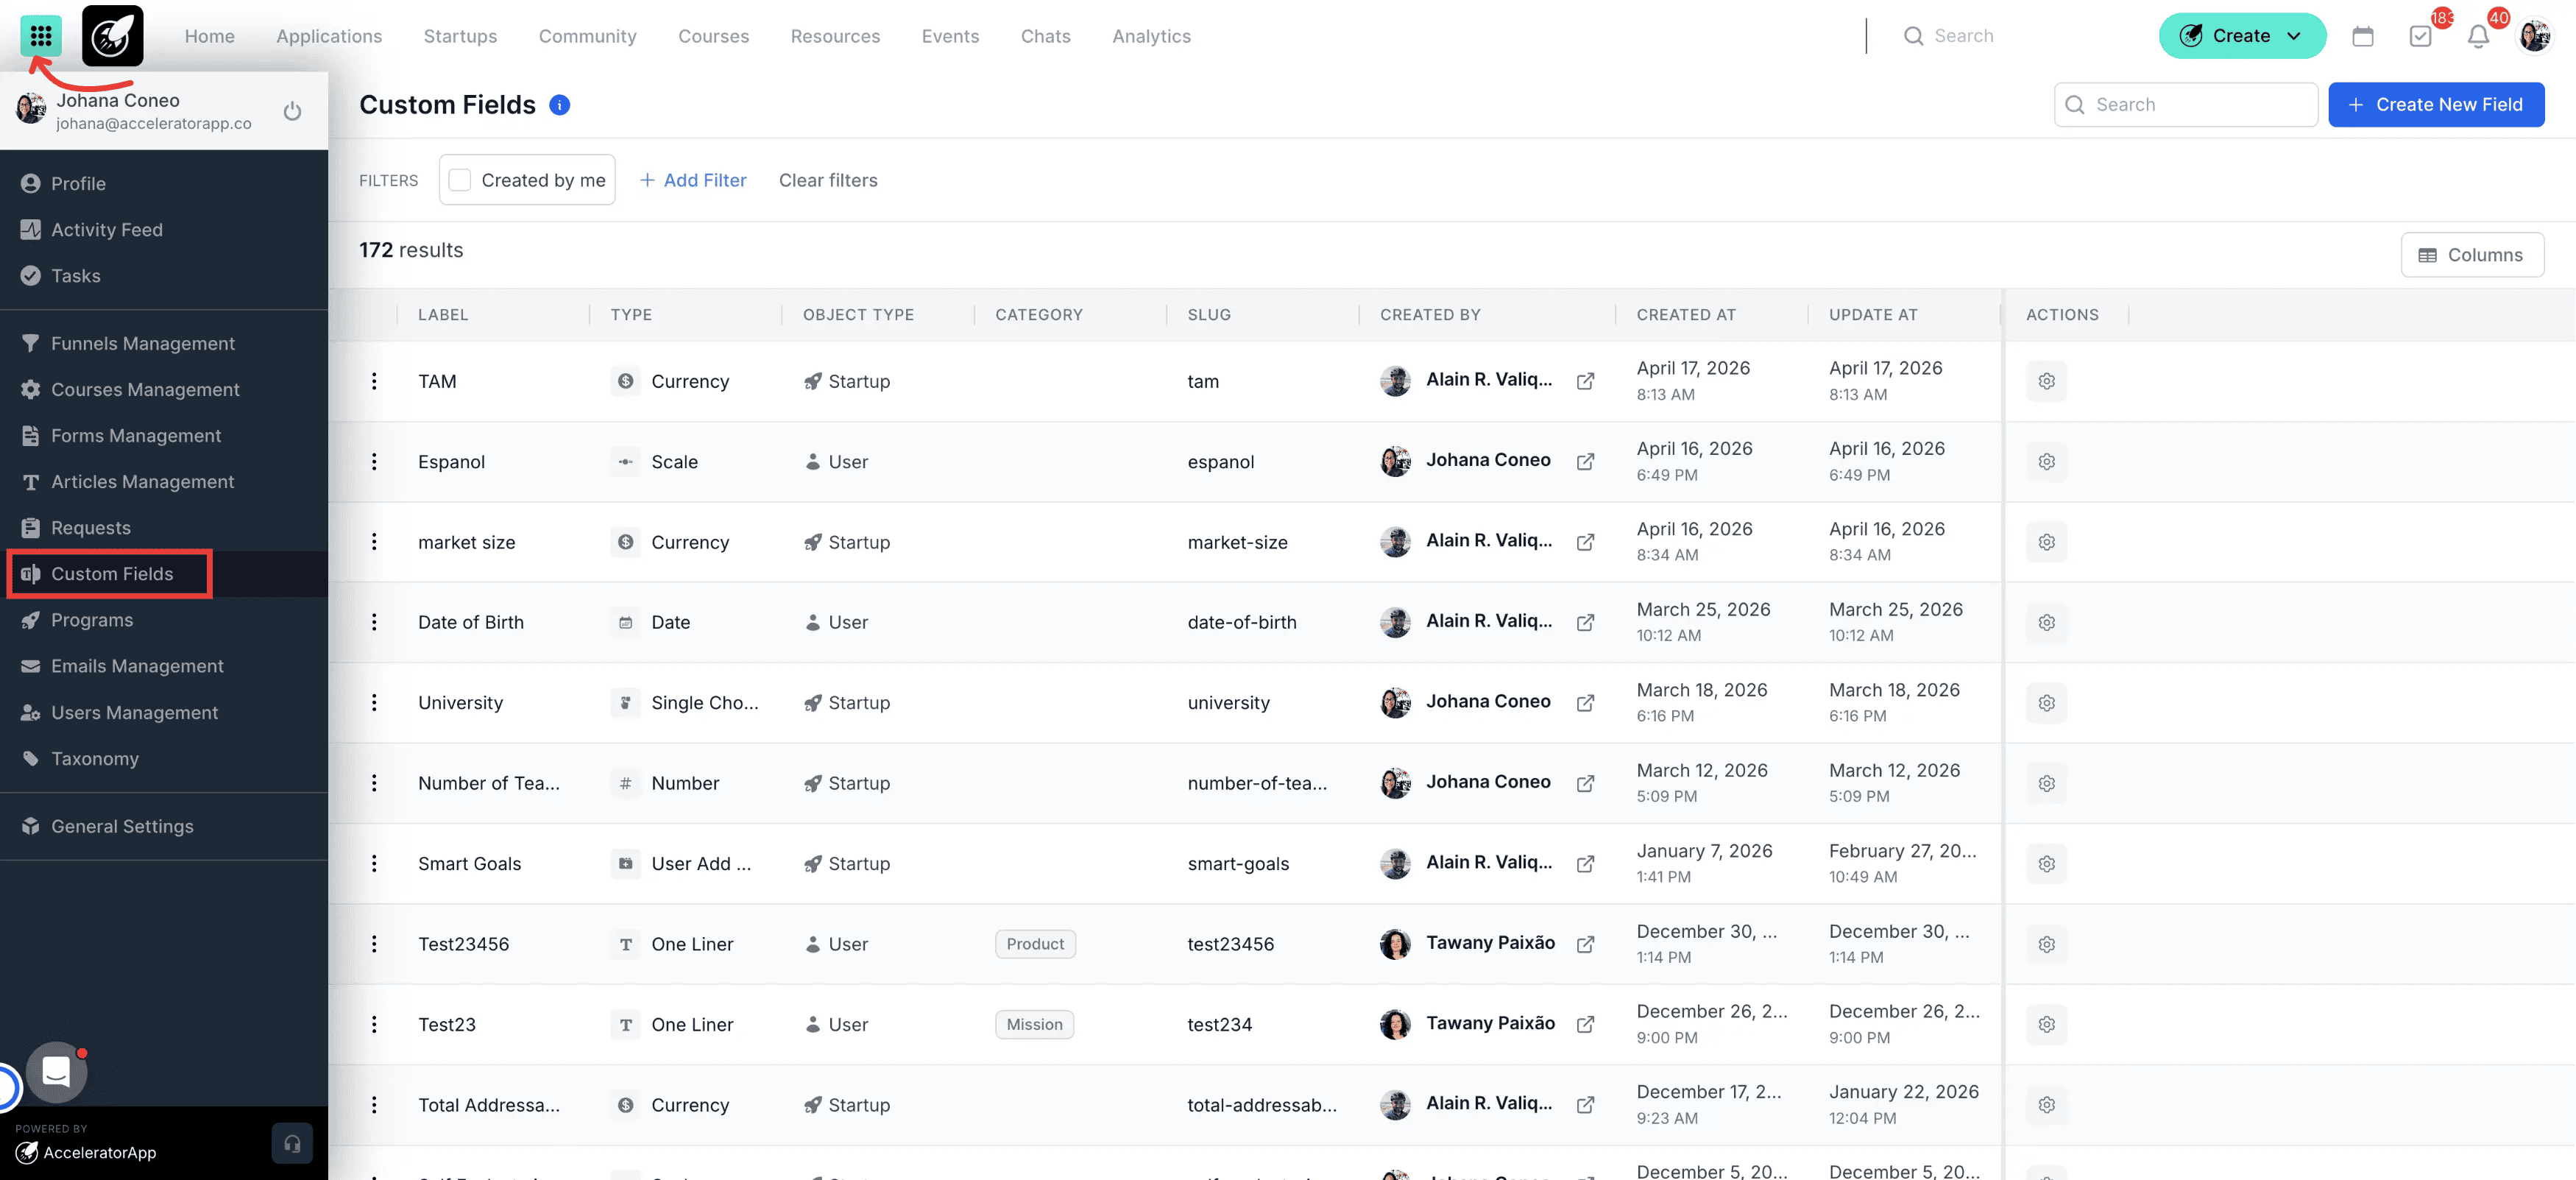
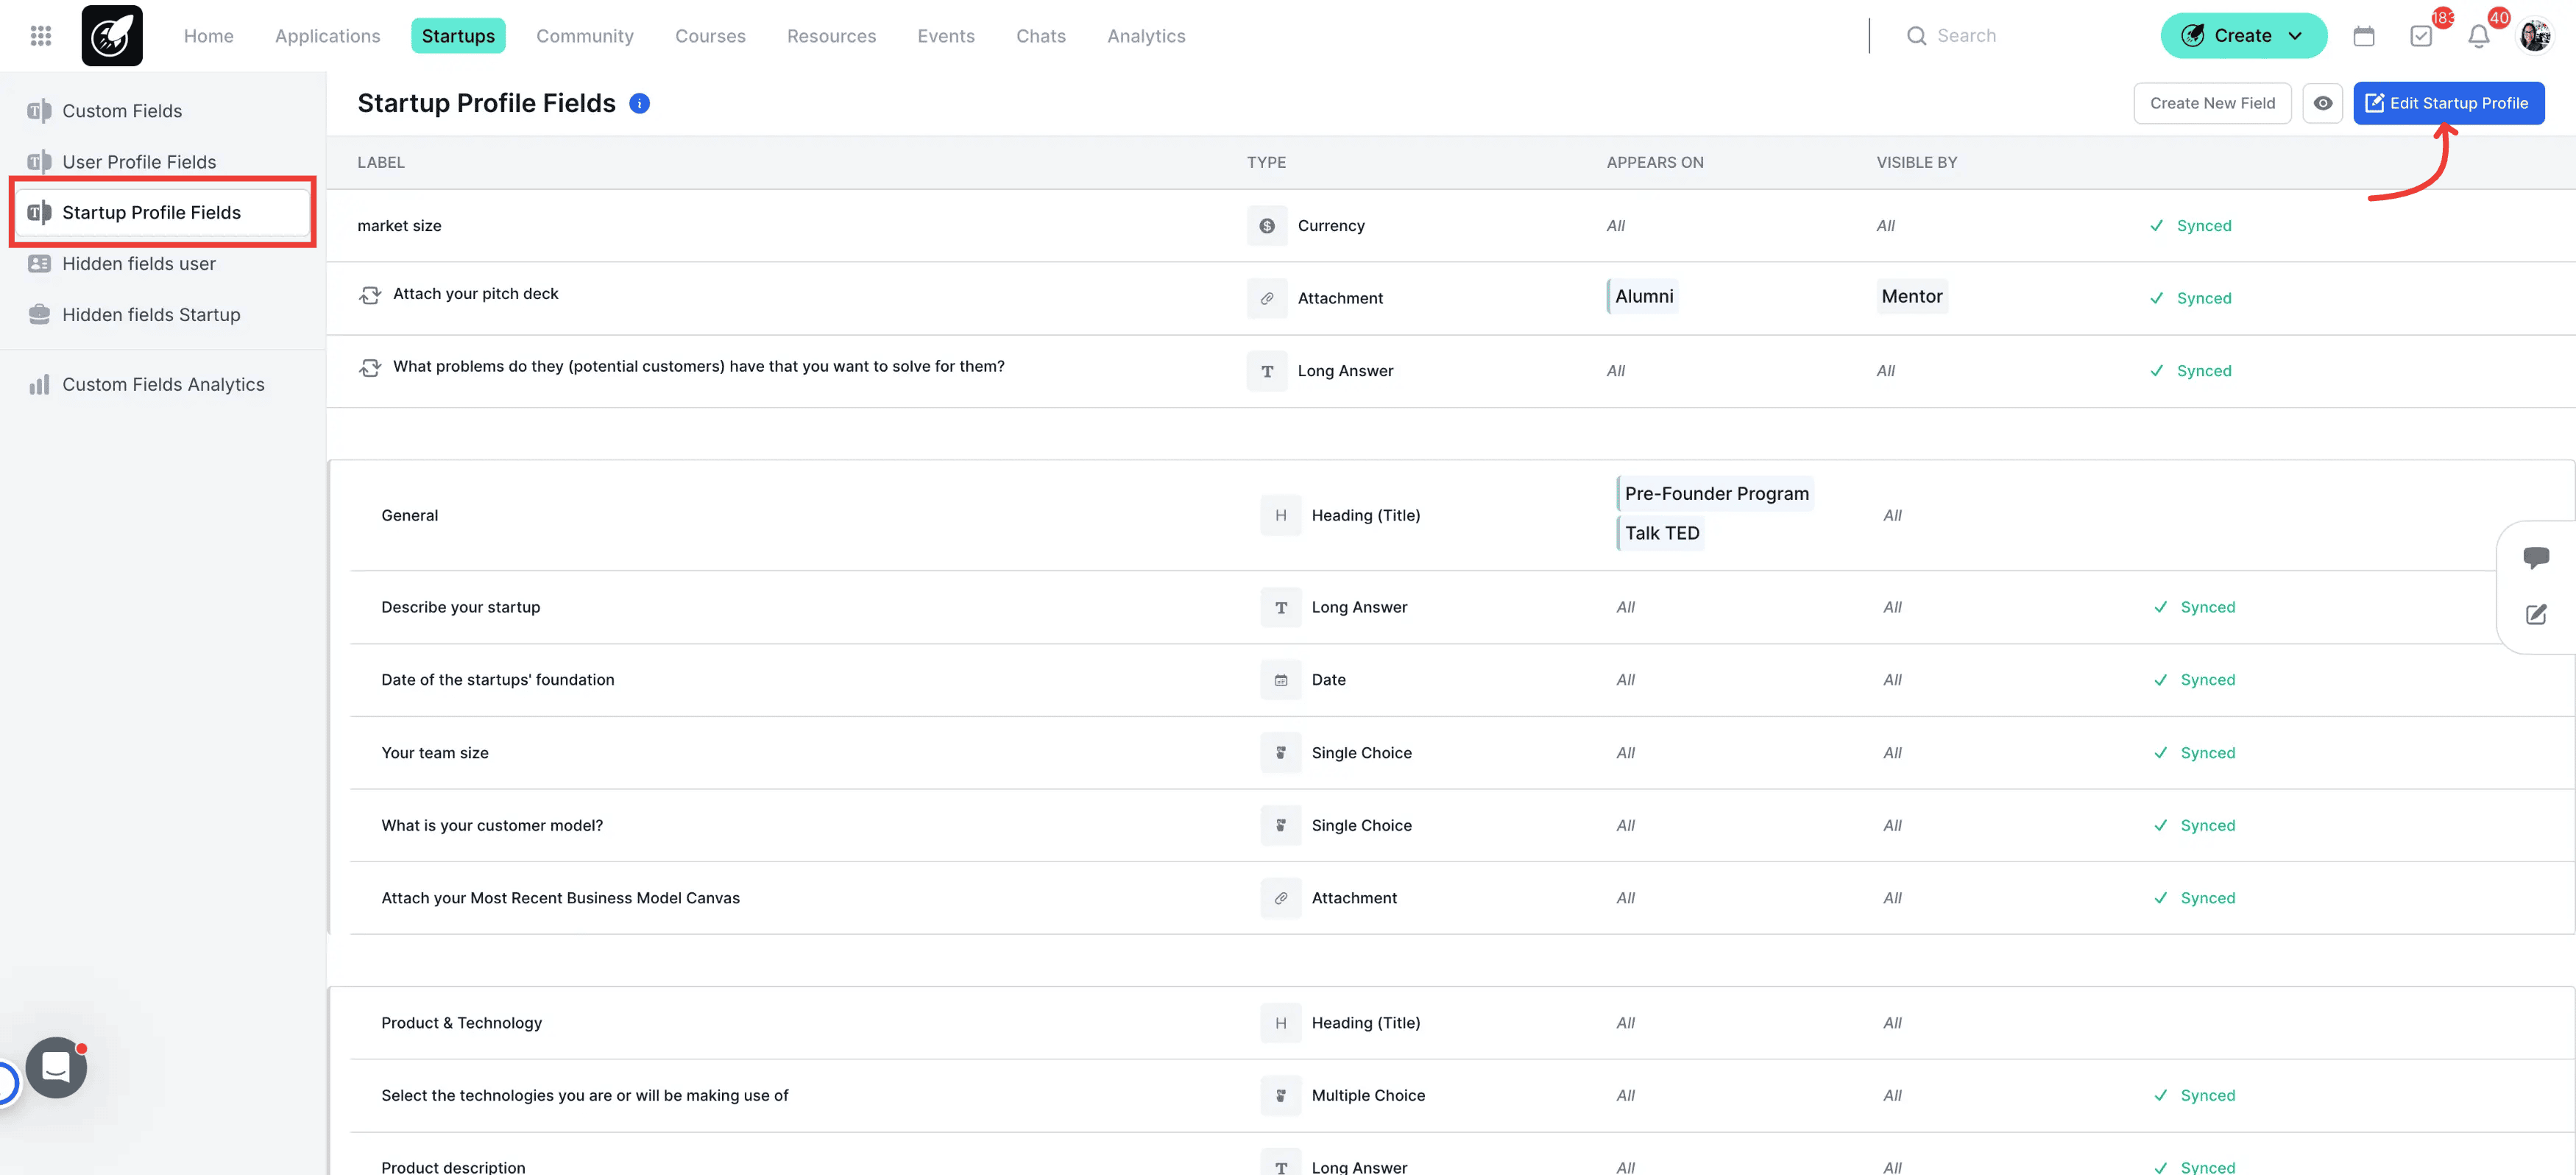
Click the Menu icon on the top left of the page, then select Custom Fields from the left sidebar, and click on the Startup Profile Fields tab. Click the Edit Startup Profile button in the top-right corner to open the template editor.
Step-by-Step
1. Open the Template Editor
Click the Menu icon in the top-left corner, select Custom Fields, click on the Startup Profile Fields tab, then click Edit Startup Profile in the top-right corner.
2. Add Fields to the Template
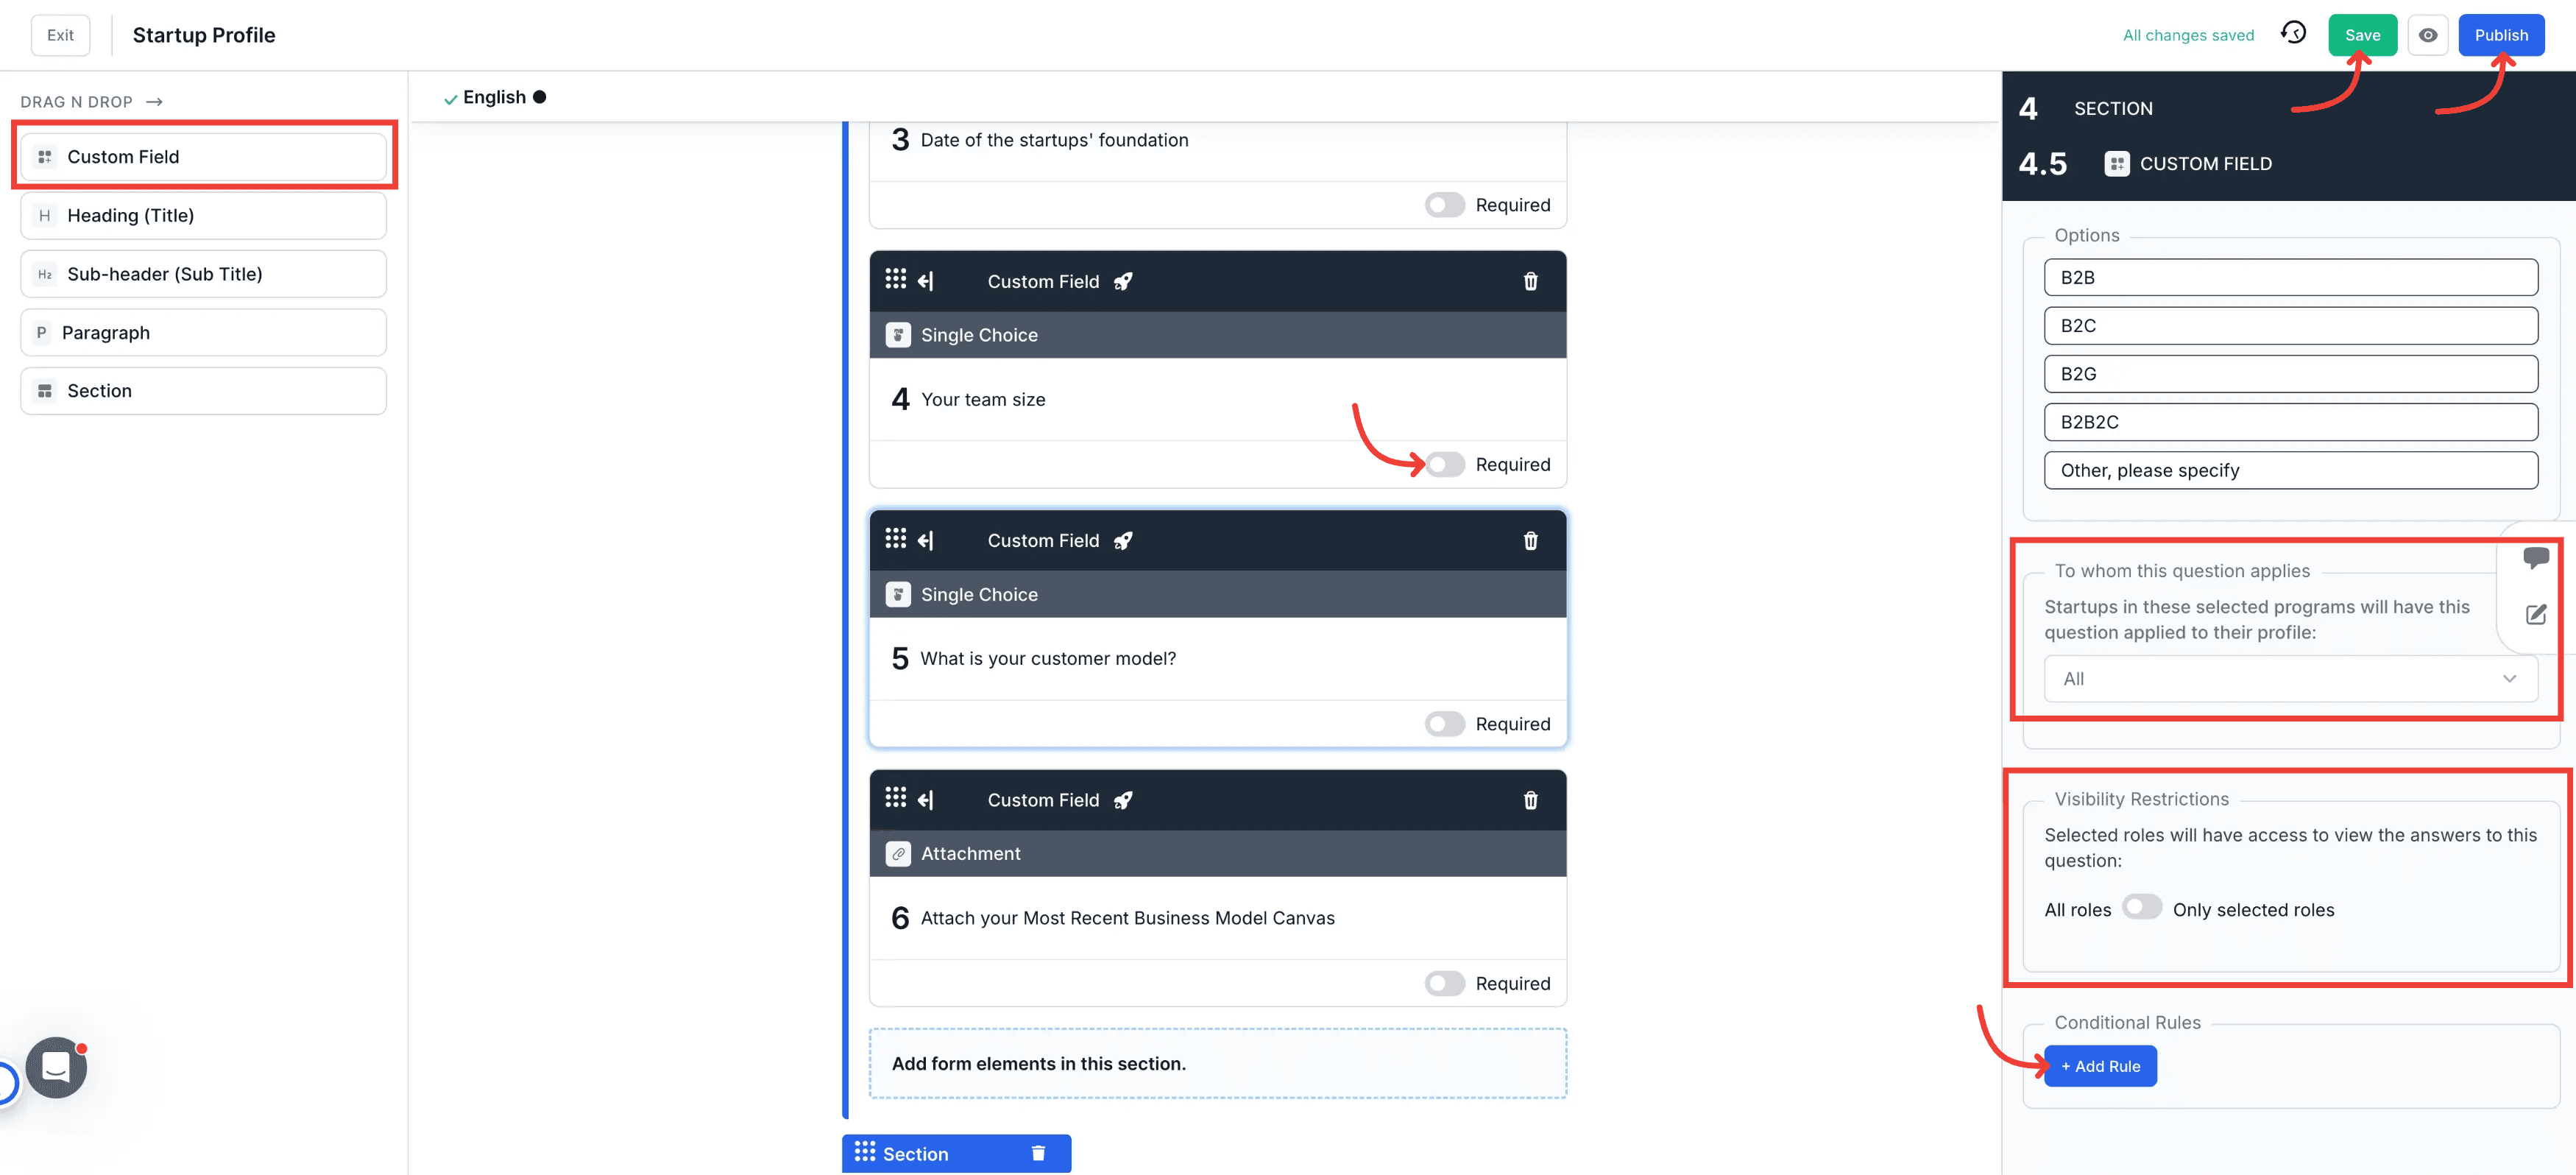
Drag and drop custom fields, sections, headings, or other components into the Startup Profile template layout.
3. Configure Field Settings
After adding a field to the template, configure its settings:
- Field Label and Description — add context to help startups understand what information is being requested.
- Required — toggle on to mark the field as required. When enabled, the system triggers a task and notification for startups to complete the missing information in their profile.
- To Whom This Question Applies — select which user roles this field should appear for, allowing you to show different fields to different types of users within the same template.
- Visibility Restrictions — control who can see this field in startup profiles based on user role, to protect internal or sensitive information.
- Conditional Rule — display a field only when a specific answer has been given in another field, keeping the profile form clean and contextually relevant.
4. Save and Publish the Template
Click Save to store your changes, then click Publish to make the updated template live for your program.
Best Practices
- Use sections and headings to keep the Startup Profile organized and easy to complete.
- Apply visibility restrictions to internal-only or mentor-only fields to protect sensitive data.
- Use structured field types (dropdowns, numbers, currency) to improve reporting accuracy.
- Group related questions using User Add Row for repeatable data such as goals or milestones.
- Avoid making too many fields required — this reduces friction for startups completing their profiles.