Introduction to One-on-One Events
One-on-One Events allow users to book individual sessions by automatically matching host availability with attendee needs. Ideal for coaching, mentoring, or office hours, they streamline scheduling, eliminate back-and-forth emails, and ensure participants can access support at the right time.
Where to Find One-on-One Events
You can initiate an event from almost any screen by using the global Create button in the top navigation bar, or by navigating to the Events page.
Step-by-Step
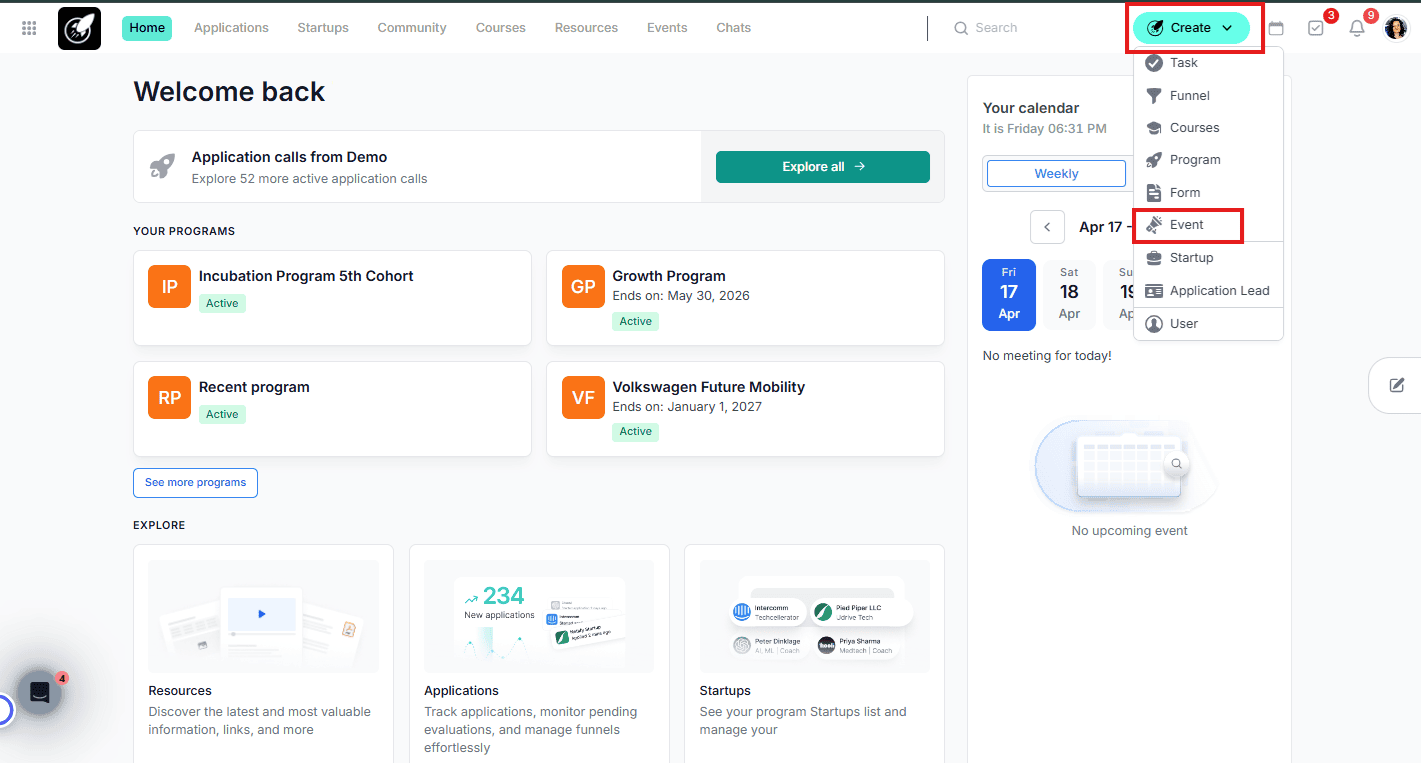
Initiate Event Creation Click on the Create button in the top navigation bar and select Event from the dropdown menu.
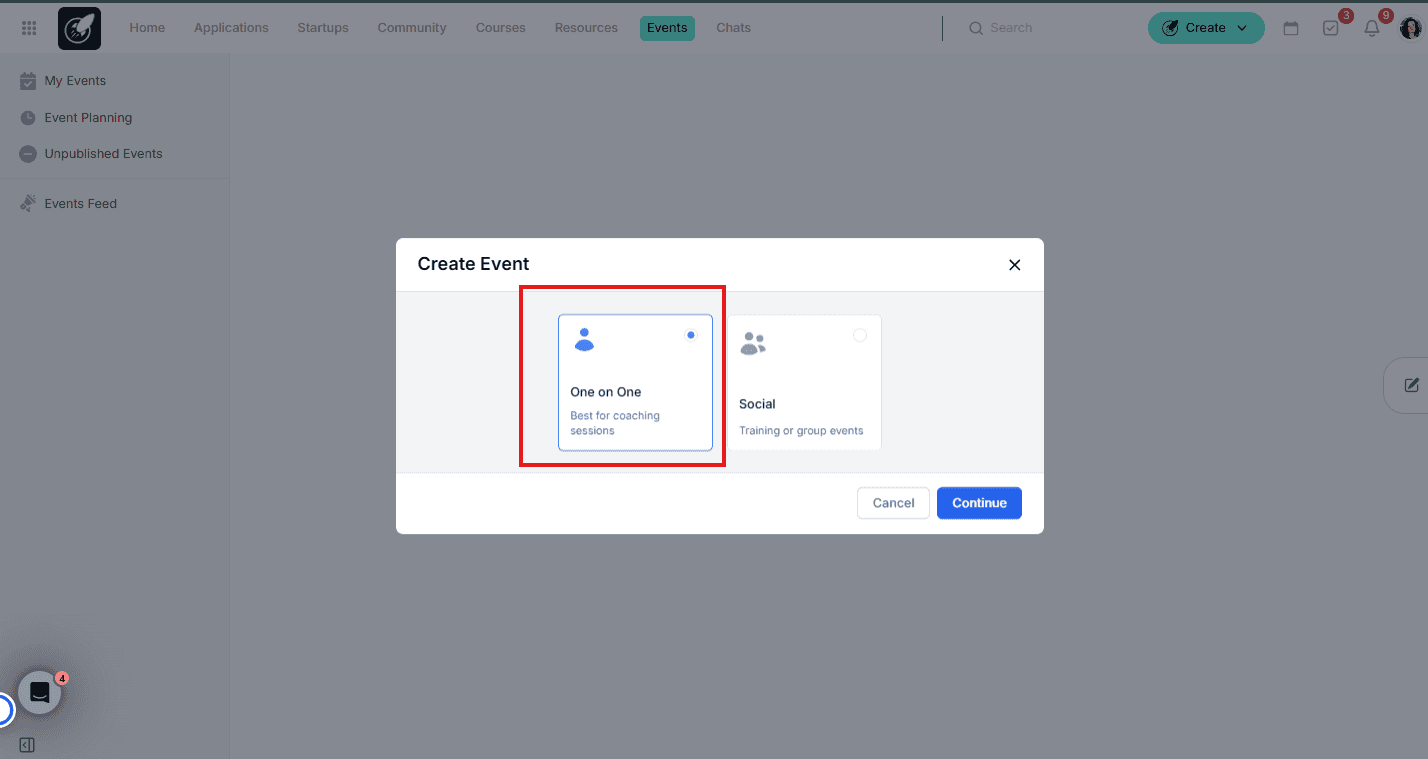
Select Event Category From the event type selection screen, choose the One-on-One option.
- Set Hosts and availabilities
- Select the user who will be conducting the sessions. You can search for specific coaches or mentors within your organization.
- Select the Duration.
- Select Increment for meeting start times (Optimize for max meetings or Set manual increment).
- Selected period.
- Edit availabilities and hit on Save and Next

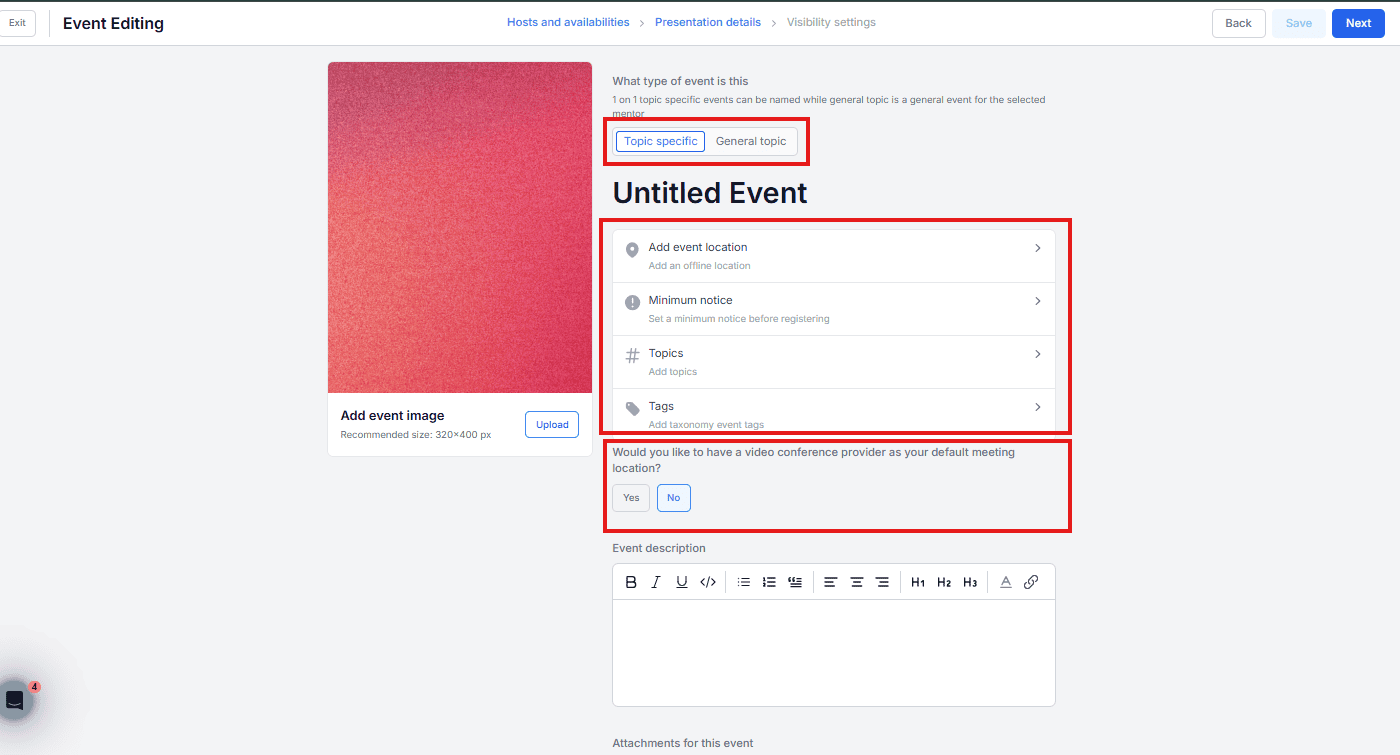
- Presentation details
- Select whether the event is General (where the host is the main attraction) or Topic Specific (where the subject matter takes center stage).
- Add event location (offline), or, if select your or no if you would like to have a video conference provider as your default meeting location. If nothing is selected, then it takes what is set in the coaching preferences from the host.
- Add minimum notice period before registering.
- Add Topics (Evaluation Criteria from Taxonomy).
- Add Tags.
- Add event Image.
- Add event description and attachments and hit on Next.
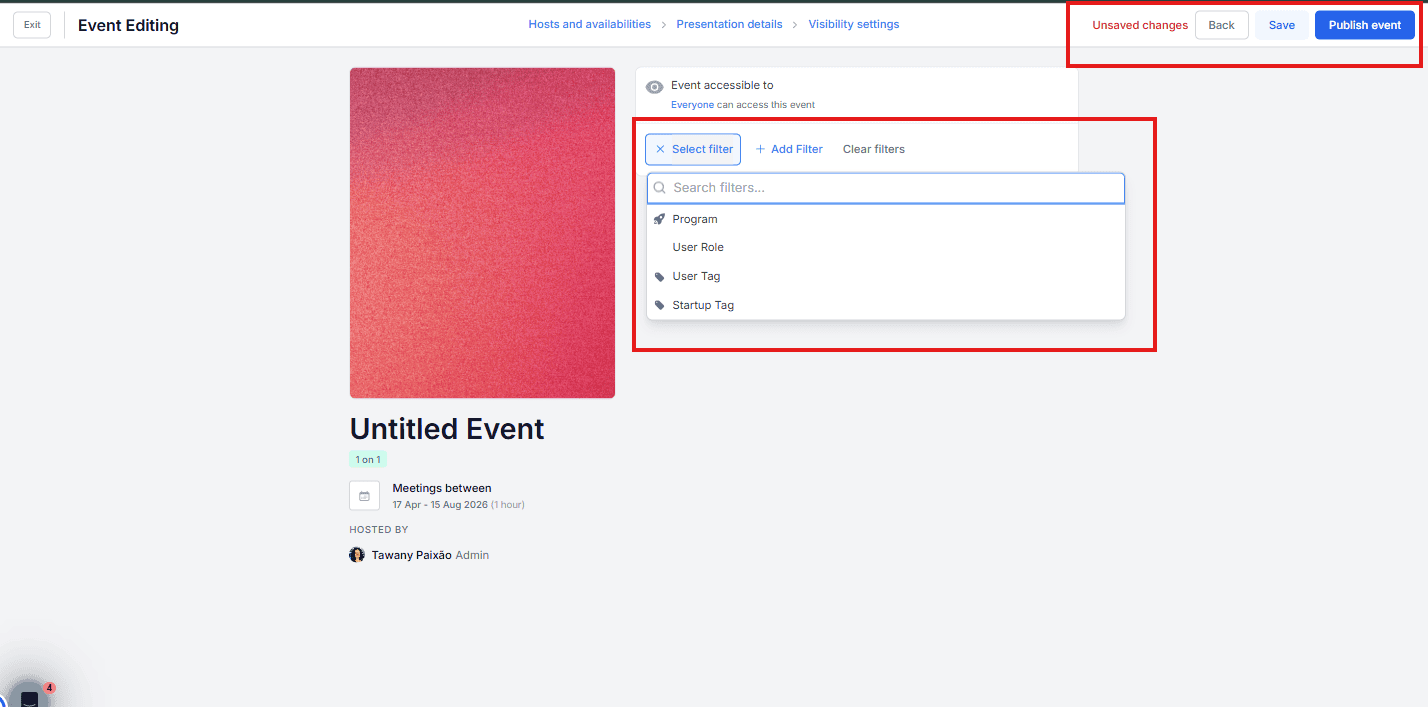
- Visibility settings
- Add filters (by Program, User Role, User Tag or Startup tag) to define who will be able to see this event.
- If you do not hit on Publish Event Button, it will be saved as draft.
- When you hit on Publish Event, the automated emails and notifications are triggered to all the users according to the visibillity settings.
Notes:
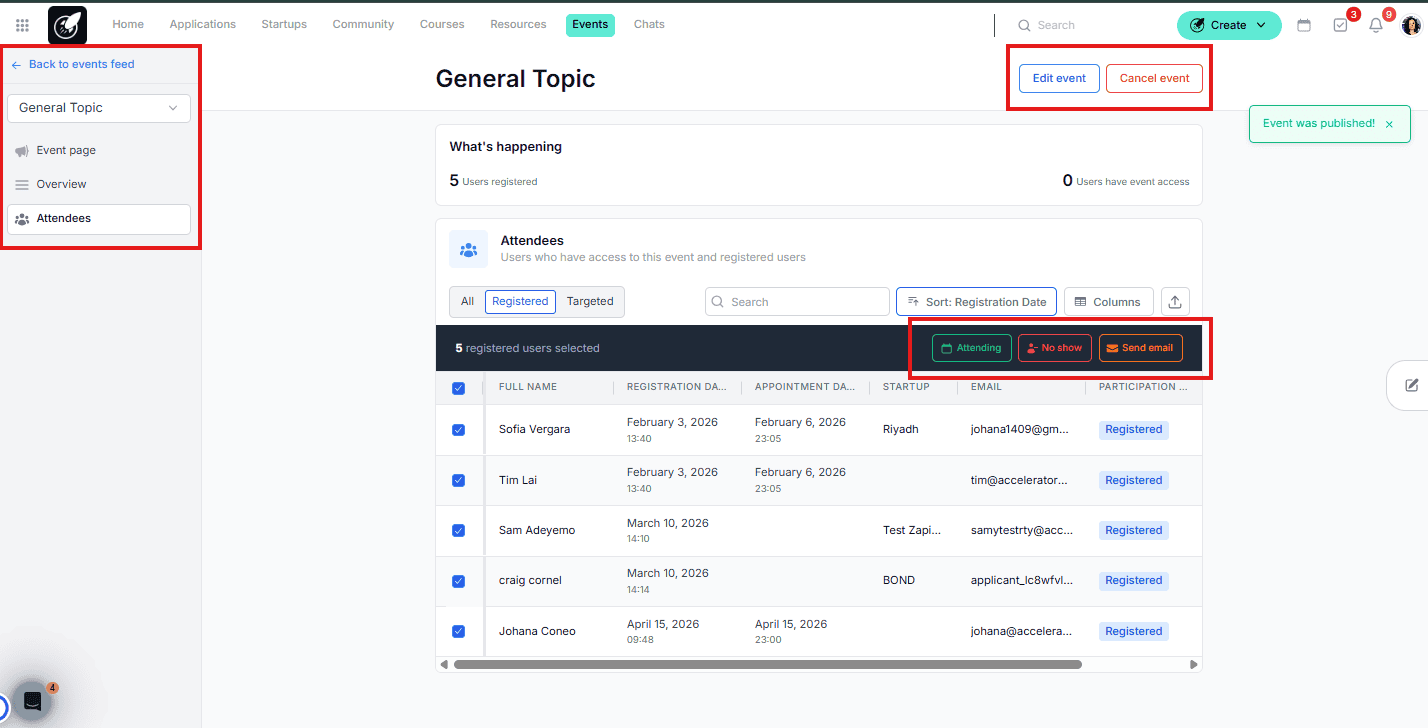
- After the Event is Published, you are able to see the events page, with the details, the Overview (from where you can send emails) and the Attendees page.
- From the Attendees table, if you click on the check box or in the 3 dots beside each users name, you can update their status (to attending, No show, or Send and email).
- After published, you can not put it in draft again or delete it. But you can cancel it. When you Cancel an event, Following things will happen: An email will be sent to registered users and the event host(s) letting them know the event was cancelled A notification will be sent to registered users and the event host(s) letting them know the event was cancelled For registered users and host(s) that have their calendar integrated, we will remove the event from their calendar
Tips & Best Practices
- Buffer Times: Encourage hosts to set specifif slots in their Availability Settings to avoid back-to-back sessions without a break.
- Host Outreach: If a host runs out of slots, Admins can manually add more availability to the event on their behalf.
- Automated Nudges: Use the built-in email tool to notify a targeted audience once the event is published to drive immediate bookings.
- For One-on-One Events, bookings are self-service, meaning users (e.g., founders or mentees) must select and book their own time slots based on the host’s availability. At this time, admins are not able to register or schedule users on their behalf within this event type. If you need more control over scheduling, we recommend using the Create button → Meeting option instead, which allows admins to manually set up meetings and manage participants directly.