


Introduction to the Community Section
The Community section is your hub for discovering and connecting with the people and startups in your ecosystem. What you can see and do depends on your user role and the visibility permissions set by your program administrators.
Access to profiles and content within the Community section depends on the visibility permissions configured for each user role. To learn more about how to control what each role can see, refer to How to Manage Community Access Settings.
Where to Find the Community Section
Click on Community in the top navigation menu. Access to this section and its features is subject to the permissions configured for your user role.
The left sidebar includes several areas that may vary depending on your role and permissions:
- News Feed — a shared space where everyone can post, comment on, and react to updates from the community.
- Community — the main directory of people and startups in your ecosystem (covered in detail below).
- Profile Analytics — view analytics based on custom fields from user and startup profiles.
- User Program Assignation — assign users to programs.
- Mentors Management — manage mentor assignments.
- Users Management — manage user accounts and roles.
Step-by-Step
1. Choose Between People and Startups
Inside the Community tab, select which view you want to access:
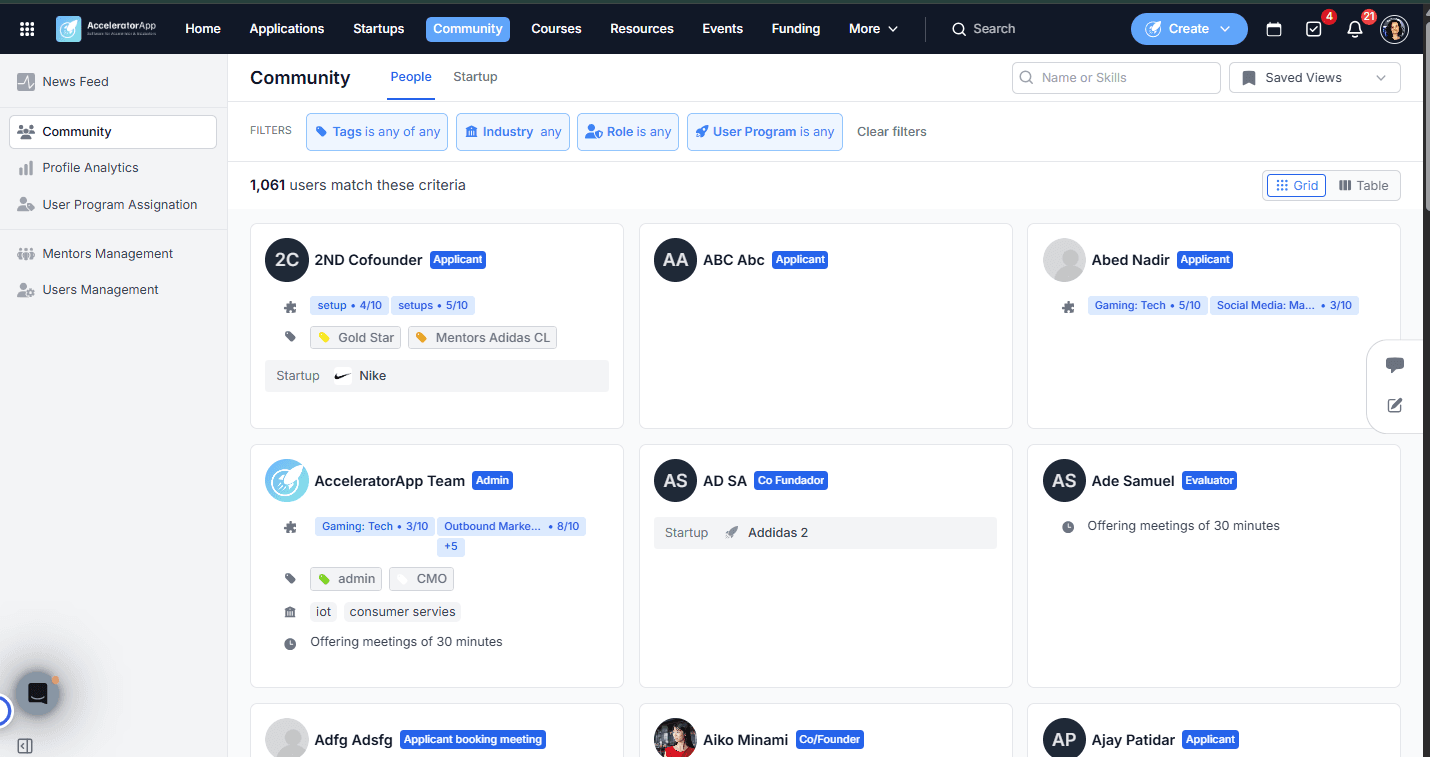
- People — displays individual users in the platform according to your role's visibility permissions.
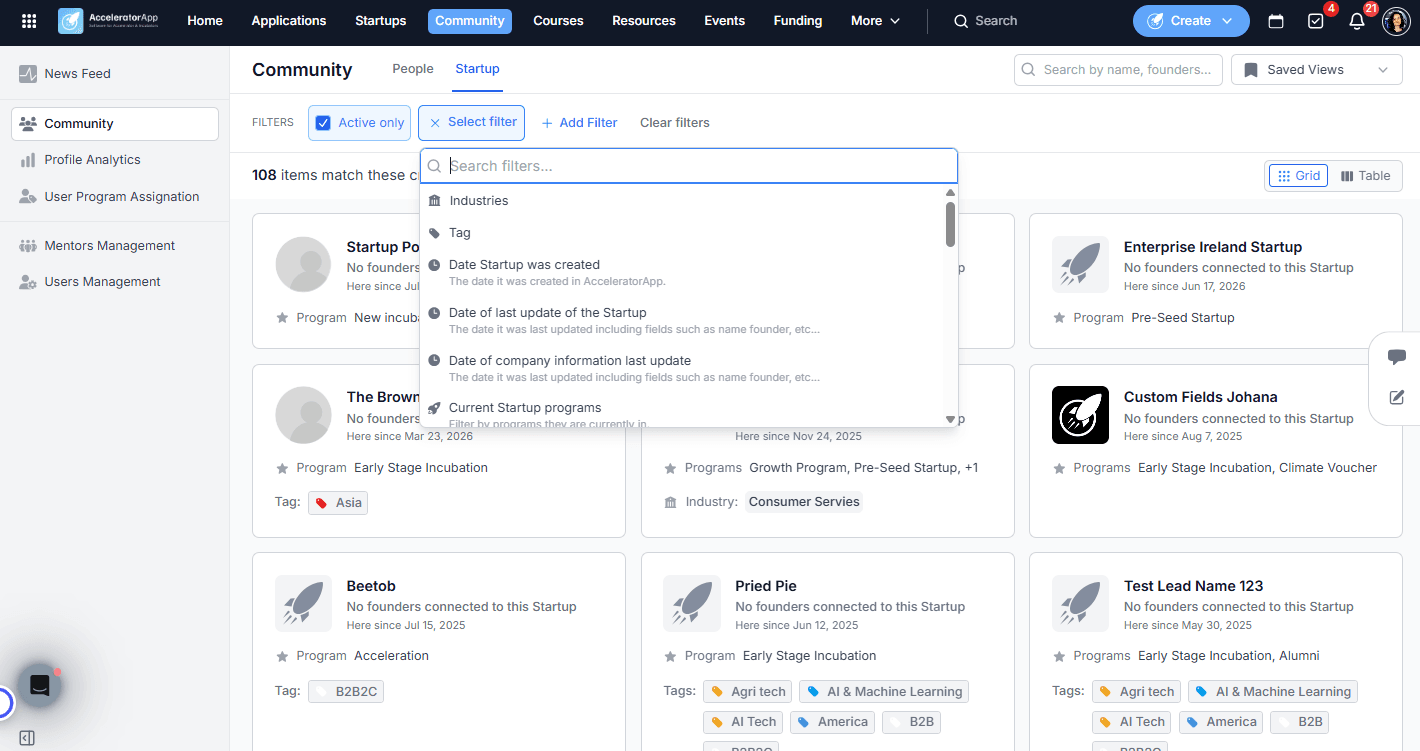
- Startups — displays a view organized by startup rather than by individual user.
2. Browse and Filter People
In the People tab you can:
- Search by name or skills using the search bar.
- Filter by tags, industry, role, or user program.
- Switch between Grid view and Table view. In Table view, you can select which columns are visible.
- Save your filter and column configuration as a Saved View for quick access later.
In Grid view, hover over a user card to reveal the option to visit their public profile. Note: despite the name, public profiles are not accessible to people outside AcceleratorApp, they can only be viewed by other logged-in users within your community.
3. Browse and Filter Startups
In the Startups tab you can:
- Search by name or skills using the search bar.
- Toggle Active Only to hide inactive startups from the view.
- Click Add Filter to apply additional filters. Depending on your plan, you may have access to basic filters (industry, tags, programs) or advanced filters including custom fields.
- Switch between Grid view and Table view. In Table view, you can select which columns are visible.
- Save your filter and column configuration as a Saved View for quick access later.
In Grid view, hover over a startup card to reveal two options:
- Public Profile — view the startup's public-facing profile page. This page is visible only to other users inside your AcceleratorApp community, it is not meant to be shared with or accessed by external users without an account.
- Startup File — access the startup's full internal page, including activities, coaching sessions, metrics, and more.
Best Practices
- Use saved views to quickly return to your most-used filters. Whether you browse by program, industry, or role, saving a view means you don't have to reconfigure filters every time.
- Use Table view for side-by-side comparison. When you need to compare specific fields across multiple users or startups, Table view with custom columns is more efficient than Grid.
- Use skills search to find the right people. The search bar supports skill-based filtering — useful for finding mentors or community members with specific expertise.
- Check your visibility settings if you cannot find someone. If a user or startup is not showing up, it may be due to the visibility permissions set for your role — contact your program administrator if needed.
Additional Resources
- How to Manage Community Access Settings
- How to Assign Users to Programs
- How to Manage Users in AcceleratorApp
- How to Create and Use Saved Views in the Startup Portfolio