Introduction to Changing Application Funnels for your Applications
Changing the application funnel is a common administrative task used to "promote" a startup to a new program or redirect an applicant to a more suitable track.
Movement = Rejection: Moving an application automatically sets its status to "Rejected" in the current funnel to maintain clean data records.
Form Parity: If the new funnel uses the exact same form, the data carries over. If not, the applicant will need to fill out the new funnel's intake form.
Where to Change the Application Funnel of my Applications
You can move applications using two methods depending on your needs:
- Individual: Directly from the specific Application File.
- Bulk: From the Application Overview (ideal for moving entire cohorts or groups).

Step by Step Action
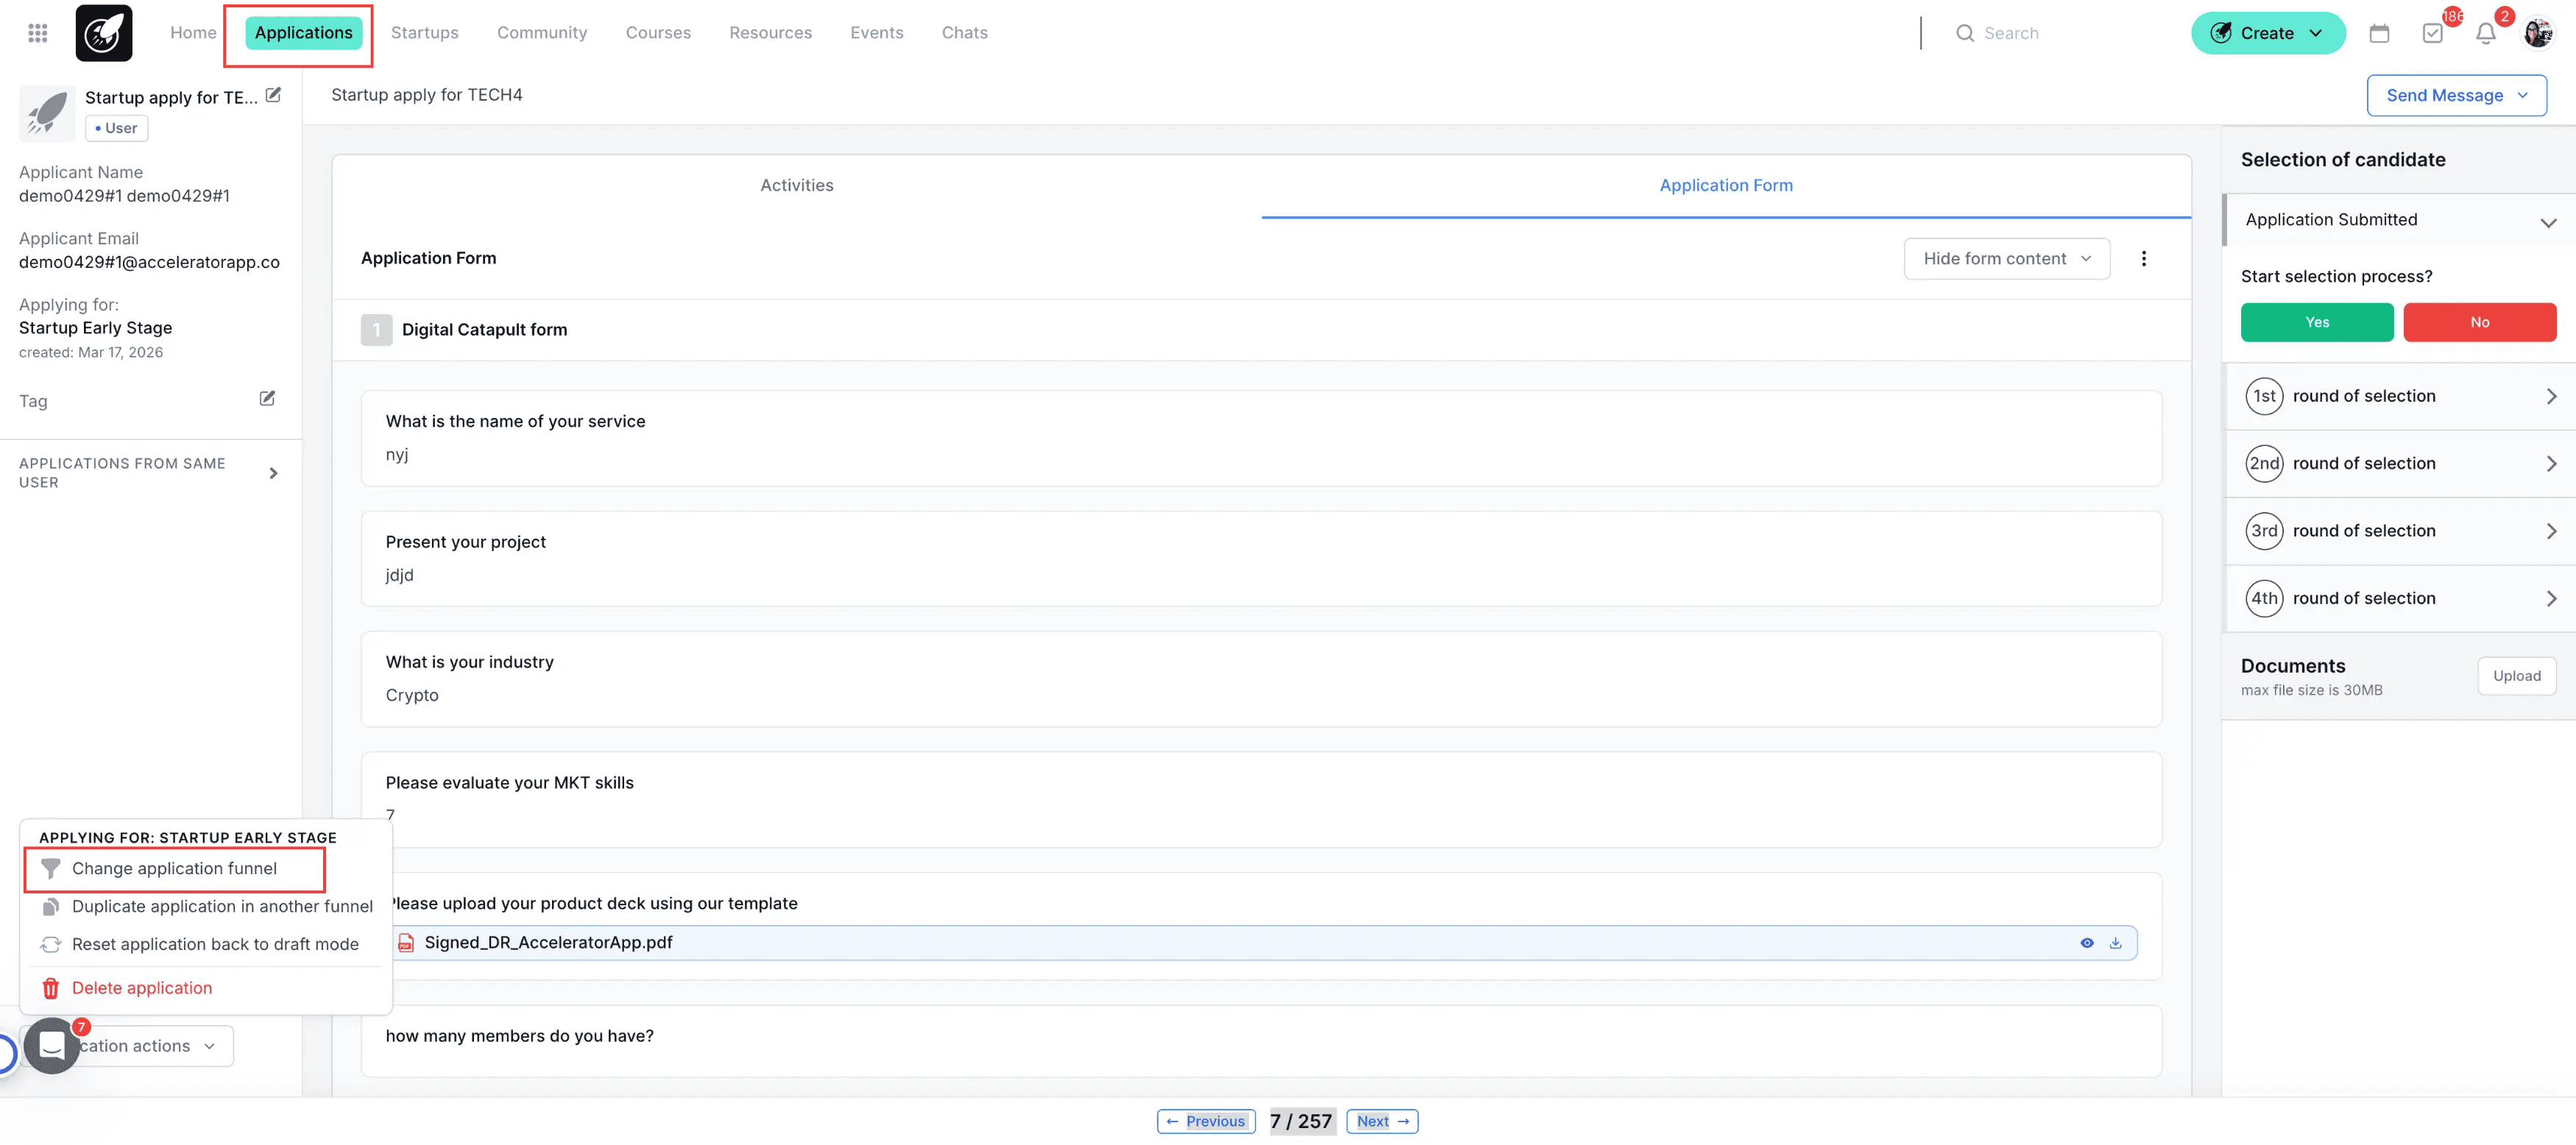
From the Application File: Use this method when you need to move a single startup after a deep-dive review.
- Open the Application: Navigate to the Application Overview and click on the Application Name.
2.Access Actions: Once the file is open, locate and click the button labeled "Application Actions" in the lower left corner.
3.Select Change Application Funnel: From the dropdown menu, select "Change Application Funnel."
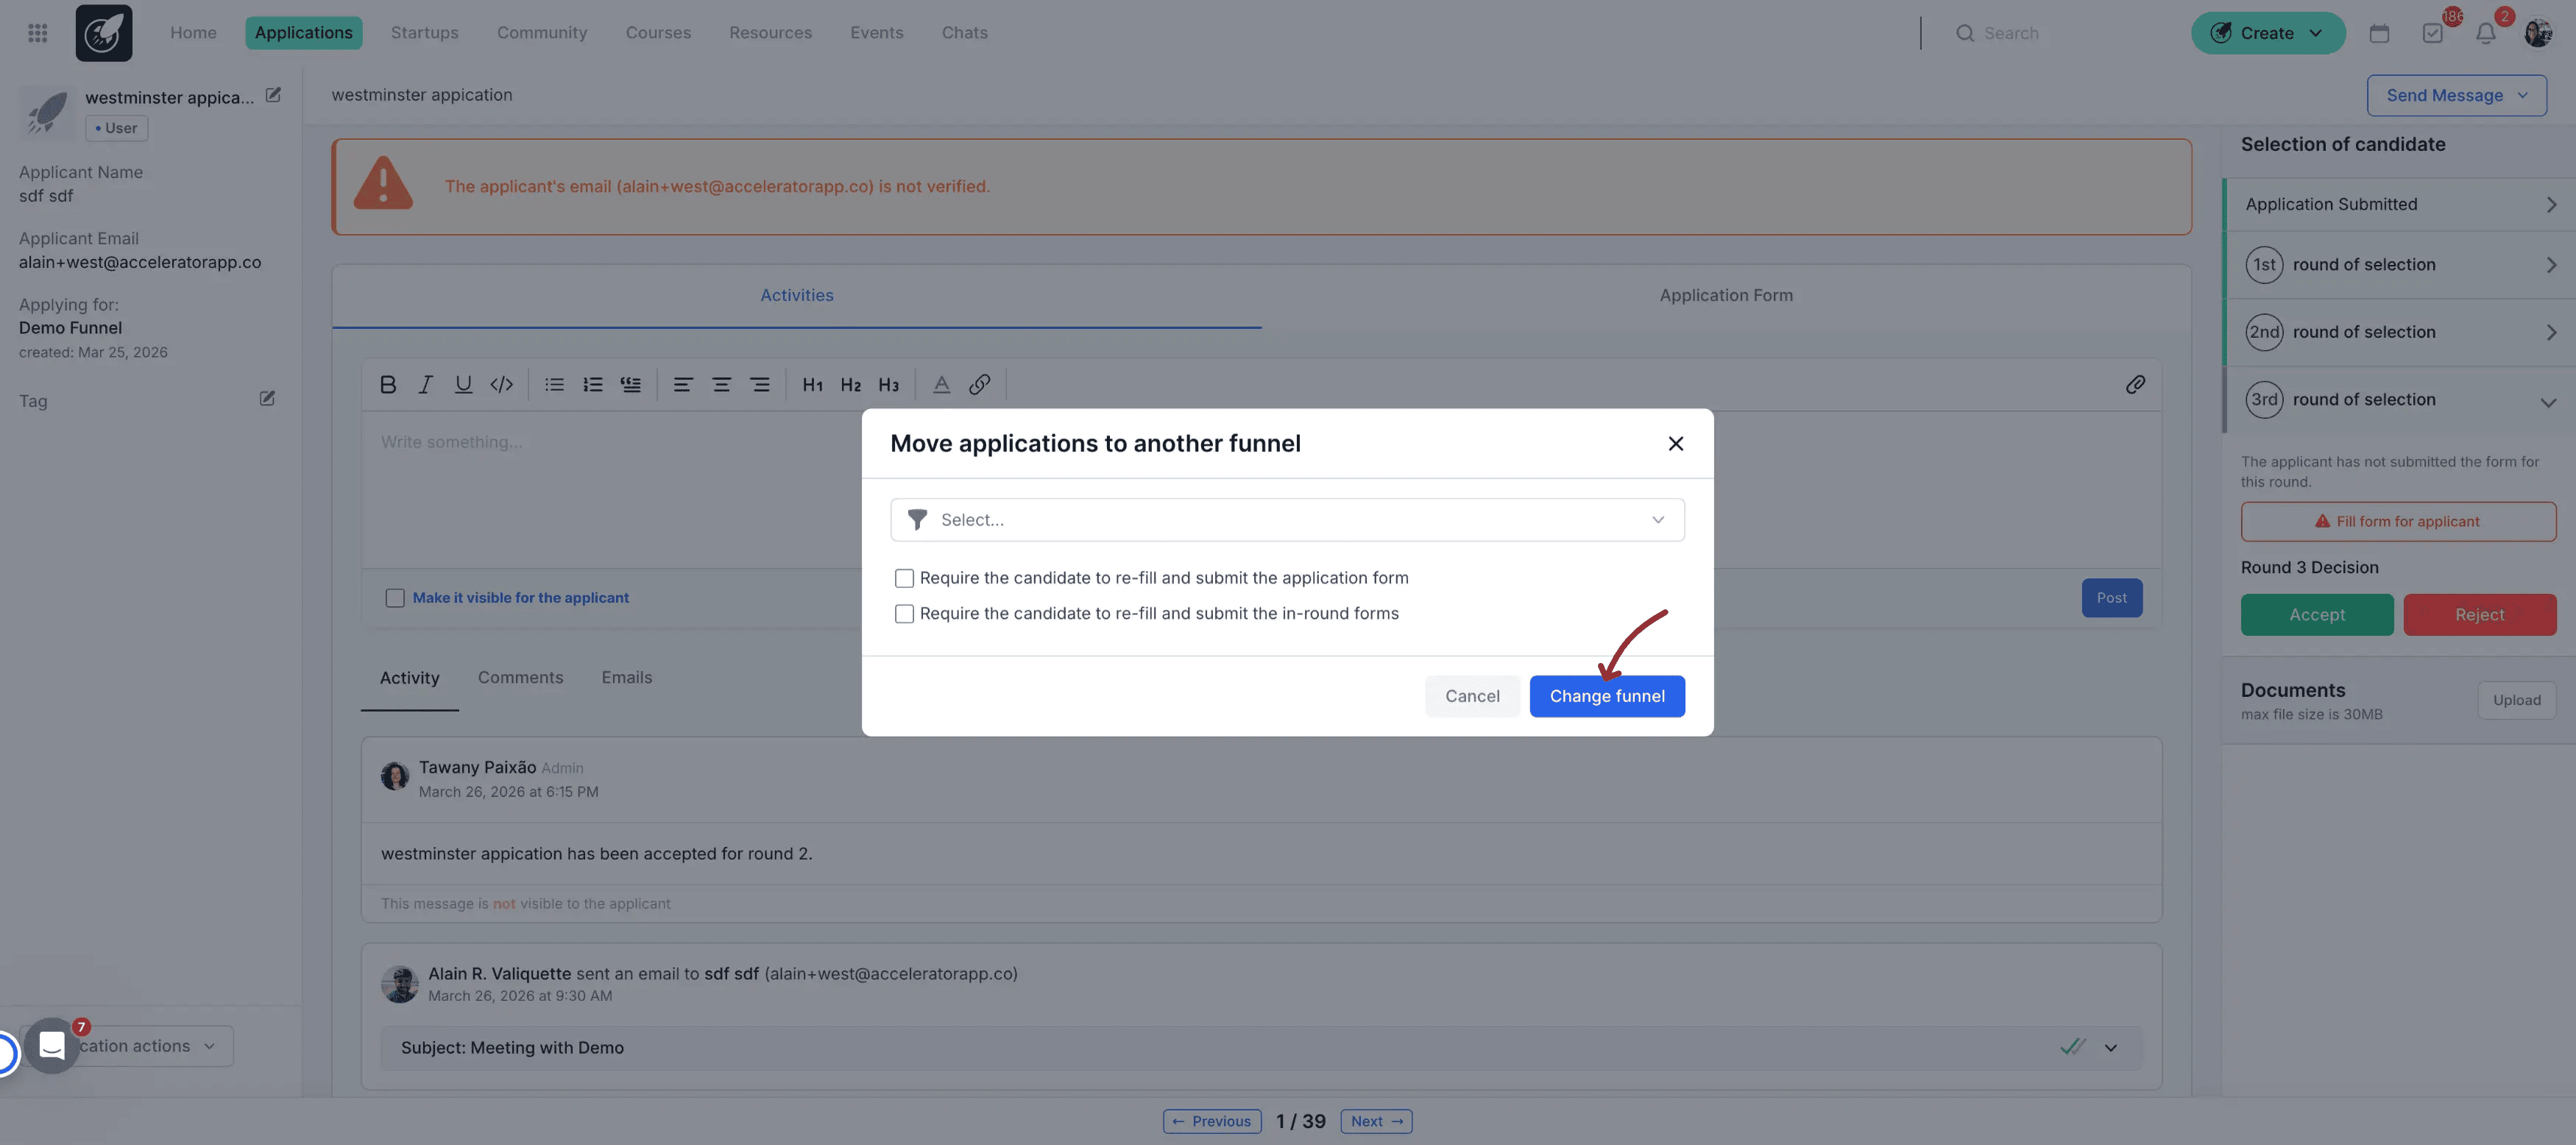
4.Choose Destination: A modal will appear where you must select:
The Target Funnel from the dropdown list.
Decide on Data: Choose whether you want to request the applicants to fill out the application forms in the new funnel or if you want to use the data already provided.
Reminder: Data transfer only works if both funnels use the same form.
5.Confirm: Click "Duplicate." The system creates a new entry in the target funnel while the original will be marked as rejected.
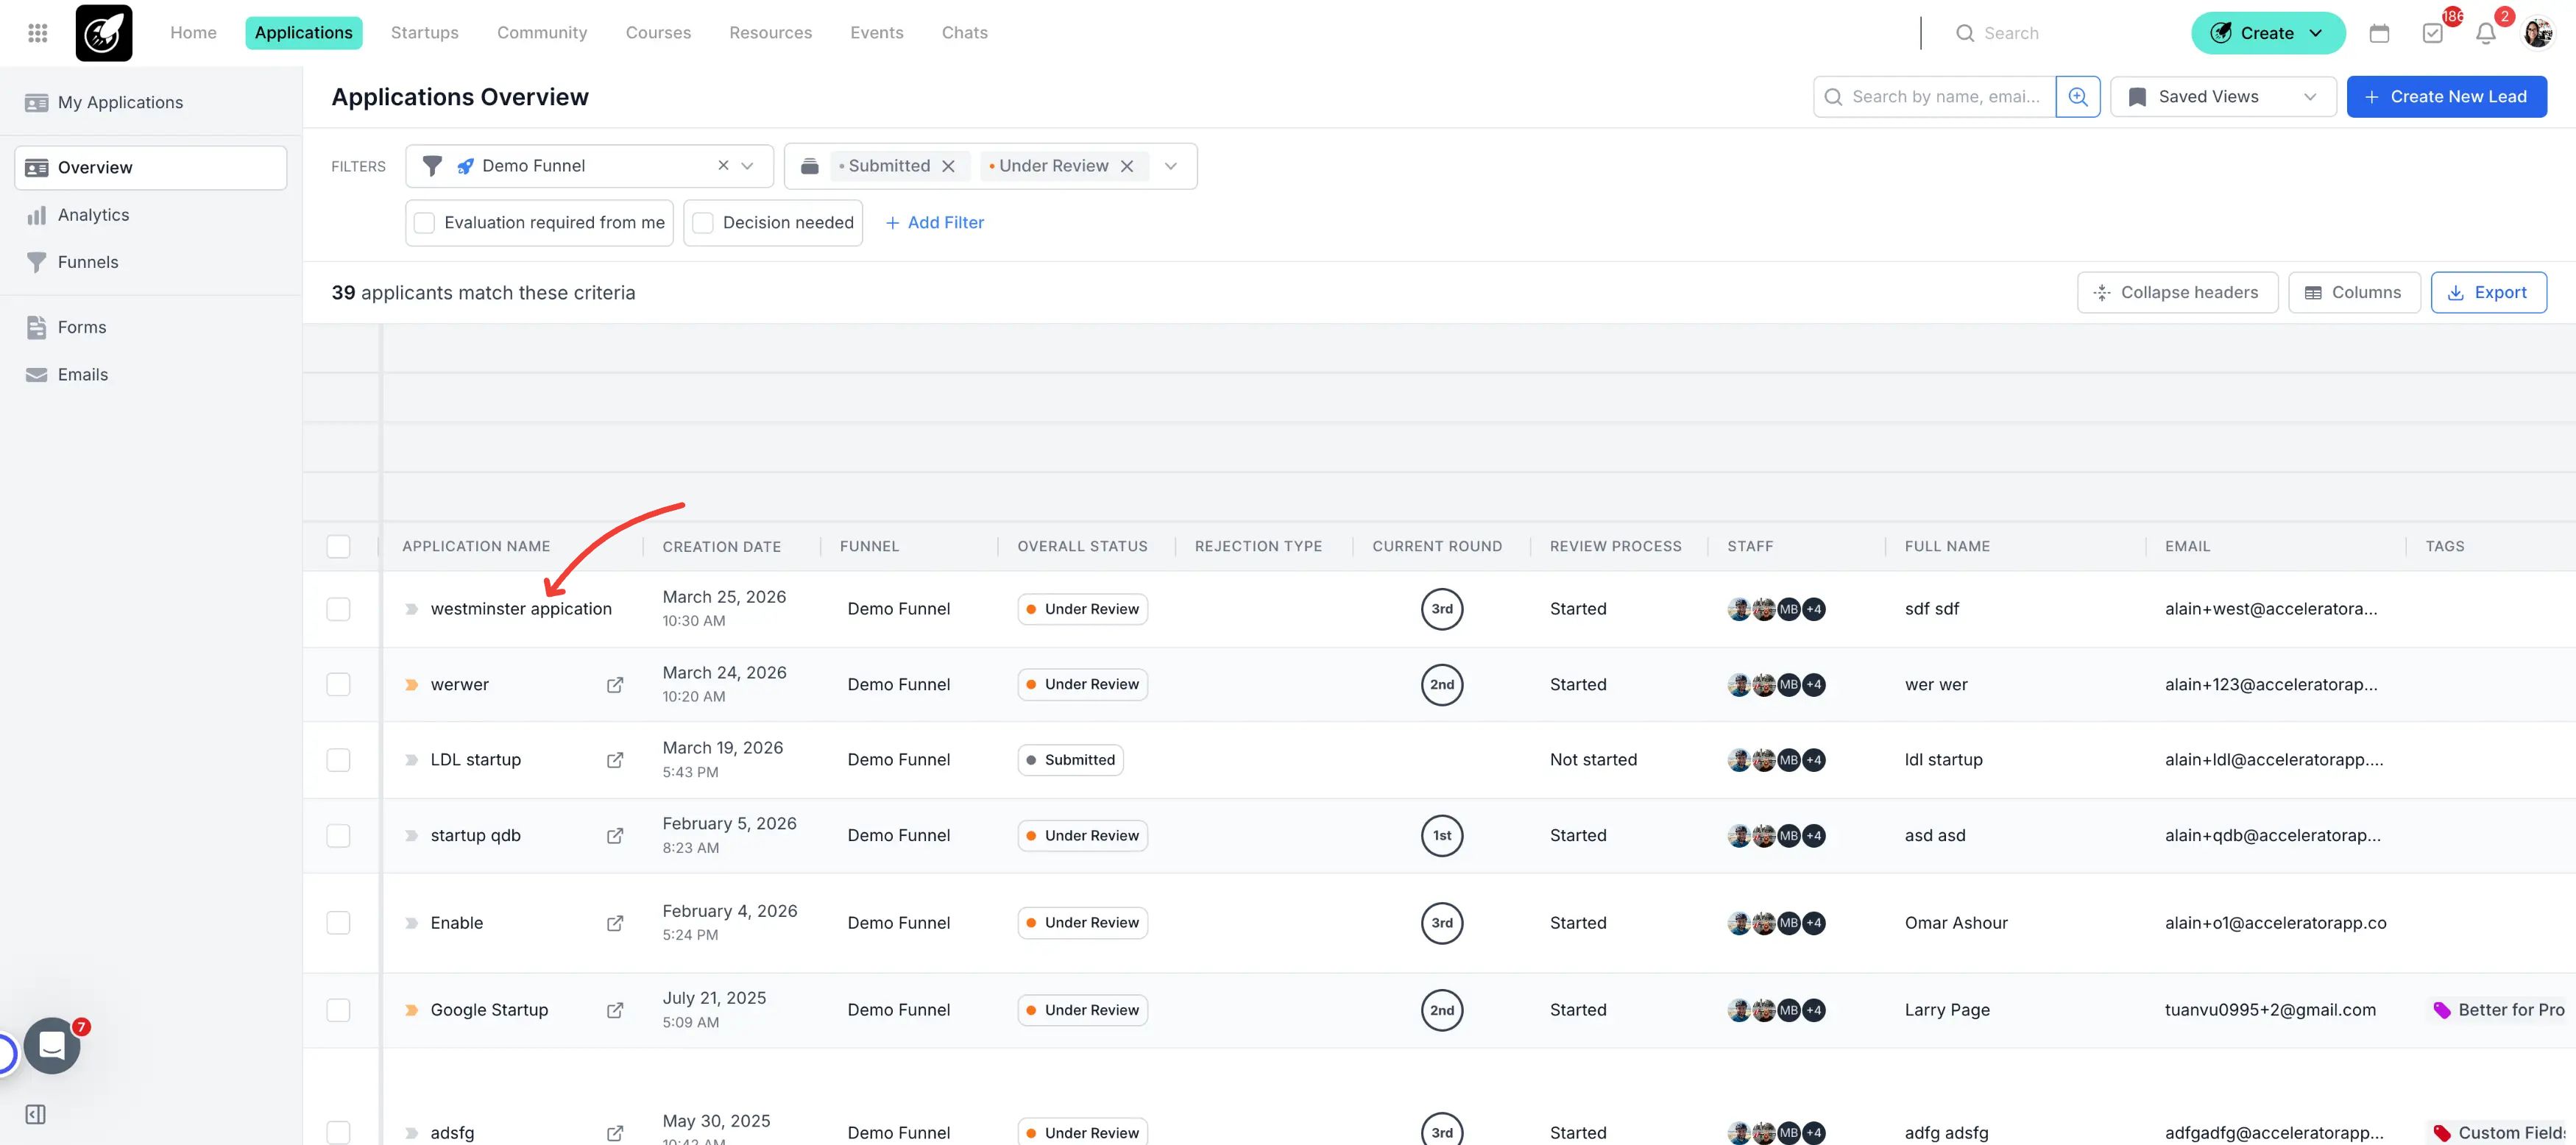
From the Application Overview (Bulk Action): Use this method to move multiple startups at once (e.g., all startups that passed the "Selection" stage).
Filter your View: Open the Application Overview and apply the funnel filter to find the specific group you want to move.
Select Applications: Select the applications you wish to change the application funnel by clicking the checkboxes on the left side of the list.
Initiate Bulk Action: Select the bulk action titled "Change Application Funnel"
4.Choose Destination: A modal will appear where you must select:
The Target Funnel from the dropdown list.
Decide on Data: Choose to request a new form submission or use existing data.
Reminder: Data transfer only works if both funnels use the same form.
5.Confirm: Click "Change Application Funnel." The system will create the new entries in the target funnel and the originals will be marked as rejected.
Tips & Best Practices:
Check the "Rejected" List: If you can't find the original application after the move, remember it is now filed under "Rejected" in the old funnel.
Verify Redirection: Once moved, check the new funnel to ensure the applicant appears in the correct stage.