1. Introduction to Taxonomy
Taxonomy is the organizational backbone of your ecosystem. In AcceleratorApp, Tags are flexible, internal labels that allow you to categorize every entity—from applicants and startups to mentors and events—without affecting their functional status or funnel stage.
By using a tagging system, your team can create a "common language" across the platform. This makes it possible to filter complex data sets instantly, track specific themes (like "Sustainability" or "High Priority"), and manage diverse groups of users with surgical precision.
2. Where to Find
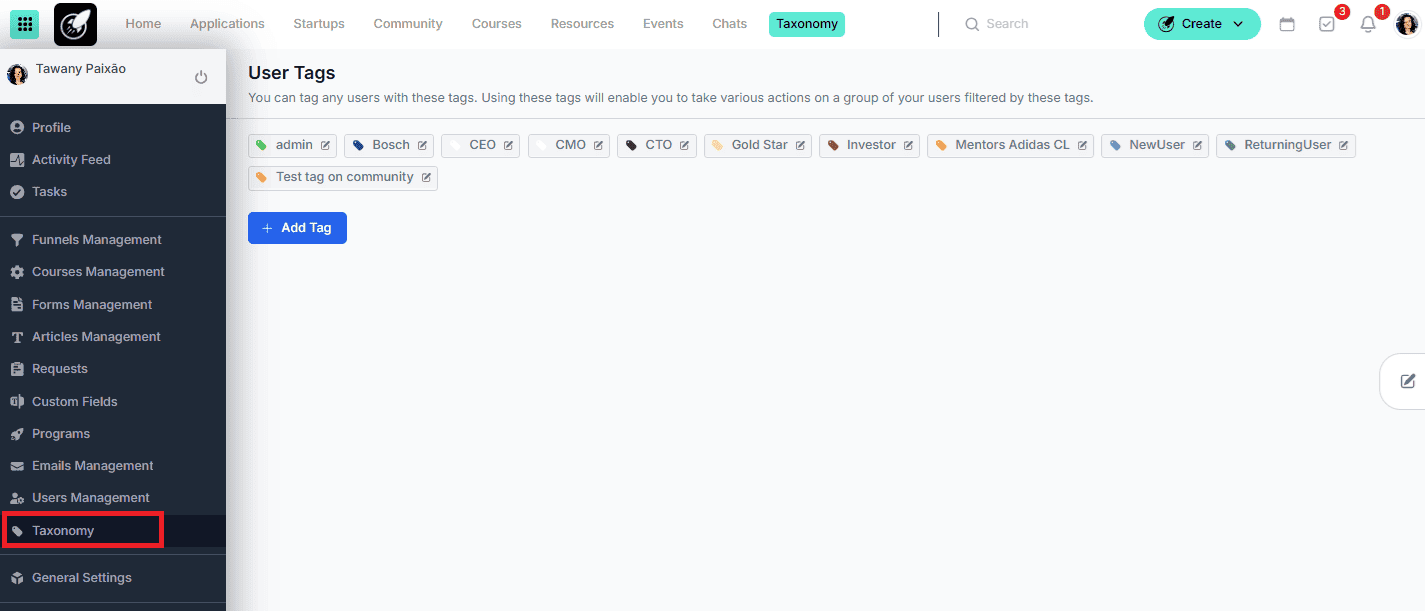
The management of your tagging system is centralized in one administrative hub: Taxonomy Management: Click the Menu Icon (top-left) > Taxonomy. The Taxonomy Menu: Once inside, you will see a sub-menu categorized by entity type:
- Application Tags: For the recruitment and intake phase.
- Startup Tags: For the active portfolio and alumni.
- Mentor Tags: For tracking expert skills and seniority.
- User Tags: For general community members or staff.
- Event Tags: For categorizing workshops, webinars, or demo days.
- Form Tags: For organizing your library of surveys and applications.
- Community Tags: For the internal social and networking space.
3. Step-by-Step
1. Defining Your Taxonomy
Before applying tags, an Admin must create them in the central library:
- Navigate to Taxonomy and select the specific category (e.g., Mentor Tags).
- Click Add Tag.
- Enter the name (e.g., Fintech Expert, Alumni 2024, Investor Ready).
- Save. The tag is now globally available for that specific module.
2. Assigning Tags to Entities
- While the creation is centralized, the assignment happens where the work is done:
- For Applications/Startups: Open the specific File/Profile. Locate the Tags field in the left or right side panel, click, and select from your list.
- For Mentors/Users: Go to the user’s profile or settings and use the dropdown tag selector.
- For Events: When creating or editing an event, use the Taxonomy/Tags section to categorize the session.
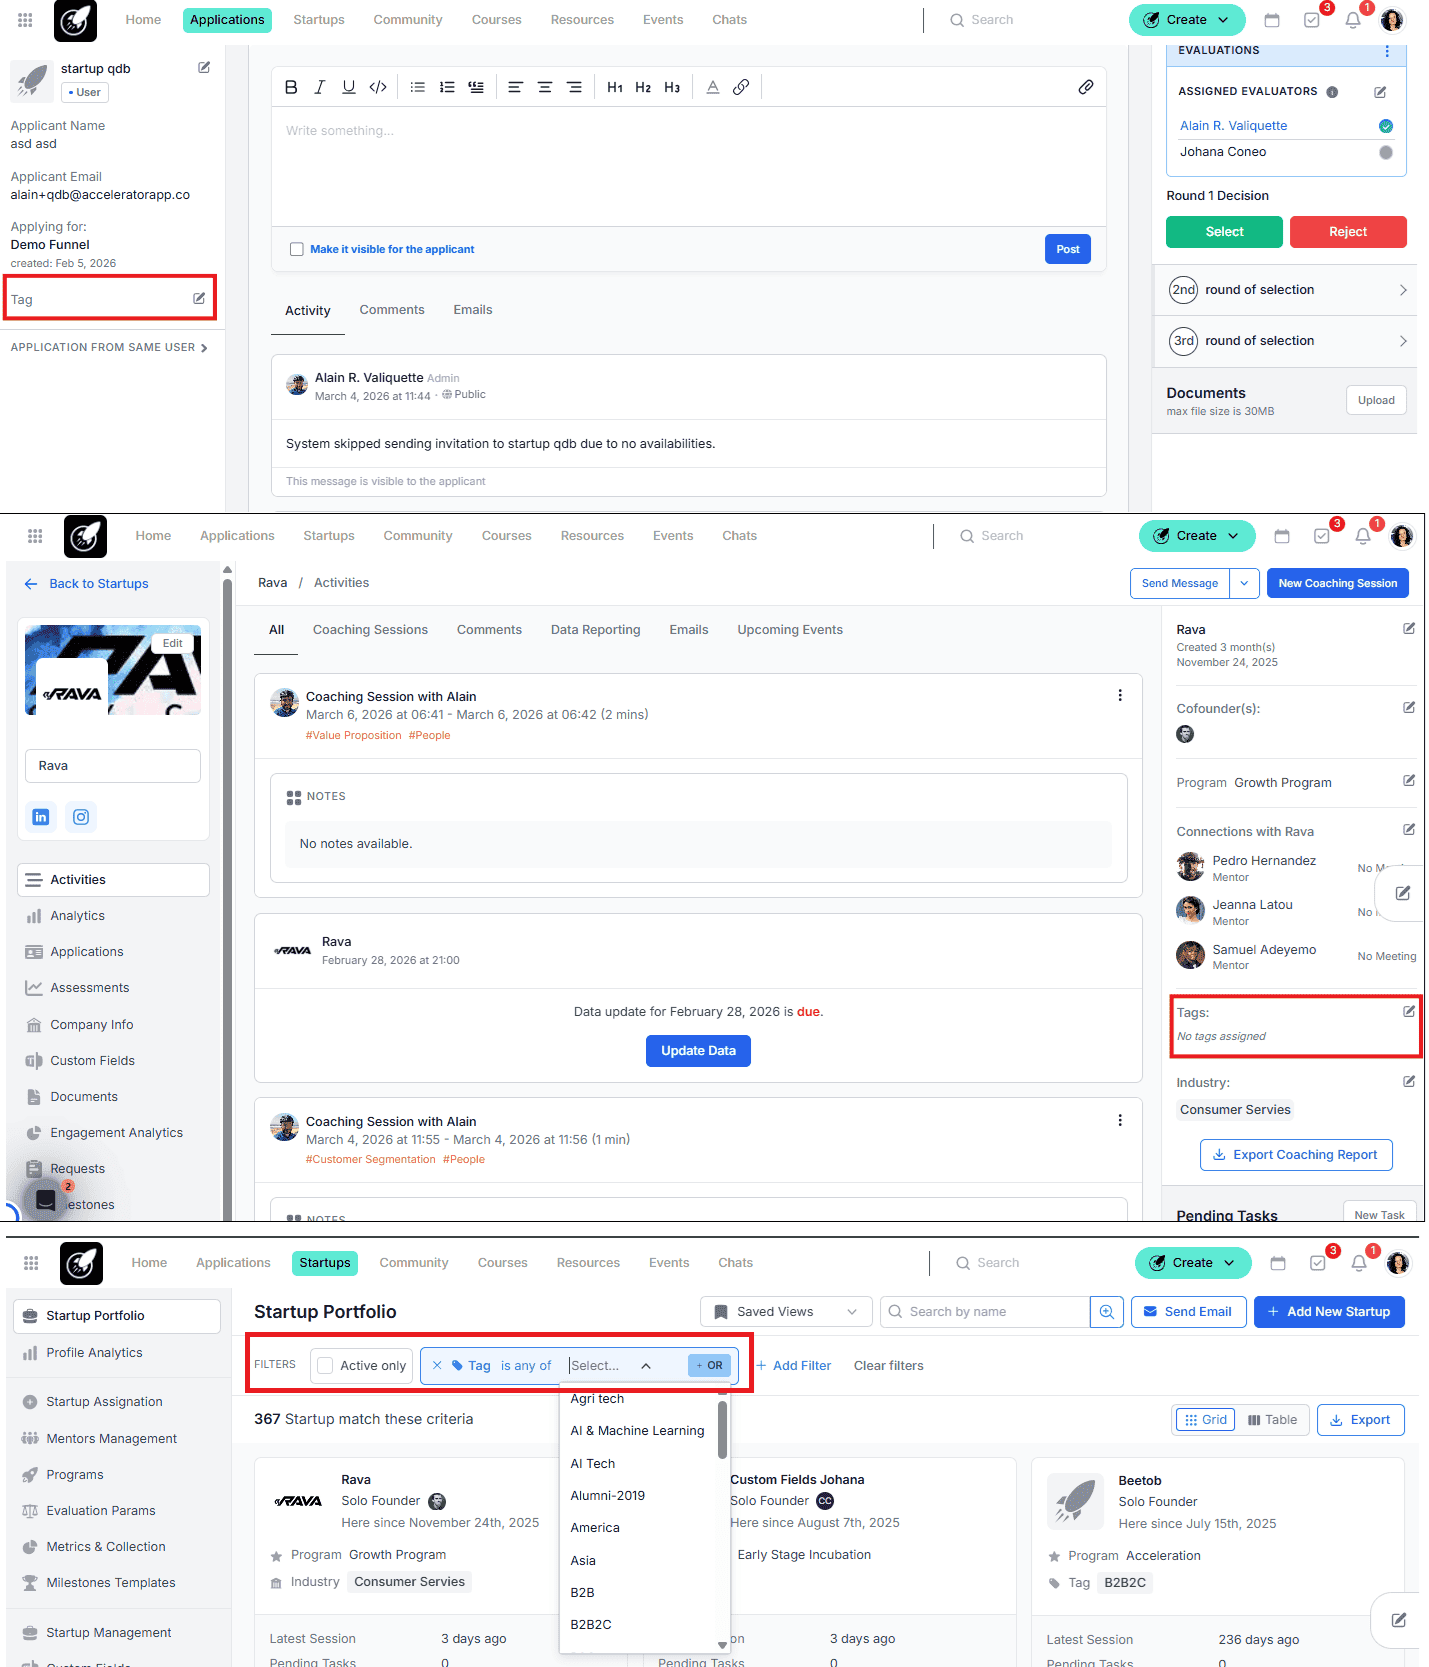
3. Filtering and Bulk Actions
The power of tags is in the Overview lists (e.g., Application Overview, Startup Portfolio or Mentor Management): Click Add Filter. Select the corresponding Tag criteria. Choose your tag(s) to narrow the list. Action: Use the Batch/Bulk options to email all filtered users, export their data, or move them to a new funnel.
Best Practices
- Scope Matters: Remember that tags are "scoped." A tag created under Application Tags will not appear in Mentor Tags. If a startup moves from applicant to participant, ensure you have a corresponding Startup Tag if you wish to continue tracking that attribute.
- Use for "Expertise Matching": Use Mentor Tags to label specific skills (e.g., Legal, SaaS, Fundraising). This makes it significantly easier for Admins to find the right mentor for a startup's specific challenge.
- Clean Up Periodically: Taxonomy can get cluttered. Periodically visit the Taxonomy menu to delete duplicate tags or merge similar ones (e.g., merging Fin-tech and Fintech).
- Internal Workflow Markers: Use tags as "flags" for your team.
- Tag filter types: Try the differnt ways of filtering tags. Is any of: the user must have at least one of the selected tags. Is all of: the user must have every selected tags.