Introduction to Accepting and Rejecting Applicants
The selection process is at the heart of any successful program. The Accepting and Rejecting feature allows administrators to move applicants through the funnel efficiently. This feature ensures that high-potential startups or users are transitioned seamlessly into active programs while maintaining professional communication with those who are not the right fit through automated, reason-based notifications.
Where to Accept or Reject Applicants
The actions for accepting or rejecting applicants are primarily managed within the Application Management section:
- Application Funnel: View the overall pipeline.
- Application File: Access individual applications to perform reviews and actions.
- Emails Management: This is where you pre-configure rejection templates based on specific motives.
Step-by-Step
1. Select the applicants
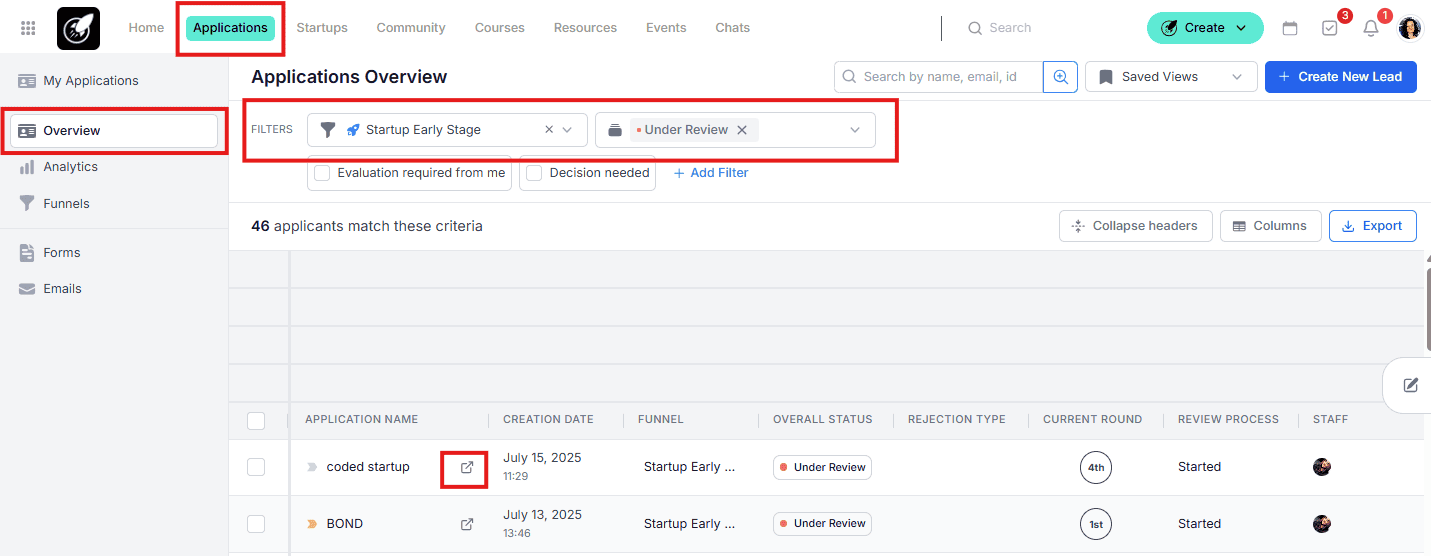
- Go to Application Overview.
- Apply the filters: Funnel, status and round.
- Apply additional filters if necessary (for example, Decision Needed, which will show only the applicants that still need to be accepted or rejected).
- Select an applicant to start and open their Application File.
2. Take action
- Perform the required action (evaluate, a meeting, leave a comment, etc.)
3. Decide
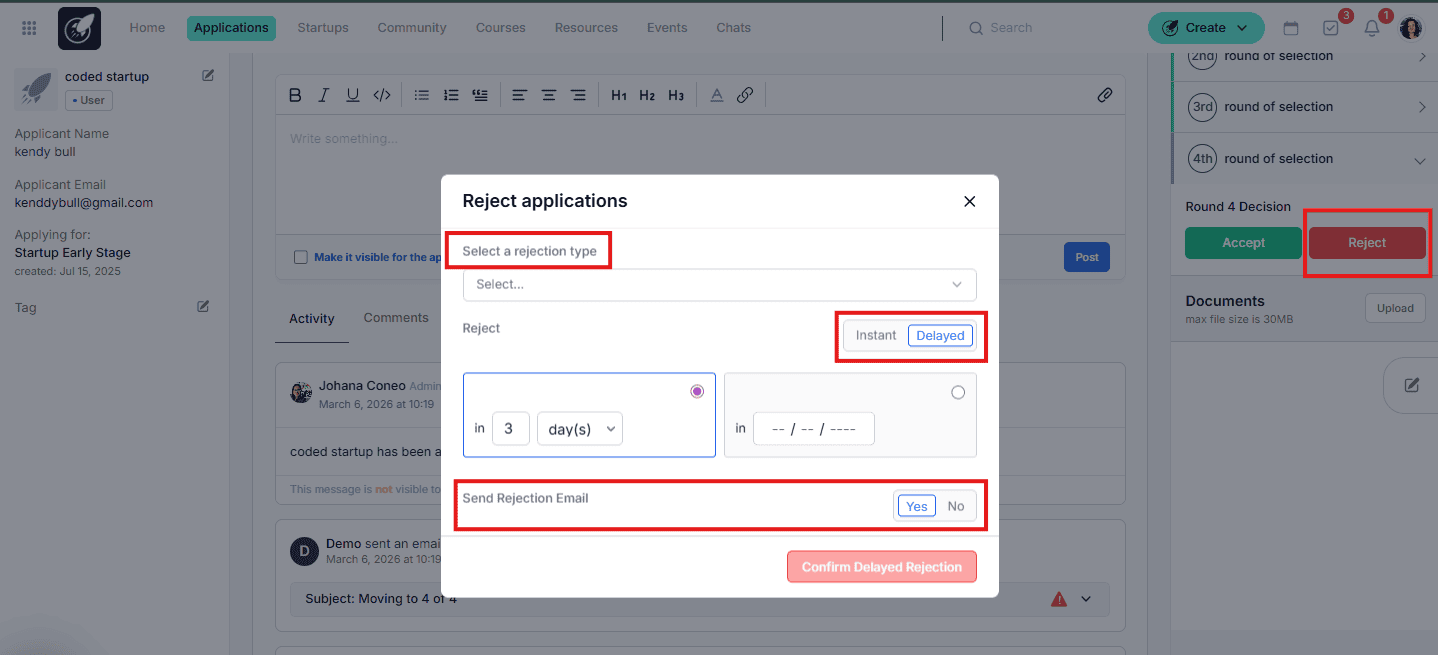
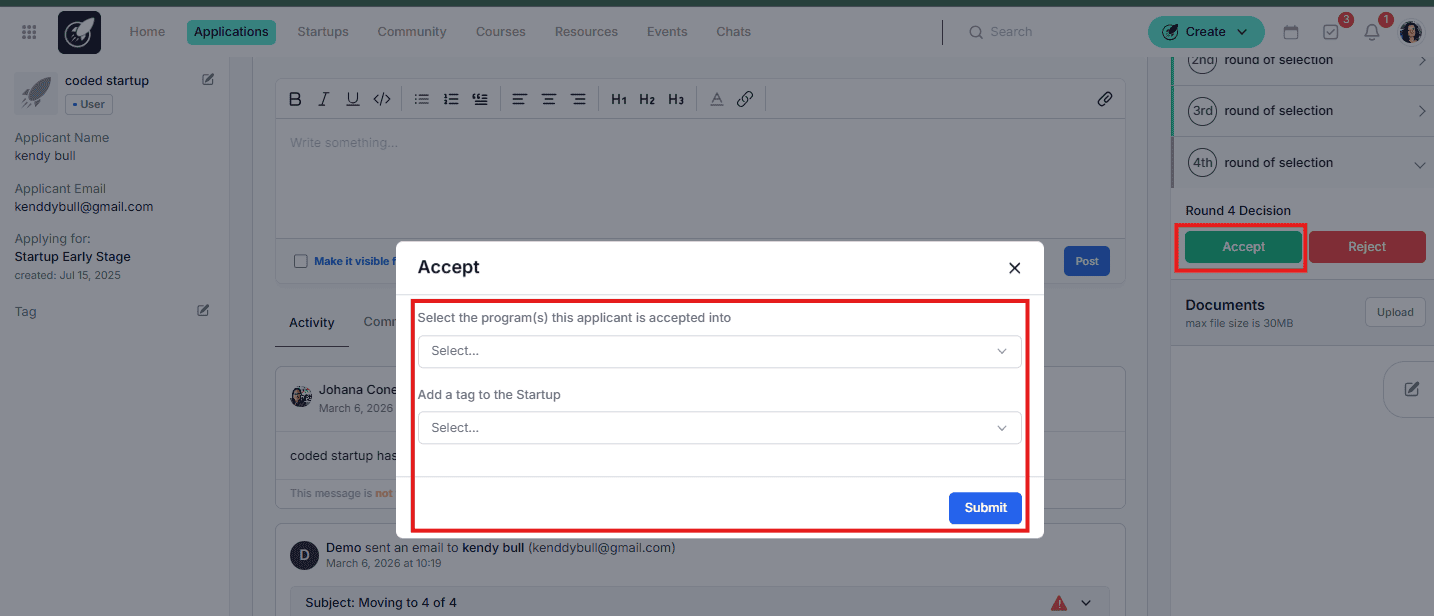
- Choose to Accept or Reject the applicant to move them to the next round.
- If you accept, the applicant will receive an email according to the configuration set in the funnel, if applicable.
- When you select Reject, a pop-up will appear allowing you to choose the rejection type. By selecting a type, you are choosing the specific email that will be sent automatically. (To know more about how to create or edit the rejection emails templates, please click here). From there, you can decide whether to send the notification immediately, schedule it for later, or opt not to send an email at all.
4. Final round
- When you reach the final round and accept the applicant, you will need to select which Program the user will be linked to, as well as assign their tags. If it was a startup funnel, the applicant will automatically be converted to the cofounder user role and the statup file is created. If it was a user funnel, you will have the option to choose which user role they will be converted to.
Note: Regarding automated emails:
- Round acceptance emails are configured within the funnel
- Rejection emails are configured in Email Management tab
- Program acceptance emails are configured in Program Management tab
Best Practices
- Permissions: Only Admins and Sub-Admins have the authority to accept or reject applicants. If you cannot see these buttons, check your user role permissions.
- Bulk Actions (Efficiency Tip): You can process dozens of applicants at once. Go to the funnel view, filter by status, use the Checkboxes to select multiple applicants, and use the Batch Options to accept or reject them in one click.
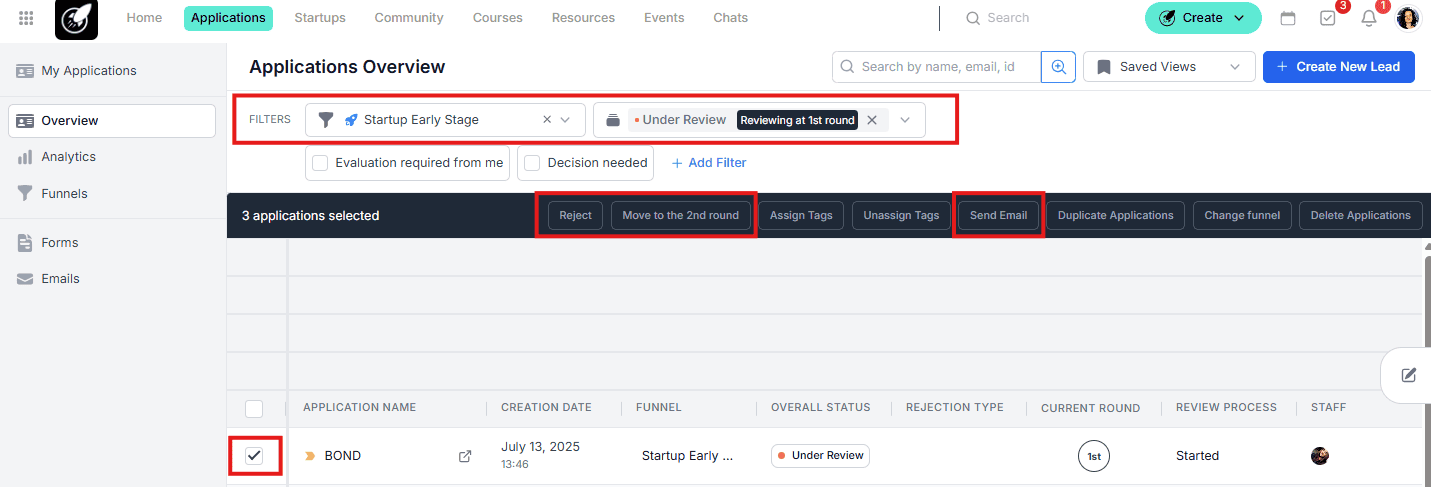
- Case-by-Case Communication: If you need to send a highly personalized message that differs from your standard templates, use the Bulk Email option from the application overview.
- Motive-Based Rejections: Always ensure your Emails Management section is updated with clear templates for different rejection reasons (e.g., "Out of Scope," "Market fit," "Out of geography"). This ensures the applicant receives constructive feedback automatically..