Introduction to Programs
Programs in AcceleratorApp function as a powerful grouping system, allowing administrators to organize startups and users into distinct cohorts. By dividing your community into focused cohorts, you can deliver tailored support frameworks, deploy targeted resources, track distinct progress metrics, and manage group-specific communication seamlessly.
This feature solves the challenge of managing diverse groups within an incubator or accelerator simultaneously. For example, you can create separate, dedicated spaces for early-stage startups, growth-stage tracks, or community-focused initiatives. Each program operates with its own specific resources, events, courses, team members, and success metrics, allowing program administrators to streamline day-to-day operations based on the unique needs of each participant category.
Where to Find Programs
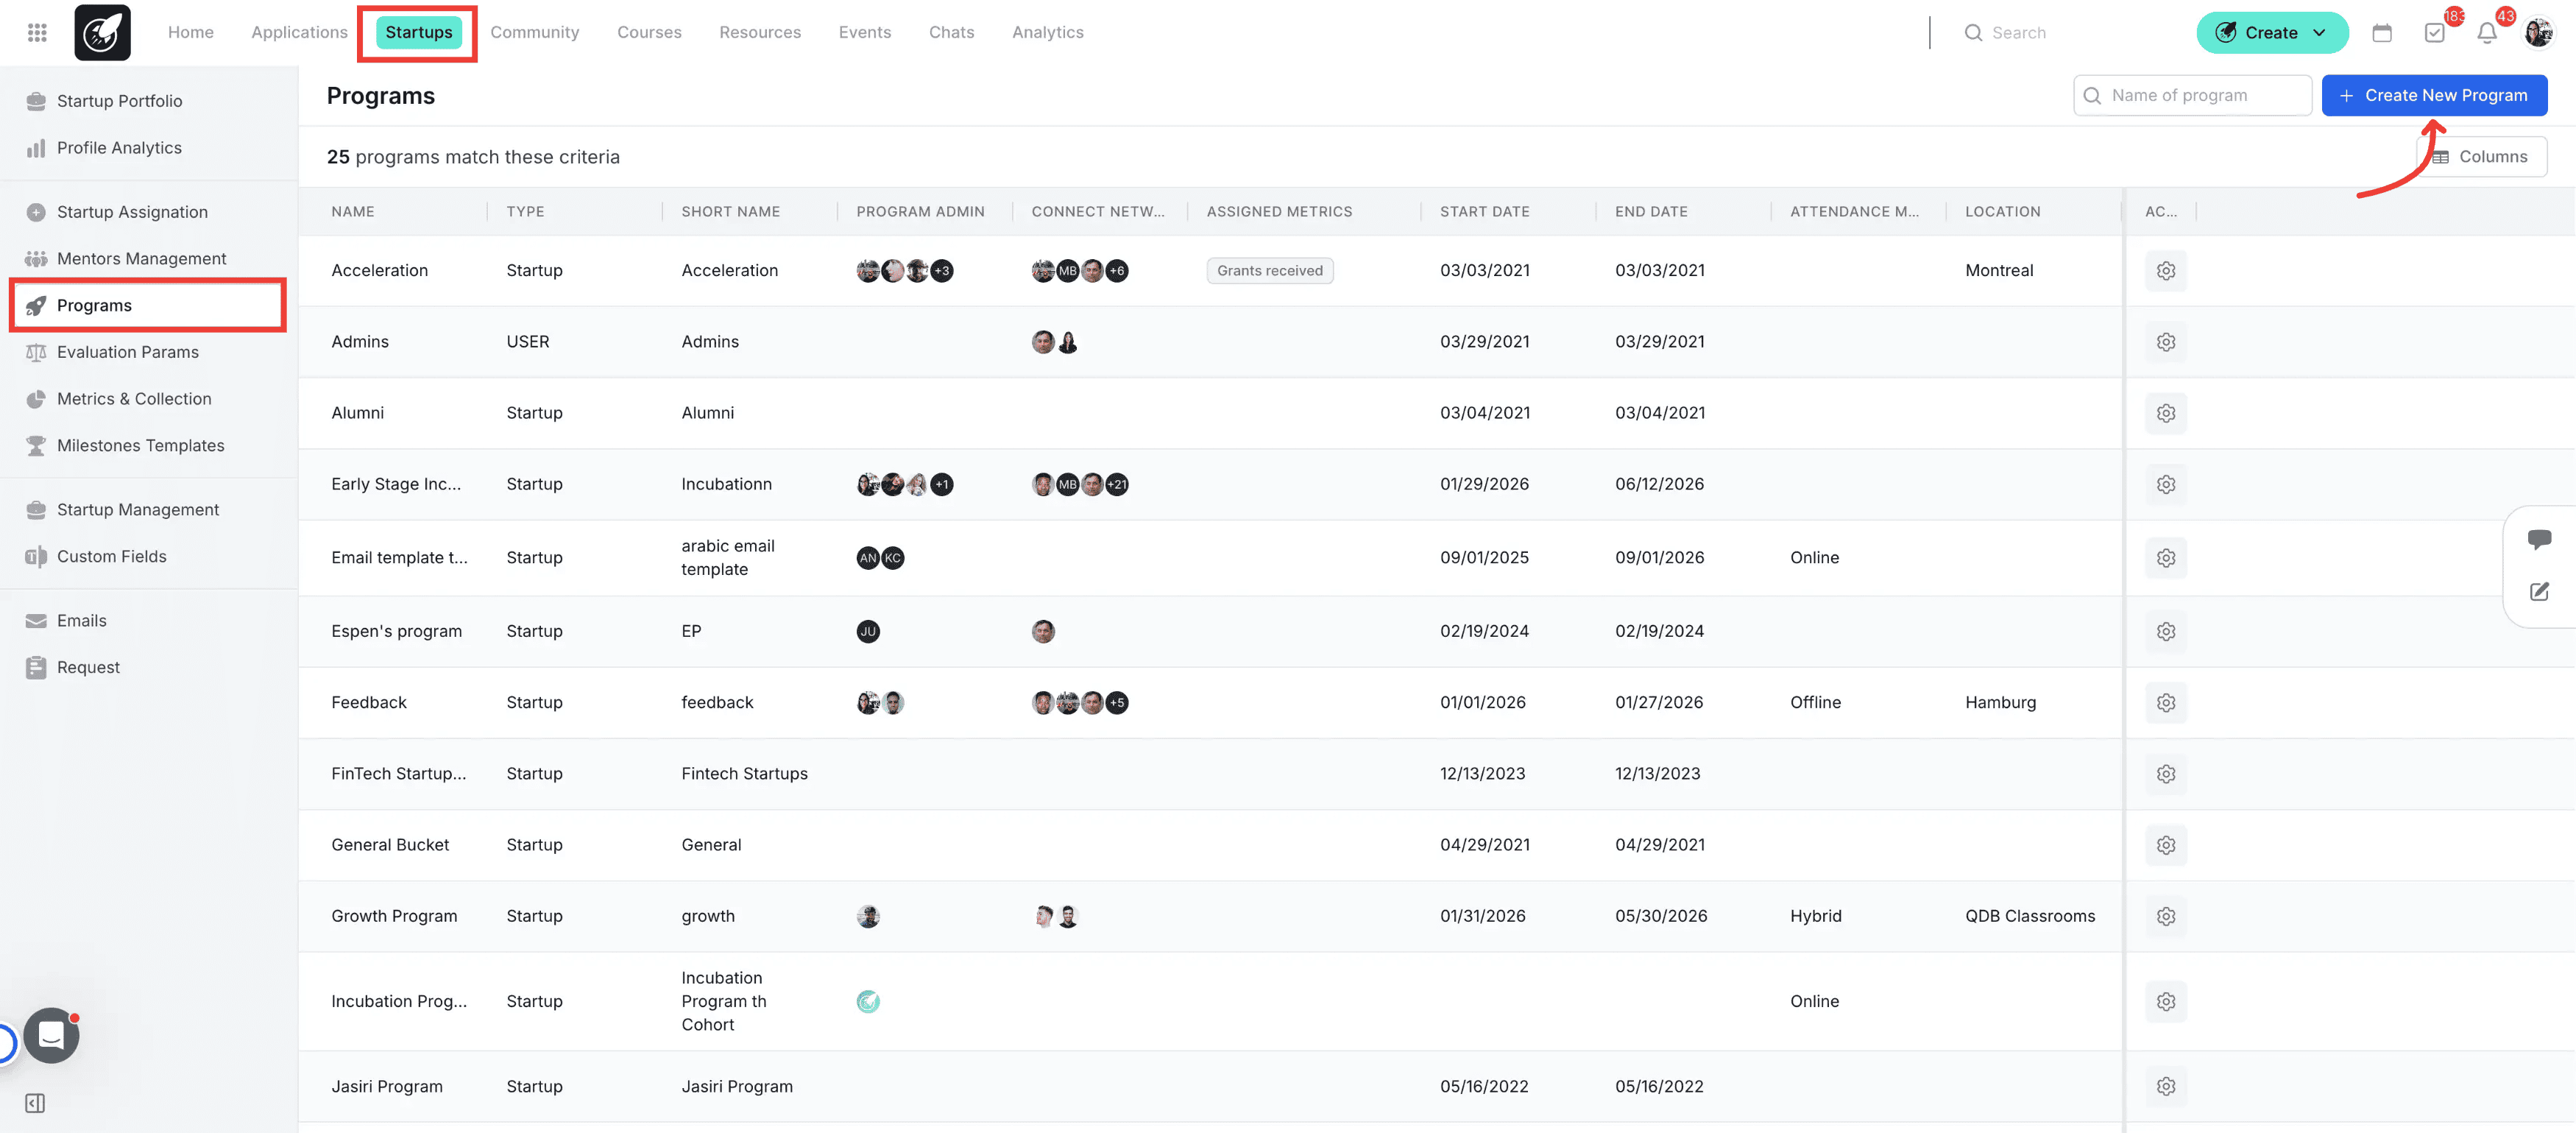
To access your programs, click on the Startups module in the top navigation menu, and then click on Programs from the left sidebar navigation menu.
Step-by-Step
1. Navigate to the Programs section
Click on Startups from the top navigation menu or the dashboard Home Page, then click on Programs in the left sidebar menu.
2. Launch the creation wizard
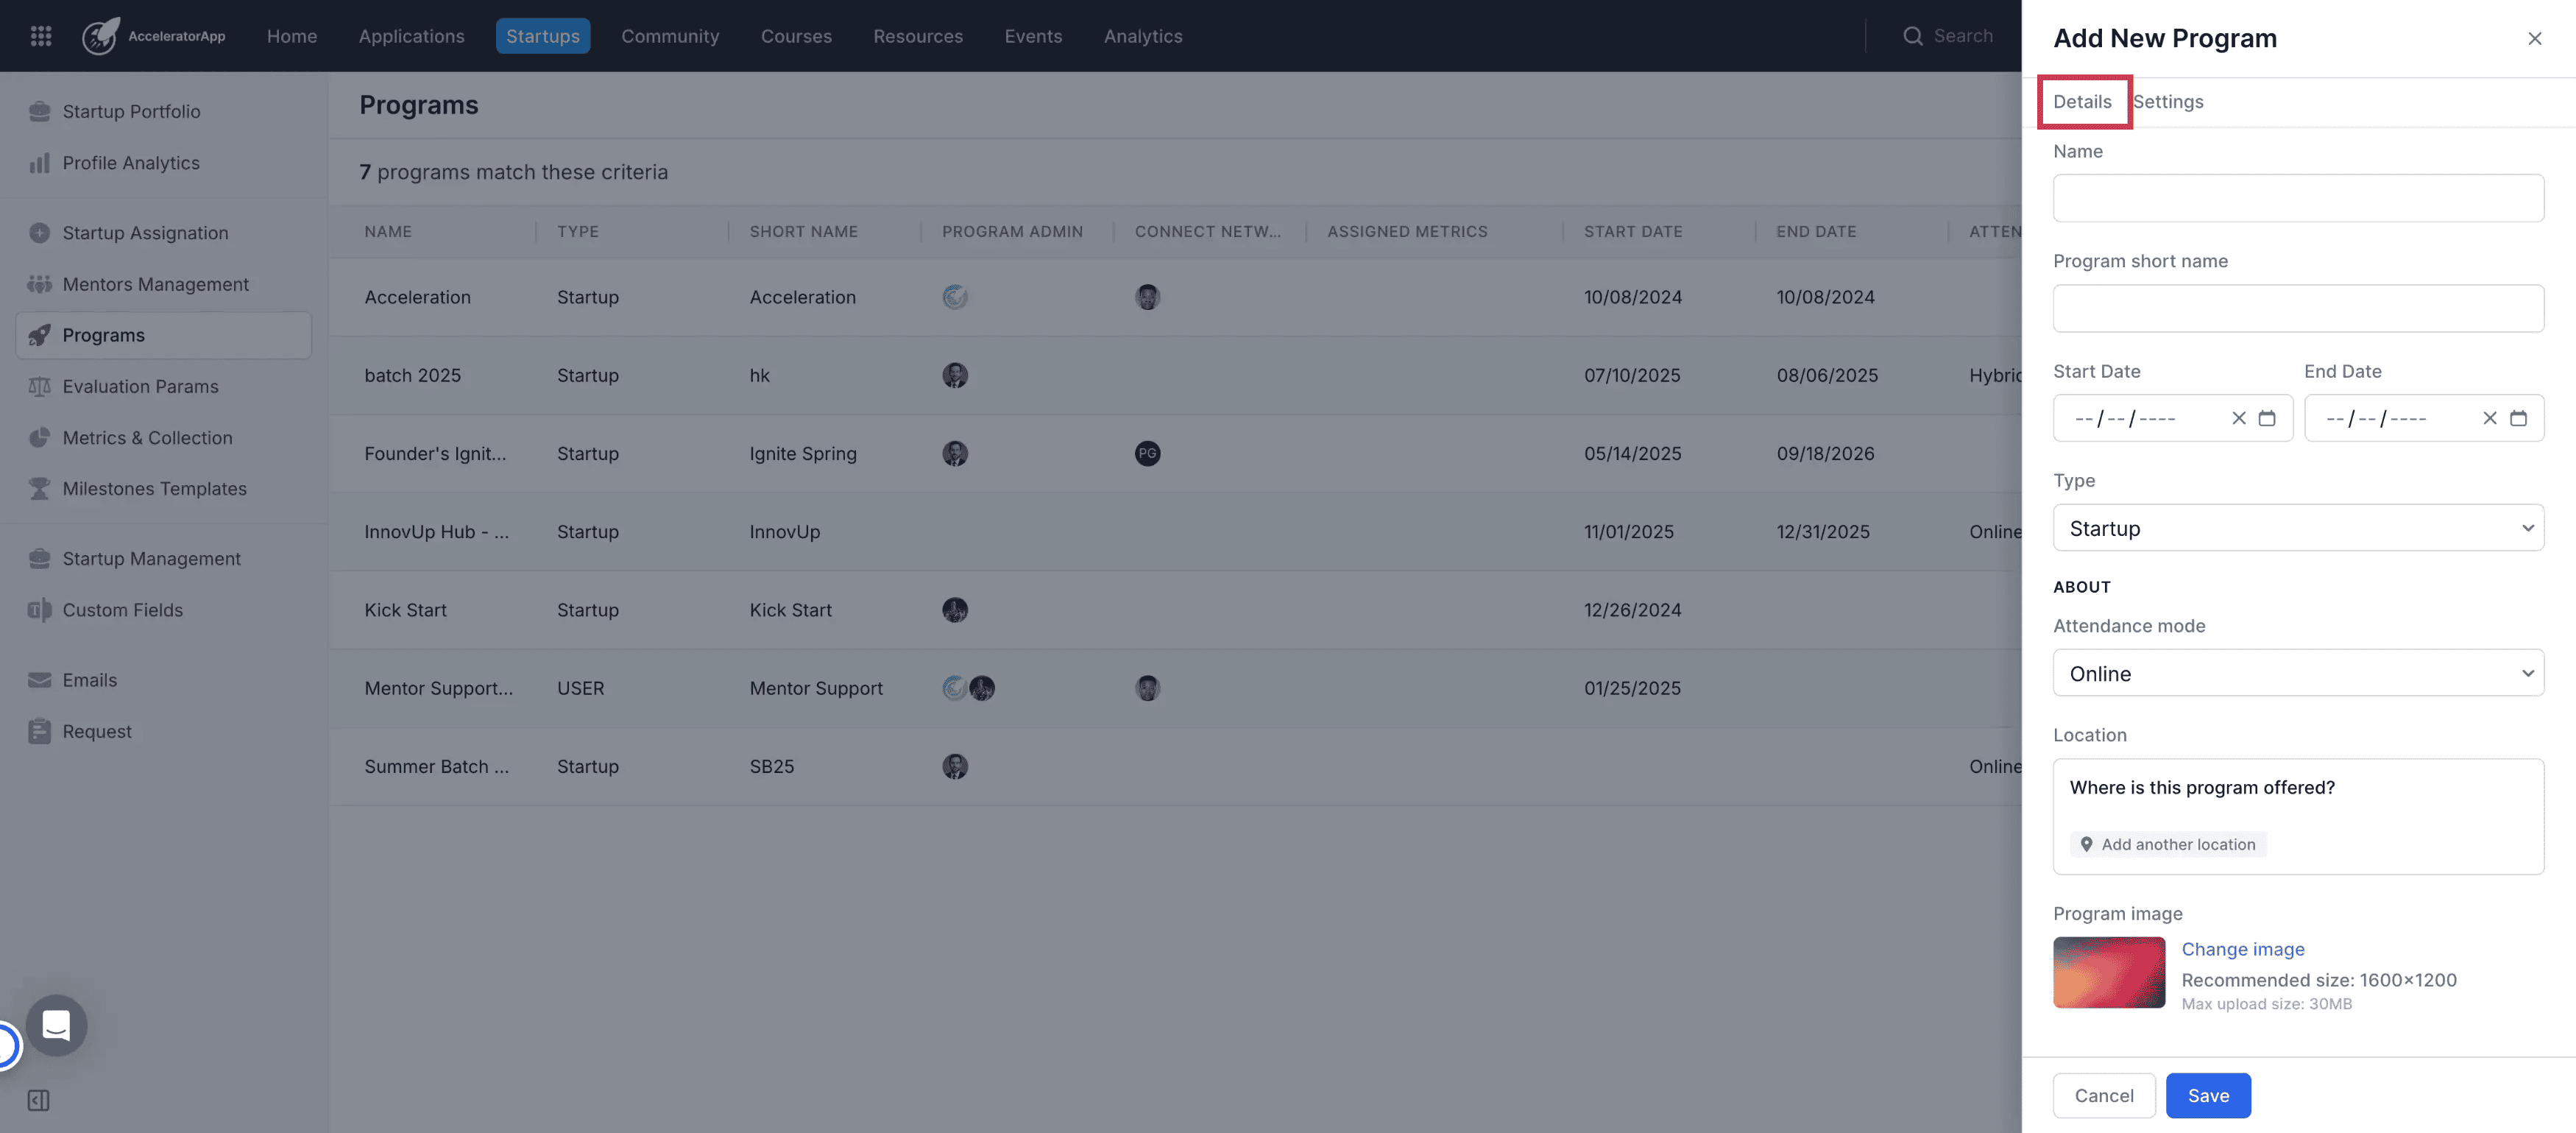
Click on the blue Create New Program button located in the upper right corner of the dashboard screen.
3. Input basic program identifiers
Enter a unique Name and a Short Name for your program to ensure clear tracking across the platform.
4. Define program operation dates
Enter the specific Start Date and End Date to set the active operational timeframe for the cohort.
5. Choose the program participant type
Select Startup if the program is explicitly designed for venture tracking, or select User for user-centric, mentor, or general community cohorts. [KALED: please verify if a Startup program completely restricts the addition of individual independent users]
6. Set the attendance mode and location
Select your attendance type (Online, Offline, or Hybrid) from the dropdown menu, and designate the specific physical or virtual locations hosting the program.
7. Select a Location
If the Program will happen in person you can select the address select locations available o create a new one
8. Upload a program cover image
Click to select or upload a dedicated program image to personalize the visual identity of this cohort banner.
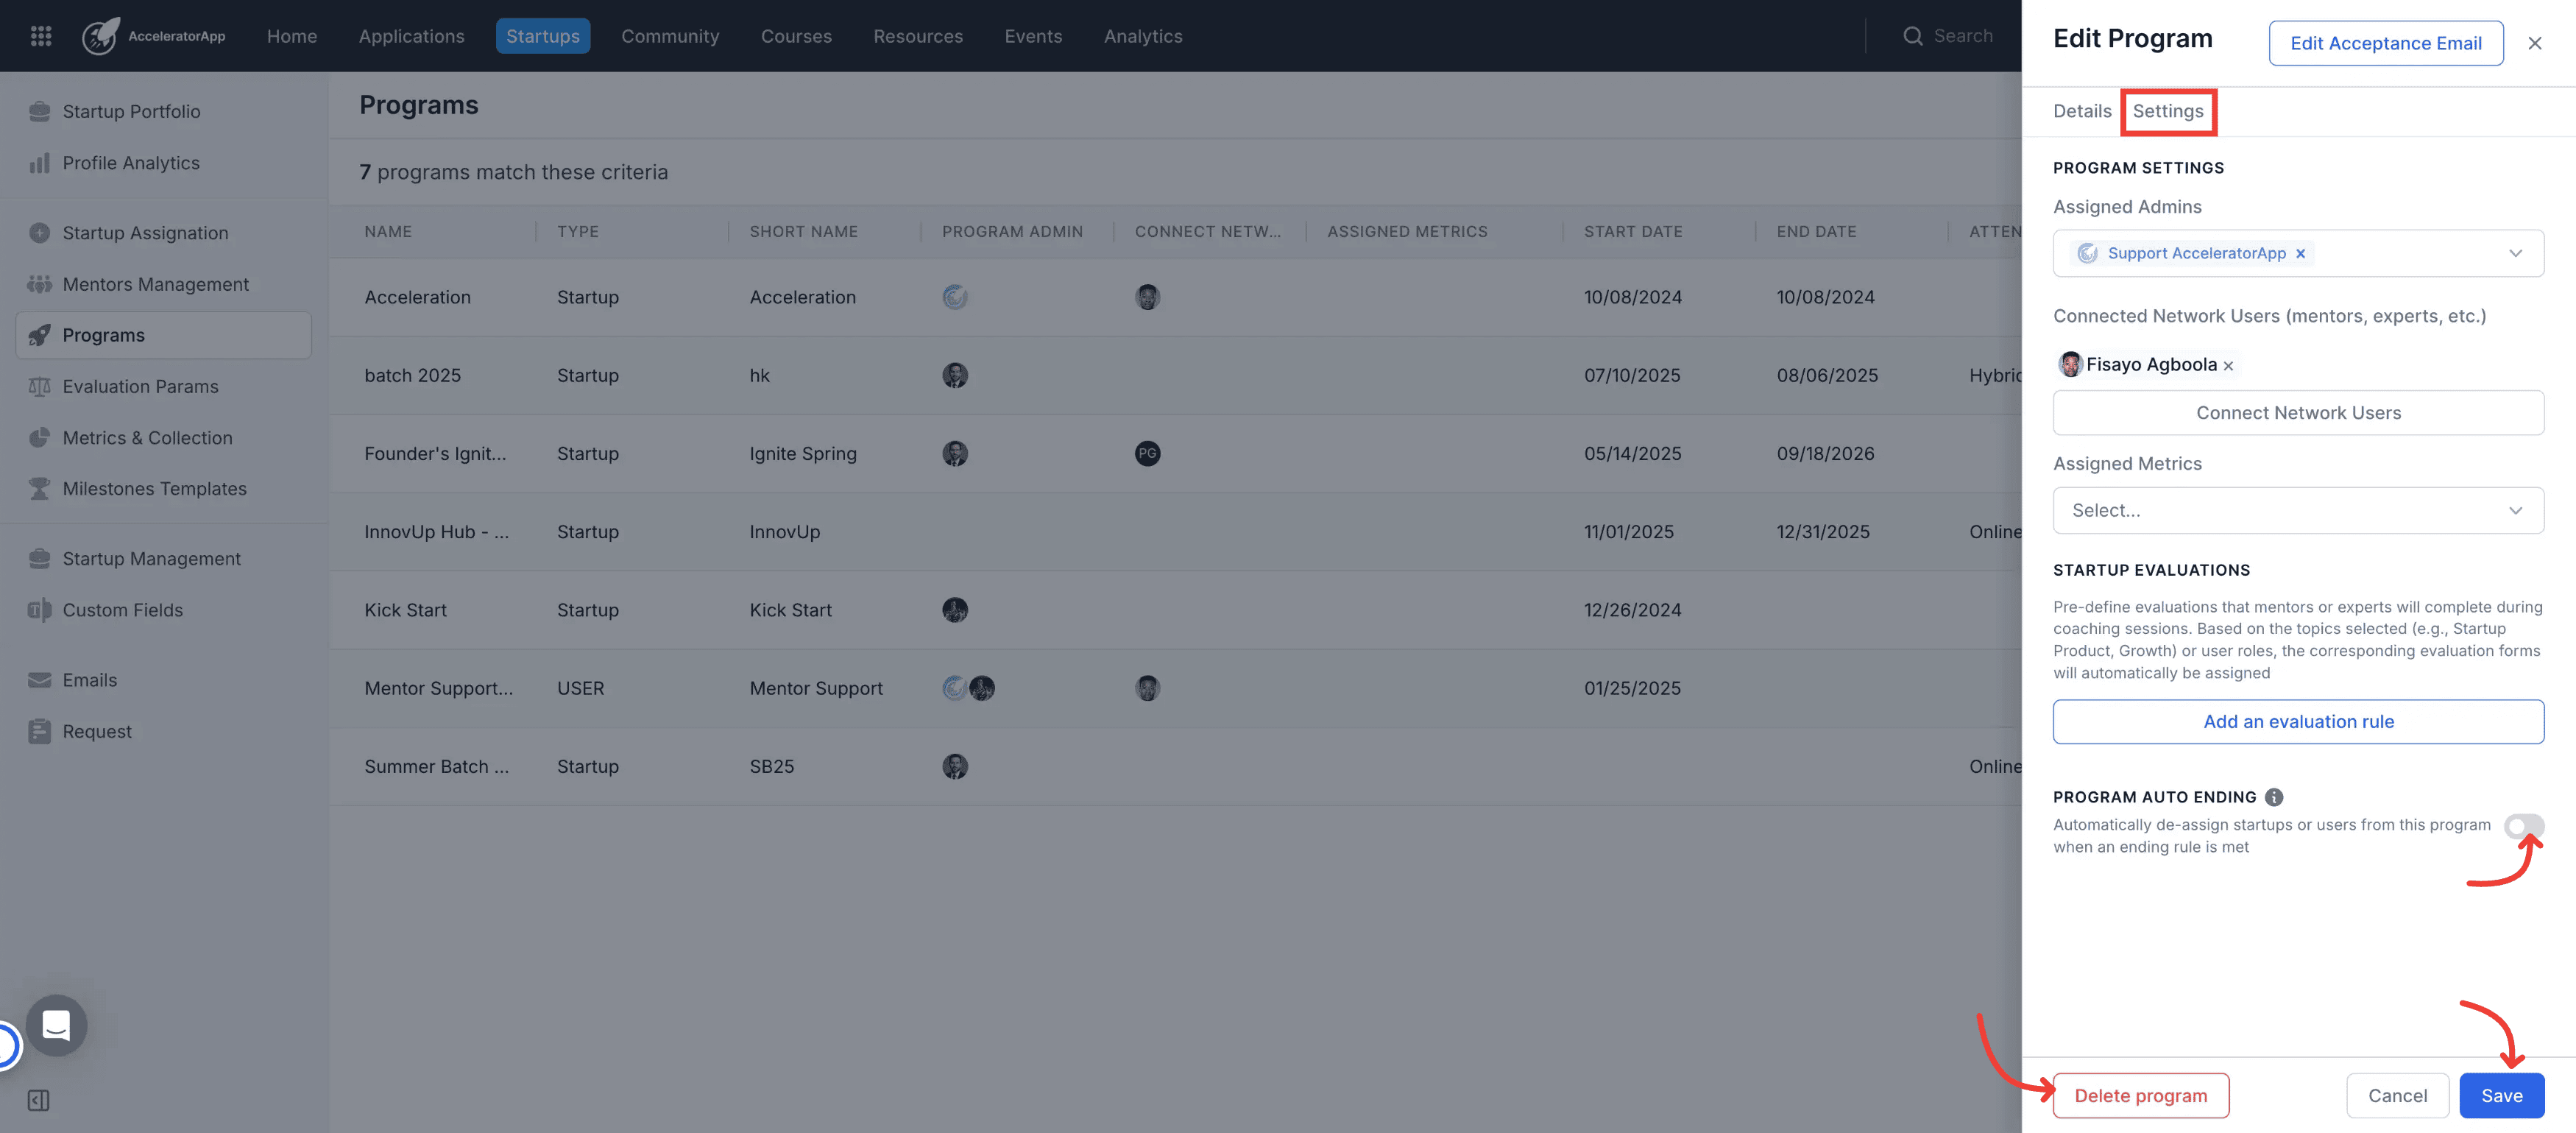
9. Assign program administrators
From the Settings tab, designate the primary administrators responsible for managing this program by selecting users holding the Admin, Sub-admin, or Coach role.
10. Connect network users and ecosystem partners
Select the ecosystem team members, such as specific mentors or industry experts, who should be structurally attached to this program. These users will be connected to your startups in a one-to-many connections all the startups or users under that program can be supported by these mentors.
11. Assign tracking metrics
Choose the predefined key performance metrics you want to track across all participants enrolled in this specific cohort.
12. Save your new program
Click the Save button to finalize your inputs and initialize the new program block in your dashboard.
13. Set up program auto ending rules
Locate the Program auto ending configuration options to automatically de-assign startups or users from this program when your specified ending rule conditions are officially met.
14. Delete a program if necessary
If you need to permanently remove the track from your ecosystem, click the red Delete program button and confirm the destructive action.
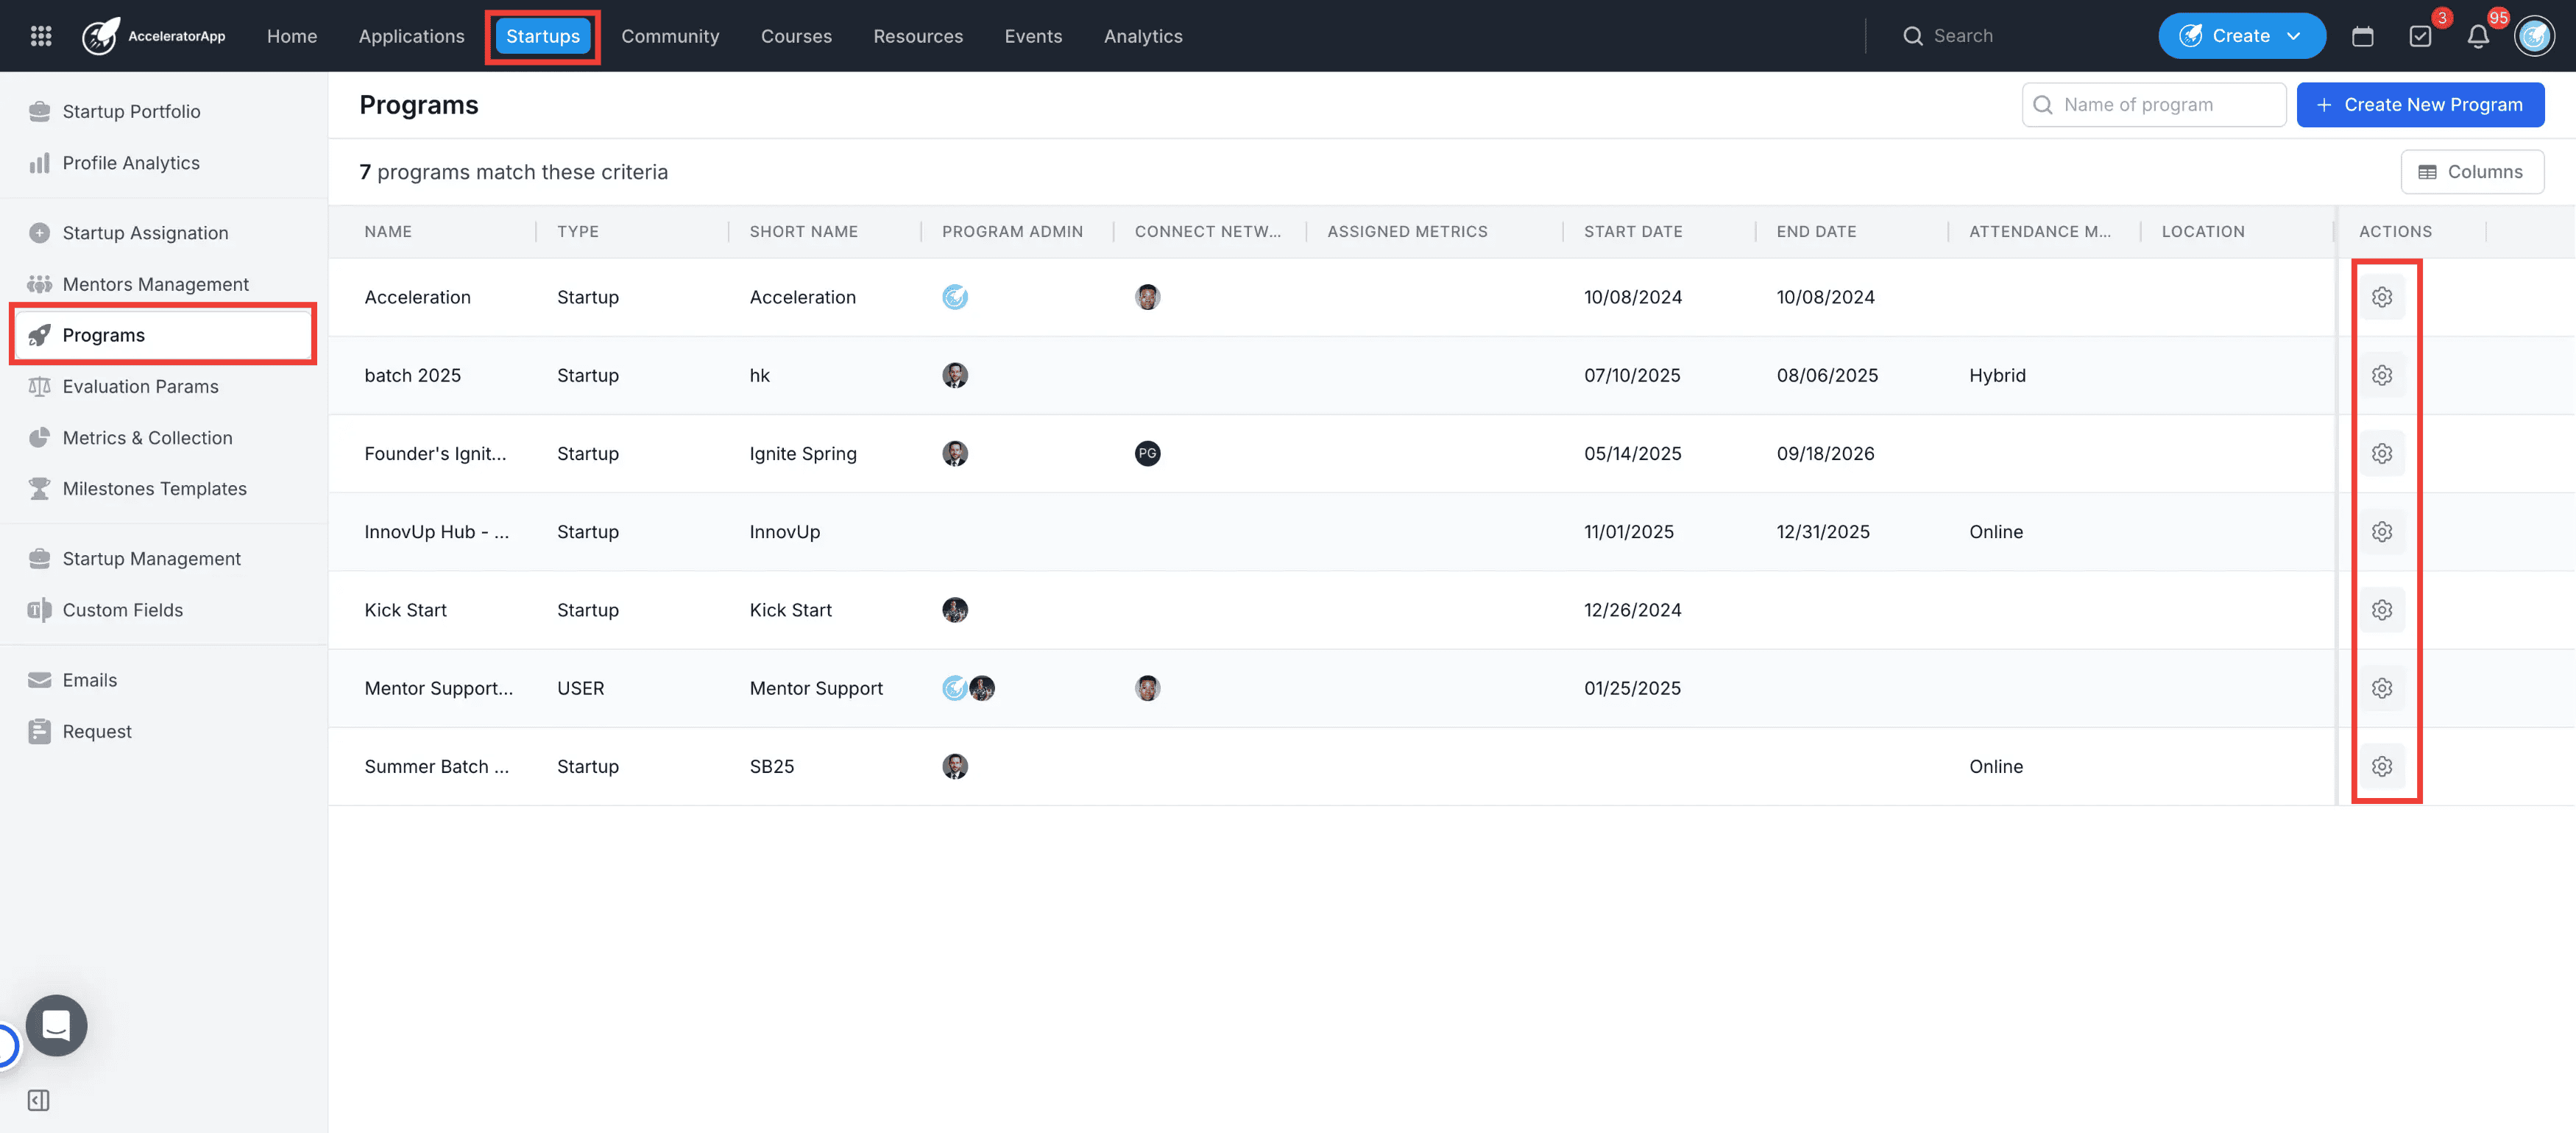
15. Edit your Program
If you need to make an update on the information of your program navigate back to the program section and click on the edit icon after that save the changes
Best Practices
Leverage auto-ending for offboarding automation: Utilize the Program auto ending settings to automate system clean-up, ensuring that graduating participants are de-assigned promptly without requiring tedious manual database tracking.
Maintain clear nomenclature: Ensure each program has a unique, descriptive name to prevent pipeline confusion among users who might belong to multiple active cohorts.
Audit assignments regularly: Perform periodic updates on your Assigned Admins and Connected Network Users lists to align system permissions with changes in your internal staffing structure.
Tailor the welcome experience: Always take the time to customize your Acceptance Email template so your accepted applicants receive immediate, highly relevant instructions unique to their onboarding track.