Introduction to Acceptance and Rejection Emails
In any application process, clear and timely communication is essential for a professional founder experience. The Acceptance and Rejection Email system allows administrators to automate these touchpoints as applicants move through different rounds of your funnel. By automating these messages, you save significant administrative time while ensuring no applicant is left in the dark.
This feature allows for highly specific customization: the final Acceptance email is tied to program admission, while Rejection emails can be categorized by type to provide more tailored feedback to unsuccessful candidates.
Where to Find Email Settings
Email management is handled in two primary locations:
1. Program Settings
Used to configure the final Acceptance email — the one sent when an applicant is officially admitted into a program.
2. Email Management Page
Used to create diverse rejection templates and view default system emails.
Step-by-Step
1. Setting the Program Acceptance Email
The acceptance email is the message an applicant receives after passing through all funnel stages and being officially admitted into a program. This email is configured directly in the Program Settings — not inside the funnel.
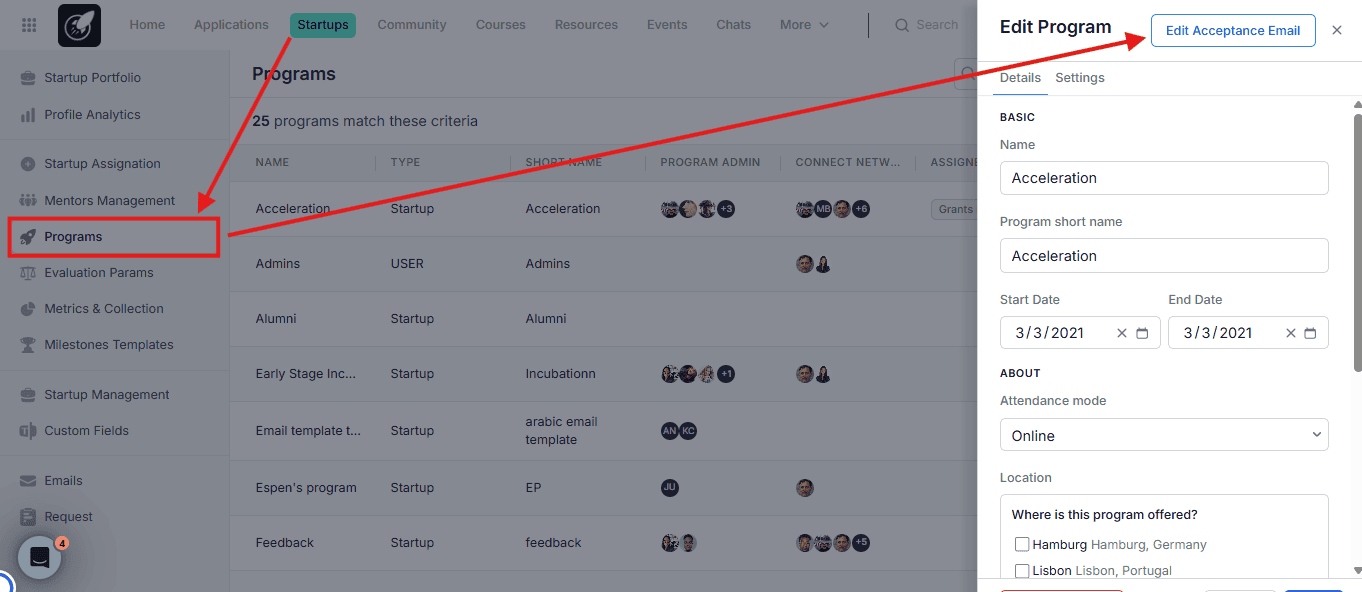
a. Navigate to the Programs page.
b. Locate the program you want to configure and click on its Actions menu.
c. Select Edit Acceptance Email.
d. Customize the content and save.
This email is only sent once — when an applicant is officially accepted into the program after completing the full funnel process.
2. Creating New Rejection Email Types
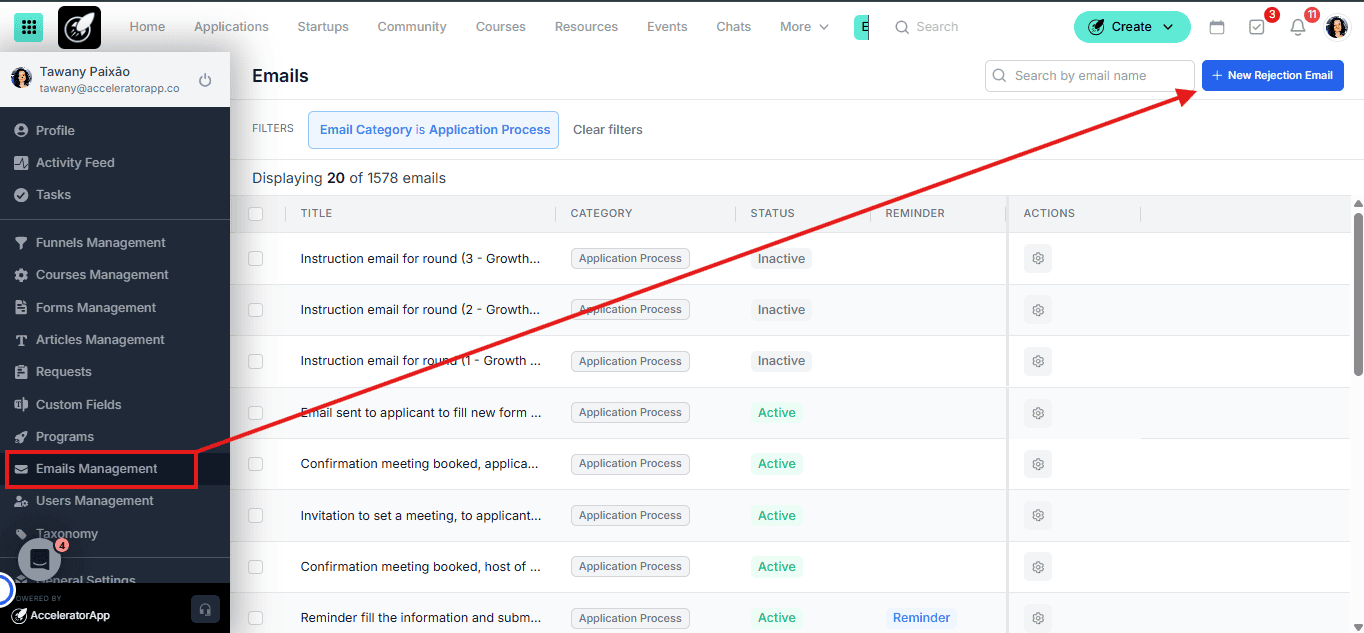
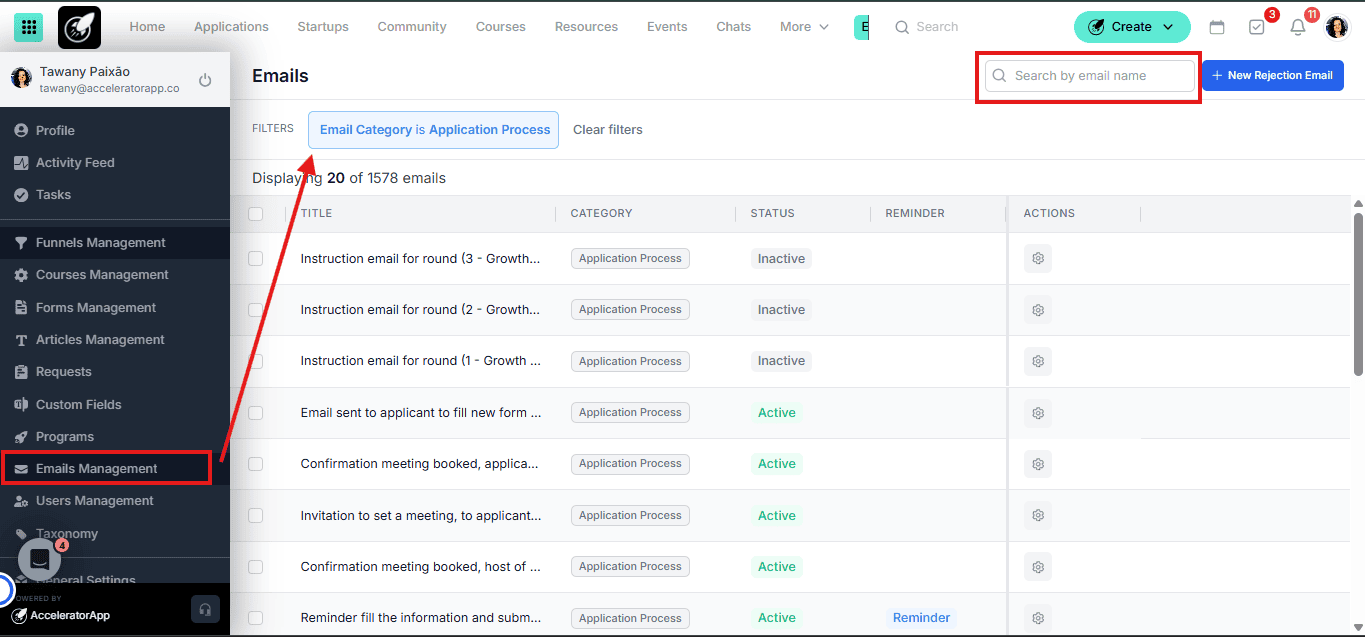
a. Navigate to the Email Management page from the main sidebar.
b. Click the New Rejection Email button.
c. Define the Type Name (e.g. "Out of Scope," "Market Fit," or "Team Size").
d. Draft your content and save the template.
This allows you to select a specific rejection reason when rejecting a candidate, making the communication more relevant and thoughtful.
3. Managing Default Transactional Emails
a. On the Email Management page, use the filter to view Onboarding Emails or use the search bar to find the default Acceptance template.
b. Edit the global default if needed — though we recommend customizing the acceptance email directly in Program Settings (Step 1) for a more controlled experience.
4. Triggering a Rejection during Review
a. Open an Application File during your review process.
b. Select the Reject action.
c. A dropdown will appear prompting you to select the Rejection Type you created in Step 2.
d. Confirm to send the specific rejection message associated with that reason.
Best Practices
- Set the acceptance email in Program Settings before going live. Make sure it is configured and tested before your first applicants are admitted.
- Segment rejections. Create at least 3–4 rejection types. A "Not a fit right now" email feels much better to a founder than a generic rejection message.
- Use placeholders. Use dynamic tags like {{first_name}} or {{startup_name}} to ensure automated emails still feel personal and professional.
- Test your flow. Move a test application through your funnel to ensure the right emails are firing at the right stages before going live.