


Introduction to Use Planned Actions in Events
Planned Actions allow admins to schedule communications and tasks tied to a group event in advance. Instead of having to manually send emails or assign tasks at the right moment, you can define the entire workflow once — and let the platform handle execution automatically at the right time.
Planned Actions are available for group events only. They are not available for one-on-one events. If you do not see the Schedule for later option when composing an email, request, or task, this feature may not be included in your current plan. Contact your Customer Success Manager to learn more.
Where to Find Planned Actions
Open any published group event and navigate to the Communication tab. From here you can compose emails, create feedback requests, and assign tasks — and choose to send them immediately or schedule them for later.
Step-by-Step
1. Open the Communication Tab
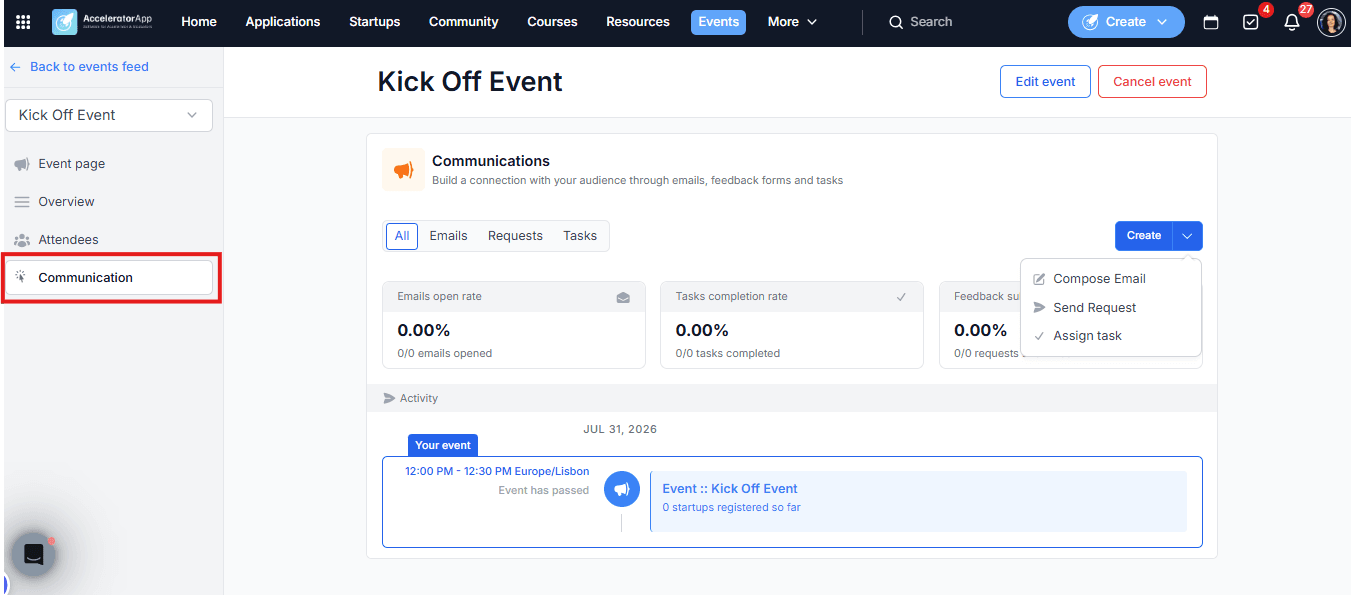
Inside a group event, click on the Communication tab from the left sidebar. You will see three action types available: Emails, Requests, and Tasks.
2. Create an Action
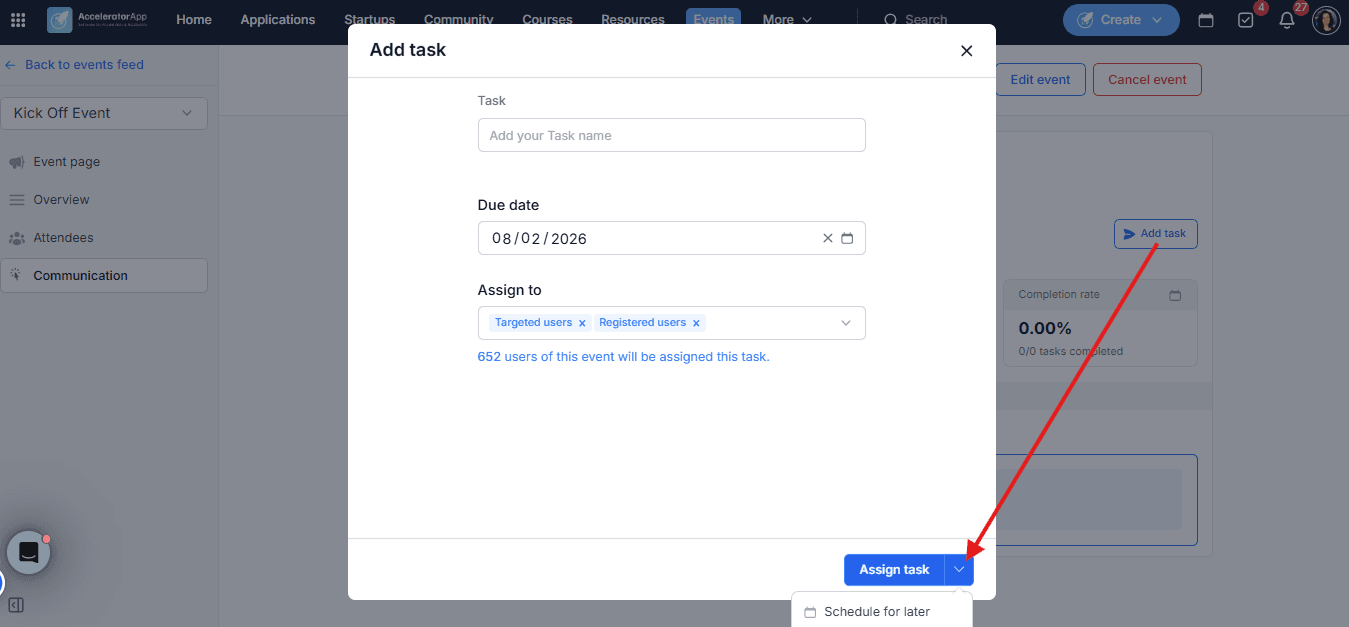
Click the relevant button (Compose Email, Add Request, or Add Task) and fill in the details — audience, subject, content, or task description as applicable.
3. Schedule for Later
Instead of sending or assigning immediately, click Schedule for later. You will then choose between two scheduling modes:
- Relative to event — schedule the action based on the event's timing. For example: 12 hours before the event starts, or 1 day after the event ends. The platform will show you a preview of the exact date and time the action will be executed, displayed in both the event's timezone and your own user preference timezone.
- Absolute time — pick a specific date and time, independent of the event schedule.
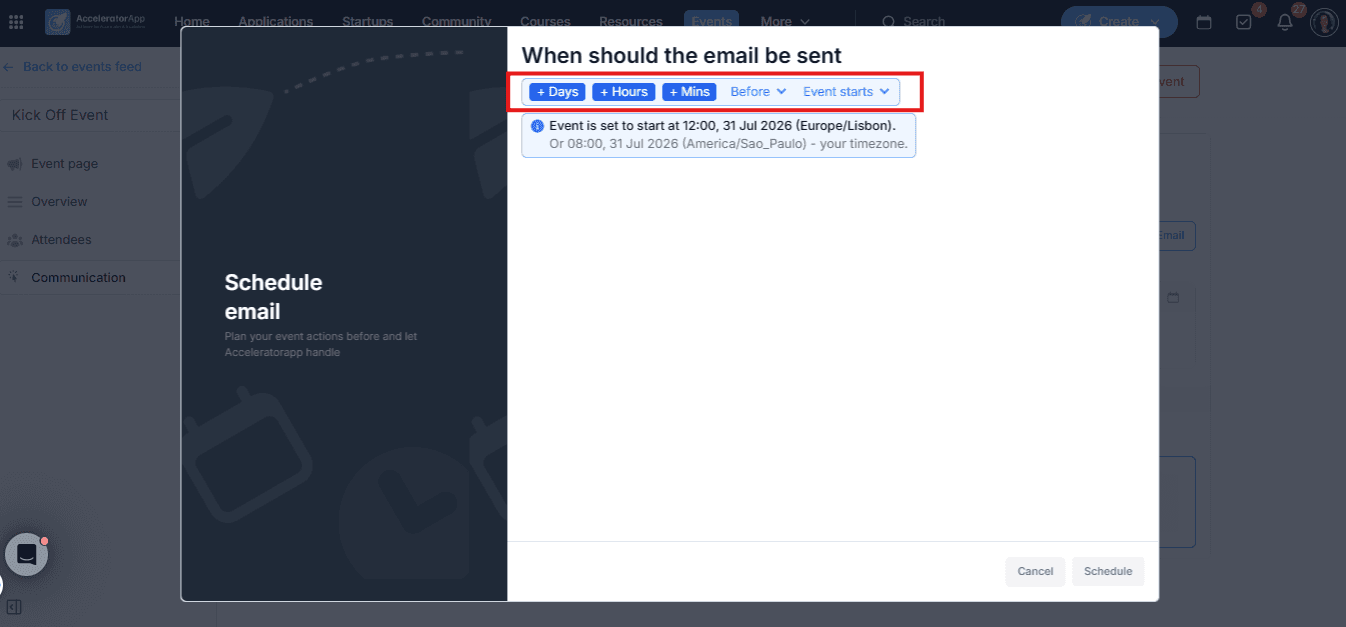
Click Schedule to confirm. The action will appear in the activity timeline below, showing its planned execution time and status.
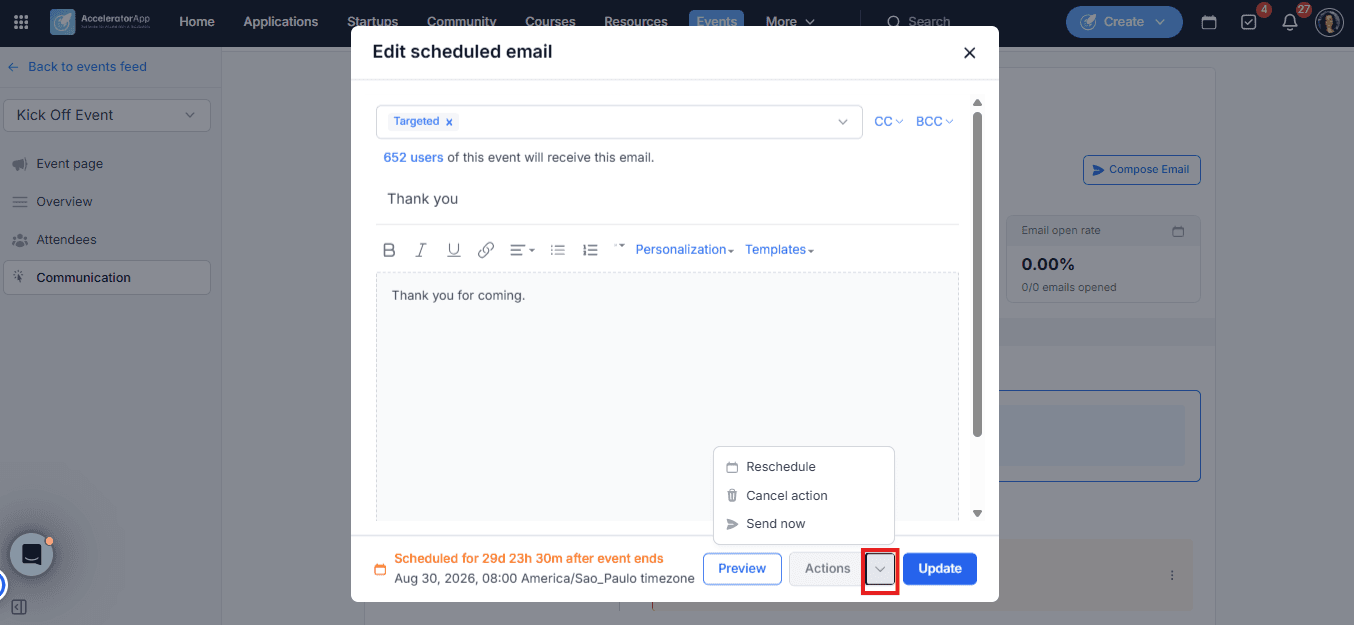
4. Manage Scheduled Actions
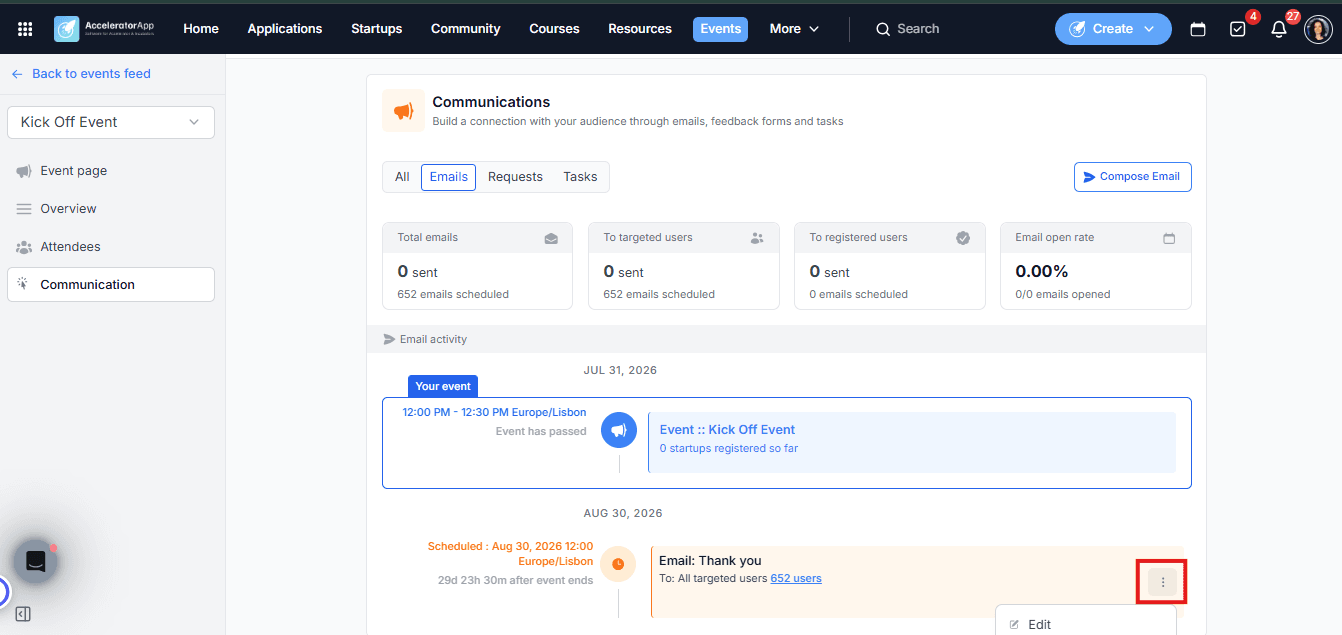
From the activity timeline, you can manage any upcoming planned action:
- Reschedule — change the timing without losing the content.
- Edit — update the content or audience before it executes.
- Send now — trigger the action immediately instead of waiting for the scheduled time.
- Cancel — remove the action from the schedule. Cancelled actions remain visible in the timeline history but will not execute.
5. What Happens When the Event Is Rescheduled
If you change the event's start or end time after scheduling relative actions, the platform will automatically recalculate and update the execution times of all relative planned actions to match the new event timing. You will be prompted to review and confirm the changes before publishing.
Absolute-time actions are not affected by event time changes — they remain fixed to the date and time you originally selected.
6. What Happens When the Event Is Cancelled
If you cancel the event, all associated planned actions are cancelled automatically. No emails, requests, or tasks will be sent or assigned after cancellation.
Best Practices
- Plan your full communication workflow before publishing the event. With Planned Actions, you can set up pre-event reminders, day-of confirmations, and post-event follow-ups all at once — saving significant time during the event itself.
- Use relative scheduling whenever possible. Scheduling actions relative to the event start or end time means everything adjusts automatically if you reschedule the event — no manual rework needed.
- Use absolute scheduling for time-sensitive announcements. If you need an action to go out at a specific moment regardless of event timing (e.g. a registration deadline reminder), use absolute time instead.
- Review your timeline before publishing changes. When rescheduling an event, always check the planned actions summary to make sure the updated times still make sense for your audience.